
BLOG
How to Keep Indoor Plants Watered While You're Away

For a weekend trip, a deep soak and a shaded spot are all most plants need. For 3–7 days, a DIY bottle drip or watering globe buys you the time. For 1–2 weeks, a cotton-wick system or self-watering container is your most reliable option. For anything longer than two weeks, a tested drip timer or a trusted plant sitter is the move.
Here’s the quick breakdown by trip length:
- 0–3 days: Deep soak 24–48 hours before leaving, move plants away from direct sun, group them together.
- 3–7 days: Inverted bottle drip, watering globe, or bathtub soak method.
- 1–2 weeks: Cotton-wick reservoir system or a self-watering container. UF/IFAS extension guidance confirms self-watering containers are a reliable option for absences in this range.
- 2–4+ weeks: A battery-powered drip timer or a plant sitter with written instructions. Wirecutter’s practical testing shows many houseplants handle up to about 10 days on a proper pre-soak alone, but beyond that, automation or human help is worth it.
For frequent travelers who want a permanent fix, Farmdaddy’s self-watering planters are the most consistent long-term solution covered in this guide.
Pro Tip: Test any new watering system at least one week before you leave. A wick that slips, a bottle that drains in 12 hours, or a timer with a dead battery will not announce itself until you’re already at the airport.
Key Takeaways
Match your watering method to your trip length, test it for a full week before you leave, and pair it with at least one moisture-retention trick for the most reliable results.
| Point | Details |
|---|---|
| Match method to trip length | Use a soak for 0–3 days, a wick or bottle drip for up to 2 weeks, and a timer or sitter for longer. |
| Test at least one week ahead | Run any new system for 7 days before departure to catch leaks, wick slippage, or battery failures. |
| Slow evaporation passively | Group plants, use humidity trays, and swap terracotta for glazed pots to extend watering intervals. |
| Know your plant’s tolerance | Succulents last 2–4 weeks; ferns and herbs need water every 3–5 days; adjust for pot size and season. |
| Farmdaddy for frequent travelers | Farmdaddy’s sub-irrigation planter system delivers consistent moisture from a built-in reservoir, ideal for regular trips. |
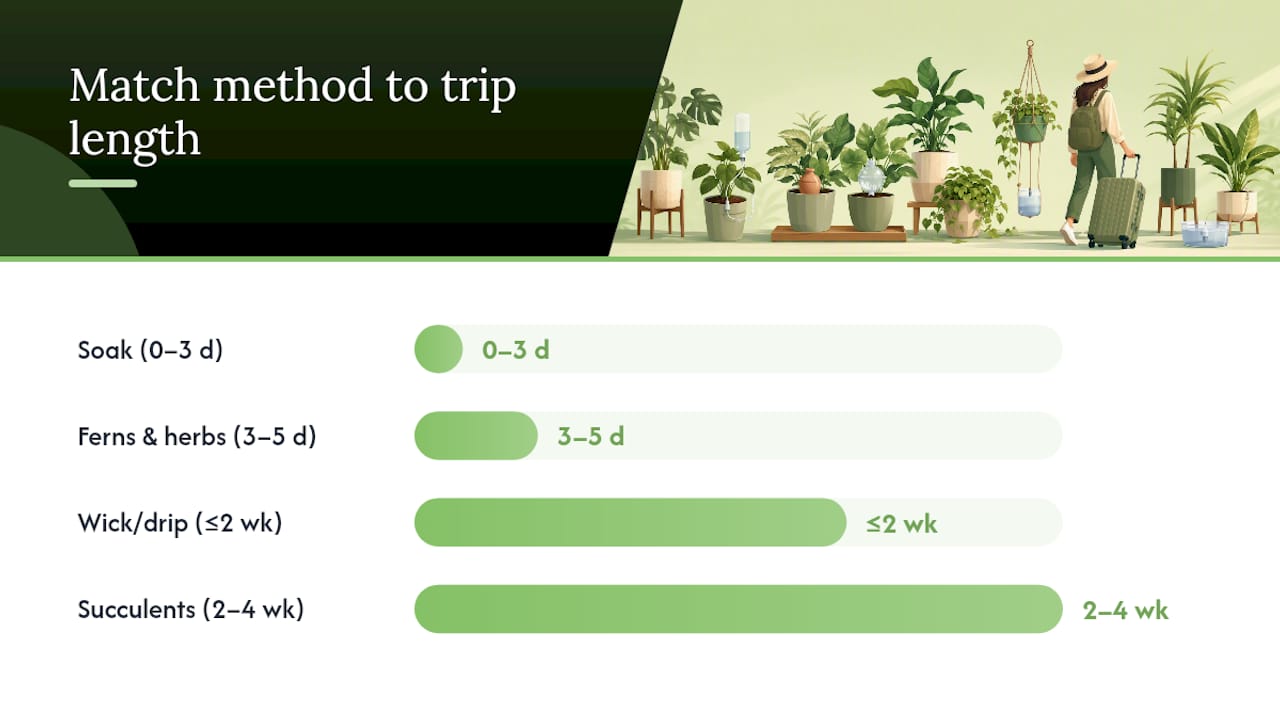
Table of Contents
- What to do the day before you leave
- Passive tricks that keep soil moist longer
- DIY watering methods that actually work
- How to set up a simple drip timer for longer trips
- Why self-watering containers are the most reliable long-term solution
- Why Farmdaddy planters are built for travelers
- How to test your setup and what to leave for a sitter
- How long can your plants actually go without water?
- What commonly goes wrong and how to fix it
- An experienced traveler’s honest take on leaving plants
- Farmdaddy makes travel-ready plant care simple
- Sources
What to do the day before you leave
A little prep the day before departure makes every watering method work better. Think of it as giving your plants the best possible starting point.
- Deep soak 24–48 hours before leaving, not the morning of. Water thoroughly until it drains from the bottom, then let the soil settle. This gives roots time to absorb moisture without sitting in soggy soil.
- Remove saucers if you’re using a wick or drip system (they can overflow). Add humidity trays filled with pebbles and water under plants that prefer moisture, like ferns or peace lilies.
- Move plants away from south-facing windows, heating vents, and air conditioning registers. Direct sun and forced air dramatically speed up soil drying.
- Group plants together on a table or in a corner. Plants release moisture through their leaves, and a cluster creates a shared humid microclimate that slows water loss for everyone in the group.
- Top-dress with mulch or damp moss if you have it. Even a thin layer over the soil surface slows surface evaporation noticeably.
- Label any plants with special needs. A sticky note that says “water every 3 days, not more” is worth its weight if a well-meaning neighbor stops by.
The Missouri Botanical Garden warns that overwatering before you leave is one of the most common causes of root rot and pest problems. Water as you normally would, then do the deep soak 24–48 hours before departure. Do not add extra water the morning you walk out the door.
Pro Tip: Seasonal adjustments matter. In winter, indoor heating dries soil faster than you’d expect. In summer, air conditioning can actually slow evaporation. Check your thermostat setting before you leave and adjust your chosen watering method’s frequency accordingly.
Passive tricks that keep soil moist longer
These no-cost or low-cost tactics extend the time between waterings. Pair them with any watering method and you’ll get noticeably better results.
- Mulch or decorative top-dressing: A layer of coco coir, bark chips, or even decorative pebbles over the soil surface cuts surface evaporation. This works especially well in dry indoor air.
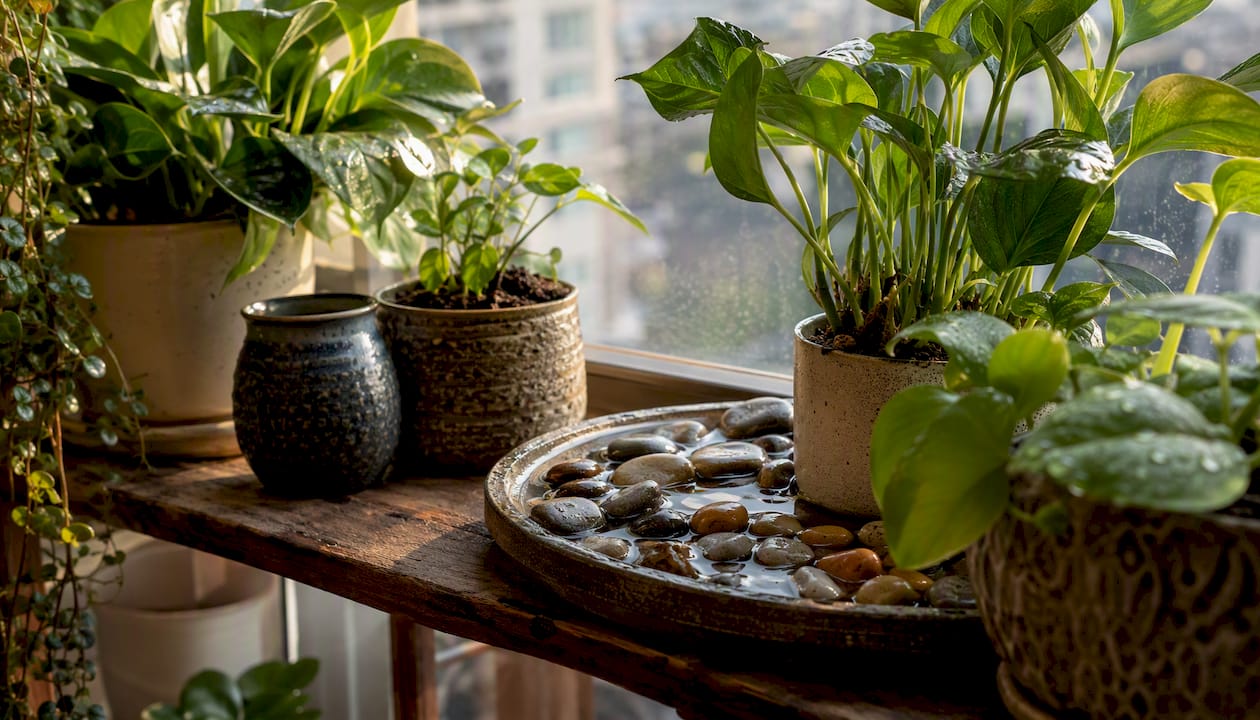
- Humidity trays: Place a shallow tray filled with pebbles and water under the pot. As water evaporates from the tray, it raises the humidity immediately around the plant. Keep the pot above the waterline so roots don’t sit in standing water.
- Group plants: As noted above, clustering plants slows transpiration for the whole group. Folia Collective’s guidance confirms this is one of the most effective passive tactics for extending watering intervals.
- Move to a lower-light, cooler spot: Bright light and warmth accelerate both evaporation and plant water use. A north-facing room or a shaded corner can meaningfully extend how long soil stays moist.
- Swap to a larger pot if you have time: Larger soil volume holds more moisture. If a plant is in a small pot and you’re leaving for more than a week, repotting it a few weeks before your trip (not right before) gives it more buffer.
- Use glazed ceramic or plastic pots instead of terracotta: Terracotta is porous and loses moisture through its walls. Glazed or plastic containers retain moisture significantly longer, which matters most on longer trips.
One caution: if you’re using the plastic-bag greenhouse method (covered below), never place a bagged plant in direct sun. The trapped heat will cook it.
Pro Tip: Pair at least two moisture-retention tactics together. Grouping plants AND adding a humidity tray, for example, compounds the benefit and gives your chosen watering method a longer window to work.
DIY watering methods that actually work
These five methods cover most trip lengths from a weekend to two weeks. Each has a clear setup process and honest trade-offs.
1. Inverted bottle drip
Best for: 3–7 days. Materials: A clean plastic or glass bottle, a nail or skewer.
- Fill the bottle with water and cap it.
- Poke 1–3 small holes in the cap with a nail (fewer holes = slower drip).
- Invert the bottle and push the cap end 2–3 inches into the soil near the root zone.
- Test the drip rate before you leave. Adjust hole size as needed.
The bottle drains faster in warm rooms and slower in cool ones. A 1-liter bottle typically lasts 2–4 days for a medium pot.
2. Cotton-wick system
Best for: 1–2 weeks. Materials: Cotton rope or thick cotton shoelace, a bucket or jar of water.
- Cut a length of cotton rope long enough to reach from the bottom of a water reservoir to the center of the pot’s soil.
- Thread one end 3–4 inches into the soil near the roots.
- Submerge the other end in a bucket or jar of water placed higher than or level with the pot.
- Test for 3–5 days to confirm the wick is drawing water at the right rate.
Wicking systems and bucket reservoirs can extend watering for 1–3 weeks when sized and tested correctly. Synthetic rope does not wick reliably; use natural cotton only.
3. Bathtub soak
Best for: 3–5 days. Materials: Bathtub, old towels.
- Lay wet towels in the bathtub.
- Place pots directly on the wet towels (no saucers).
- The soil wicks moisture upward from the towels through capillary action.
This works well for most tropical houseplants. It does not work for succulents, cacti, or any plant that needs dry conditions between waterings.
4. Plastic-bag greenhouse
Best for: Up to 2 weeks for moisture-loving plants. Materials: A large clear plastic bag, stakes or chopsticks.
- Water the plant thoroughly.
- Insert chopsticks or stakes around the pot edge to keep the bag off the leaves.
- Slip the bag over the plant and loosely seal it at the base.
- Place in bright indirect light only, never direct sun.
The bag traps humidity and dramatically slows water loss. The risk: if any leaves touch the bag, they can rot. Check for condensation buildup when you return.
5. Watering globes or stakes
Best for: 3–7 days. Materials: A glass or ceramic watering globe (widely available at garden centers).
- Fill the globe with water.
- Insert the spike end into moist soil at an angle.
- The globe releases water slowly as the soil dries.
Globes are easy and low-mess, but their release rate is hard to control precisely. They work best as a supplement to another method rather than a standalone solution for trips longer than a week.
Folia Collective’s step-by-step guide covers all five of these methods with additional sizing tips for different pot volumes.
Caution: The bathtub soak and plastic-bag methods both carry a risk of mold or root rot if used too long or in poor airflow. Neither is suitable for succulents, cacti, snake plants, or any plant that prefers dry soil between waterings.
Pro Tip: For the bottle drip and wick methods, run a test in a sink first. Fill the bottle or set up the wick over a measuring cup for 24 hours and see how much water it delivers. Then scale up or down before committing to the setup for your whole trip.
How to set up a simple drip timer for longer trips
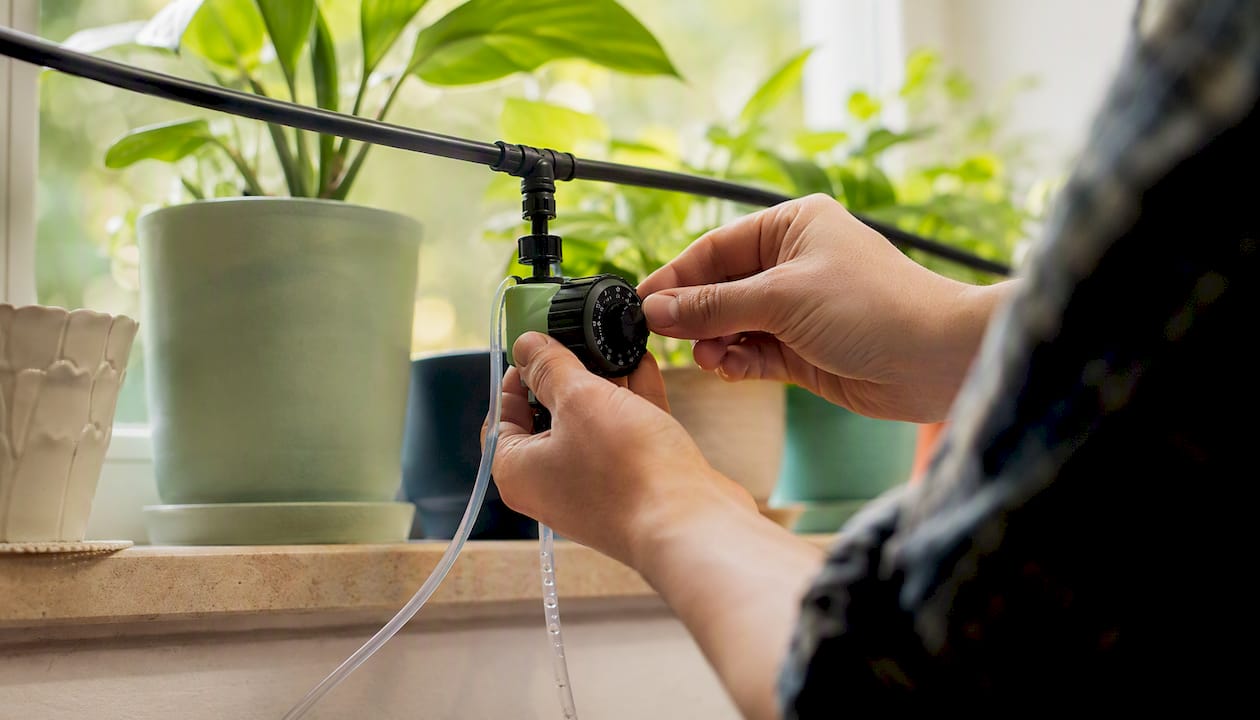
Battery-powered drip timers are the right call for trips longer than 10 days, especially when you have multiple plants. The setup is straightforward, but the testing step is non-negotiable.
What to look for when shopping:
- Adjustable frequency (daily or every few days) and adjustable duration (seconds, not just minutes)
- Reliable seals on all fittings to prevent indoor leaks
- Easy-to-clean drippers that won’t clog with mineral deposits
- A low-battery indicator so you know before you leave
Setup steps:
- Fill a large reservoir (a 5-gallon bucket works well) and place it above the level of your pots.
- Connect the timer to the reservoir outlet.
- Run drip lines to each pot, placing a dripper near each plant’s root zone.
- Set the timer to your target frequency and duration.
- Run the system manually once and watch each dripper to confirm flow.
- Let it run on its automatic schedule for a full week before you leave.
Penn State Extension’s container irrigation guidance emphasizes planning and testing the setup before leaving, including checking all connections and measuring actual water delivery per cycle.
Testing checklist:
- Measure how much water each pot receives per cycle (use a saucer to catch runoff).
- Check all fittings for drips or leaks after the first 48 hours.
- Watch plant response: soil should be moist but not waterlogged between cycles.
- Replace batteries before you leave, even if they seem fine.
- Set a reminder to check battery level if your timer doesn’t have an indicator.
For plants with complex watering needs, very high value, or unusual soil mixes, a plant sitter is still the safer choice over automation. A drip timer cannot tell when a plant is stressed or when a dripper has clogged.
Pro Tip: Run the timer for a full week before you leave, not just a day or two. A slow leak at a fitting, a clogged dripper, or a timer that resets after a power blip will show up in a week-long test. A 24-hour test will not catch these.
Why self-watering containers are the most reliable long-term solution
Self-watering containers work on a simple principle called sub-irrigation. A built-in reservoir sits below or beside the growing medium, and the soil draws water upward through capillary action as it dries. The plant takes what it needs, when it needs it, without any guesswork on your part.
This matters for travelers because the system is passive and self-regulating. You fill the reservoir before you leave, and the plant manages the rest. There’s no drip rate to calibrate, no wick to slip, and no risk of a timer delivering too much water to a pot that hasn’t dried out yet.
Key advantages:
- Consistent moisture at the root zone without daily attention
- Lower risk of overwatering compared to manual or timer-based methods
- Reservoir capacity that typically supports 1–2 weeks of growth without refilling
- Reduced mineral salt buildup compared to top-watering when used correctly
Maintenance to keep the system working:
- Refill the reservoir when it drops to the low-water mark, not before it empties completely.
- Flush the growing medium with plain water from the top every 4–6 weeks to prevent salt accumulation from fertilizers.
- Check wicks or connector hoses for blockages or mineral deposits every few months.
- In winter, reduce reservoir fill frequency since most indoor plants slow their water uptake.
UF/IFAS extension guidance specifically highlights self-watering containers as a reliable option for people who travel regularly, noting that plants draw moisture as needed rather than receiving it on a fixed schedule. The University of Maryland Extension documents the practical use and maintenance steps for these containers, including how to avoid common problems like algae growth in the reservoir.
Self-watering containers are a more sustainable long-term choice than any temporary DIY method. For a frequent traveler, the investment pays off quickly in healthier plants and less worry.
Pro Tip: Before your first trip with a self-watering container, run it for two full weeks at home and check the reservoir level daily. This tells you exactly how fast your specific plant draws water, so you know how full to fill it before you leave.
Why Farmdaddy planters are built for travelers
Farmdaddy’s self-watering planter system is designed around the exact problem this article addresses: keeping plants healthy when you’re not there to water them. The patented modular design allows each connected container to operate independently, so a thirsty tomato plant doesn’t drain the reservoir meant for your herbs.
Key features:
- Built-in water reservoir with sub-irrigation delivery
- Modular connector hoses that link multiple containers while keeping each plant’s water supply independent
- Compatible with vegetables, herbs, fruits, and flowers
- Designed for minimal upkeep, making it practical for gardeners who travel
How to set it up before a trip:
- Assemble the planter and connect any additional modules using the connector hoses.
- Fill the reservoir to the maximum fill line.
- Plant your herbs, vegetables, or flowers in the growing medium.
- Run the system for a full week at home to confirm moisture delivery and check all connections.
- Top off the reservoir the day before you leave.
Honest trade-offs:
- The reservoir needs to be filled before each trip; it’s not a set-and-forget system for months at a time.
- Like any self-watering system, it works best with plants that prefer consistent moisture. Succulents and cacti are not a good match.
- Testing before travel is still required, just as with any other method.
For frequent travelers who grow herbs, vegetables, or tropical houseplants, Farmdaddy’s system removes the guesswork that makes most DIY solutions stressful. See Farmdaddy’s vacation plant watering guide for additional setup tips specific to travel use.
Pro Tip: Fill the Farmdaddy reservoir to the top the day before you leave, not the morning of departure. This gives the system a few hours to equilibrate and lets you spot any unexpected drainage before you’re out the door.
How to test your setup and what to leave for a sitter
Testing is the step most plant owners skip, and it’s the one that matters most. A system that works for a day may fail on day five.
Testing checklist (run this one week before you leave):
- Set up your chosen watering method exactly as you plan to use it during your trip.
- Let it run for 7 full days without adjusting it.
- Check soil moisture every 2 days: it should be consistently moist but never waterlogged.
- Look for leaks at all fittings, drippers, or wick connections after 48 hours.
- Measure how much water remains in the reservoir at the end of the week to estimate consumption rate.
- Watch for leaf droop, yellowing, or wilting, which signal under-watering, and for soft, mushy stems, which signal over-watering.
- Adjust flow rate, wick length, or timer duration based on what you observe, then run for 2–3 more days to confirm.
Penn State Extension recommends exactly this kind of pre-trip test run to catch leaks, blockages, and delivery rate problems before they become plant emergencies.
Leave-instructions template for a plant sitter:
- Plant name and location: (e.g., “Pothos on the kitchen shelf”)
- Watering amount and frequency: (e.g., “Add 1 cup of water to the reservoir every 5 days if the indicator shows low”)
- What healthy looks like: Attach a photo of each plant taken the day you leave.
- Early warning signs: “If leaves are drooping or yellowing, text me.”
- Where supplies are stored: Extra water, fertilizer, spare wicks, or batteries.
- Emergency contact: Your number and a backup (neighbor, friend).
Pro Tip: Leave an easy failover for your sitter: a filled watering globe or a second reservoir already set up. If the main system has a problem, the sitter has a simple backup that requires no setup knowledge.
How long can your plants actually go without water?
The answer depends on the plant, the pot, and the season. Here’s a practical guide to common indoor plant groups.
| Plant group | Typical tolerance | Key caveats |
|---|---|---|
| Succulents and cacti | 2–4 weeks or more | Prefer dry conditions; never use a wick or soak method |
| Pothos, philodendron, ZZ plant | 1–2 weeks | Tolerate some drought; larger pots extend tolerance |
| Peace lily, calathea | 5–7 days | Sensitive to dry soil; wilts quickly but usually recovers |
| Ferns, maidenhair | 3–5 days | High moisture needs; bathtub soak or wick required |
| Herbs (basil, mint, cilantro) | 3–5 days | Small pots dry fast; self-watering containers work well |
| Large foliage (fiddle-leaf fig, monstera) | 1–2 weeks | Larger soil volume helps; check pot size before leaving |
| Orchids | 7–10 days | Bark medium dries faster than soil; bark-specific watering needed |
| Hanging baskets | 2–4 days | Exposed to air on all sides; dry out very fast |
Important caveats:
- These ranges assume average indoor temperatures (65–75°F). Summer heat or winter heating can cut tolerance windows by 30–50%.
- Terracotta pots dry out significantly faster than glazed ceramic or plastic. If your fern is in terracotta, assume the shorter end of its tolerance range. Herbs at Home’s guidance confirms that pot material is one of the most overlooked variables in vacation watering planning.
- Small pots (under 6 inches) dry out much faster than large ones. A 4-inch herb pot may need water every 2–3 days in summer.
- Winter dormancy slows water uptake for many plants, which can extend tolerance slightly. But indoor heating often compensates by drying the air faster.
High-risk plants to watch: Orchids, ferns, hanging baskets, and any plant in a small terracotta pot need the most attention. If you own several of these, a plant sitter or a self-watering system is worth the investment.
What commonly goes wrong and how to fix it
Most vacation plant failures come down to a handful of predictable mistakes. Knowing them in advance means you can avoid them before you leave and recover quickly when you return.
Common mistakes:
- Overwatering right before leaving. Soggy soil invites root rot and fungus gnats. Stick to the 24–48 hour pre-soak rule and let the soil drain fully.
- Testing a new system for only a day or two. A 24-hour test misses slow leaks, wick slippage, and timer malfunctions that show up on day 4 or 5.
- Using synthetic rope for wicking. Nylon and polyester don’t wick reliably. Natural cotton is the only material that works consistently.
- Leaving plants in a bag in direct sun. The heat buildup inside a plastic bag in direct sun can reach damaging temperatures within hours.
- Forgetting to check timer batteries. A dead battery means no water for the entire trip. Replace batteries before you leave, full stop.
Troubleshooting when you return:
- Slightly wilted plant: Water thoroughly, move to indirect light, and give it 24–48 hours. Most tropical plants bounce back quickly from mild drought stress.
- Overwatered plant (soft stems, yellowing leaves, soggy soil): Remove from the saucer, let the pot drain completely, and improve airflow around the plant. Reduce watering frequency going forward and check roots for rot.
- Severe root rot: Remove the plant from its pot, trim any black or mushy roots with clean scissors, let the roots air-dry for an hour, and repot in fresh, dry soil. Hold off watering for a few days.
Warning: Stressed plants, whether from drought or overwatering, are significantly more vulnerable to fungal infections and pest outbreaks. When you return, check the undersides of leaves for spider mites and the soil surface for fungus gnats. Catching an infestation early, before it spreads to neighboring plants, is far easier than treating a full outbreak.
Pro Tip: Take a photo of every plant the day you leave. When you return, compare the current state to the photo. Subtle changes in leaf color or posture that you might not notice day-to-day become obvious in a side-by-side comparison.
An experienced traveler’s honest take on leaving plants
The single habit that has saved more plants than any gadget or trick is the one-week test. Not a 24-hour test. Not a “looks good to me” check the morning of departure. A full seven days of running the system exactly as it will run while you’re gone, with daily soil checks and a close look at every connection.
For weekend trips, a deep soak and a shaded spot are genuinely all most plants need. For a week away, a cotton-wick system set up and tested in advance is reliable and costs almost nothing. For two weeks or more, a self-watering container removes the anxiety entirely. The method matters less than the testing.
The other habit worth keeping: written instructions for anyone who might check on your plants. Not verbal instructions. Written ones, with a photo. A neighbor who has never grown a plant in their life can follow “add water here when this line reads low” without any gardening knowledge at all.
Pro Tip: Keep a simple photo log on your phone: one photo per plant, taken the day you leave. It takes two minutes and gives you a clear baseline to compare against when you return. It also helps you explain to a sitter exactly what “healthy” looks like for each plant.
Farmdaddy makes travel-ready plant care simple
Frequent travelers need a watering solution that works without daily attention, and Farmdaddy’s self-watering planter system is built for exactly that. The reservoir-based design delivers consistent moisture through sub-irrigation, so your herbs and vegetables get what they need whether you’re home or not.
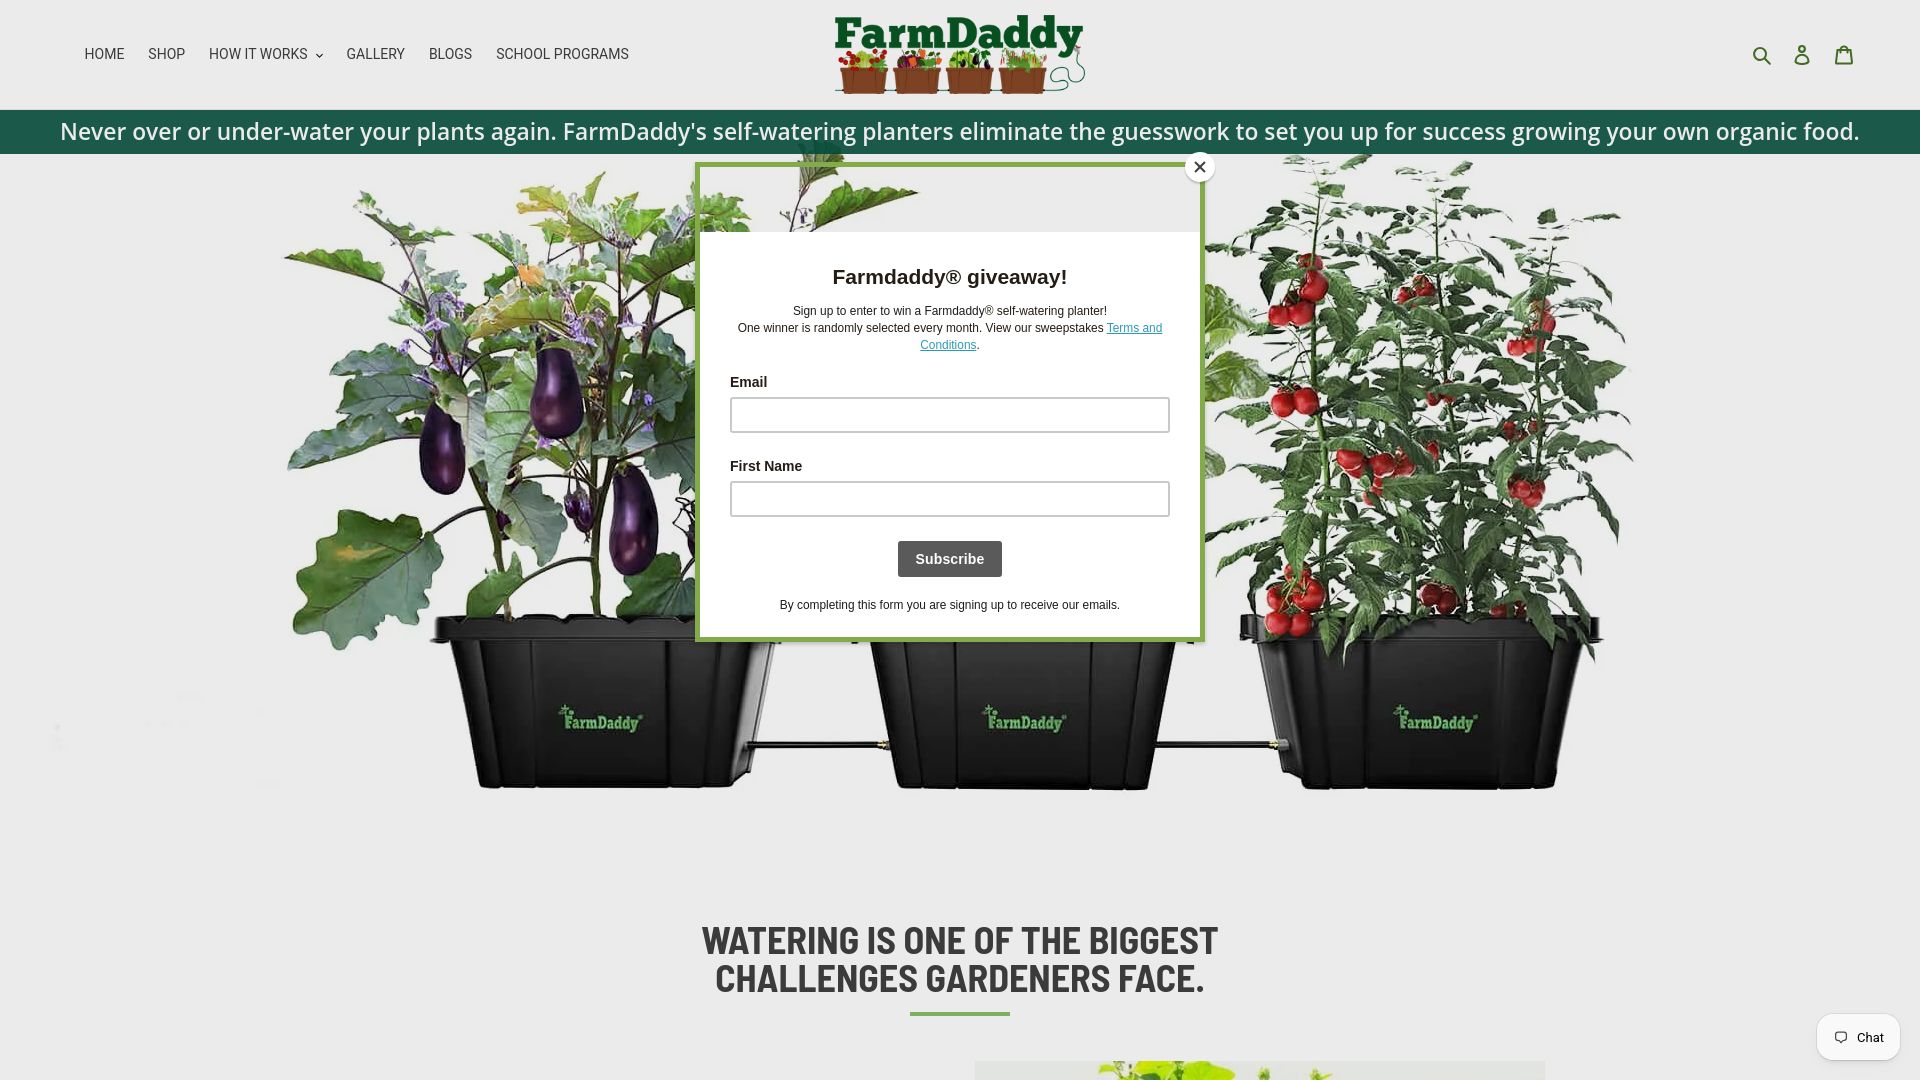
The modular connector system means you can link multiple containers while keeping each plant’s water supply independent, which is a real advantage when you’re growing a mix of thirsty herbs and more drought-tolerant plants side by side. Fill the reservoir, run a one-week test, and leave with confidence.
Ready to stop worrying about your plants every time you book a trip? Browse Farmdaddy’s self-watering planter collection and find the right system for your space. For a closer look at the full garden box option, the Farmdaddy Garden Box is a practical starting point for herb and vegetable growers who travel regularly.
Sources
These are the authoritative sources behind the recommendations in this article. Each is worth bookmarking if you want to go deeper.
- Vacation Plant Care – Gardening Solutions (UF/IFAS)
- Keeping houseplants alive and happy when you’re away – Wirecutter
- How to Water Plants While on Vacation (Folia Collective)
- Self-watering containers – University of Maryland Extension
- Building and operating a home container irrigation system – Penn State Extension
- Overwatering: Problems and prevention – Missouri Botanical Garden
Recommended
- Vacation Plant Watering Made Easy for Home Gardeners – FarmDaddy®
- Best Self-Watering Planters: Top Picks for Low-Maintenance Gardeners – FarmDaddy®
- Self-Watering Planter System: Your Easy-Care Garden Guide – FarmDaddy®
- Water Saving Gardening Ideas Using Self Watering Garden System & Conta – FarmDaddy®

