
BLOG
Best Time to Water Containers: Refill & Maintenance Guide

Refill your self-watering container reservoir every 2–7 days in summer and every 7–14 days in cooler months — the exact cadence depends on your reservoir size, plant type, and sun exposure. Before you refill, run this 60-second check:
- Look at the fill indicator. If the float or tube shows empty or near-empty, it’s time.
- Lift the container. A noticeably lighter pot confirms the reservoir is low.
- Use a dipstick or finger. Insert a thin stick into the fill tube; if it comes out dry, top up now.
Self-watering planters use roughly 50% less water than overhead watering and typically need a reservoir refill every 2–7 days depending on season and plant size. That range is your starting point. Everything below helps you narrow it to your exact setup.
Key Takeaways
Matching your reservoir size to your plant’s water demand is the single most reliable way to set the right refill cadence and keep your container garden thriving with minimal effort.
| Point | Details |
|---|---|
| Baseline refill cadence | Refill every 2–7 days in summer, every 7–14 days in cooler months, adjusted by plant and reservoir size. |
| First-fill best practice | Top-water the soil for the first 1–2 waterings to activate wick contact before switching to reservoir-only refills. |
| Maintenance cadence | Rinse the reservoir every 2–4 weeks during the growing season; do a deep clean before winter or replanting. |
| Troubleshooting priority | If soil stays wet for more than 2 weeks, stop refilling and let the reservoir empty to prevent root rot. |
| Farmdaddy advantage | Farmdaddy’s patented per-container independence lets each plant draw exactly what it needs, making refill intervals more predictable. |
Table of Contents
- What changes how often you need to refill
- Practical refill schedules by plant type and season
- How to check, refill, and safely top up your reservoir
- Routine maintenance calendar for healthy reservoirs
- Common problems and fast fixes
- Why Farmdaddy’s design changes your refill schedule
- A practical mindset that keeps reservoirs stable
- Ready to stop daily watering? Here’s where to start with Farmdaddy
- Sources
What changes how often you need to refill
Six factors move your refill schedule faster or slower than the baseline range.
| Factor | Effect on refill cadence | Why |
|---|---|---|
| High-water plants (tomatoes, cucumbers) | Shorten to 2–4 days in summer | Heavy feeders pull moisture fast |
| Low-water plants (herbs, succulents) | Lengthen to 7–14 days | Slower uptake, less draw on reservoir |
| Small reservoir (1 qt or less) | Shorten to 3–5 days in summer | Less stored water depletes quickly |
| Large reservoir (2+ gal) | Lengthen to 10–14 days | More buffer between refills |
| Full sun / high wind | Shorten by 1–3 days | Evaporation and transpiration spike |
| Cooler temps / shade | Lengthen by 3–7 days | Slower plant metabolism, less draw |
Growth stage matters too. Seedlings draw very little water; a tomato plant in full fruit set can drain a 1-gallon reservoir in 3 days during a heat wave. Check more often during flowering and fruiting.
Pro Tip: Adding a thin layer of organic mulch over the potting mix surface slows surface evaporation and can add 1–2 days to your refill interval without any other changes.
Practical refill schedules by plant type and season
Reservoir size is the single biggest predictor of refill frequency: small reservoirs around 1 quart may need refilling every 3–5 days in summer, while large 2+ gallon reservoirs can go 10–14 days between top-ups.
When a heat wave hits (above 90°F), check daily for the first two days and shorten your interval if the indicator drops faster than expected.
How to check, refill, and safely top up your reservoir
When the indicator shows empty, follow this sequence to refill correctly and protect your plant roots.
- Gather your supplies. You need a watering can or hose with a gentle flow, a dipstick or thin rod, and optionally a small funnel for narrow fill tubes.
- Check the indicator first. Read the float or fill-tube level before pouring anything. If it still shows water, wait and recheck in 24 hours.
- Pour slowly into the fill tube. Add water steadily until the indicator reaches “full” or water appears at the overflow hole. Stop there.
- Do not overfill. Overflow holes exist for a reason. Water above that line can waterlog roots.
- Confirm wick contact. After refilling, press the potting mix gently around the wick zone to keep soil in contact with the wicking material.
- Log the date. Note when you refilled so you can track your actual cadence over the first two weeks.
First fill after planting: Top-water the soil for the first 1–2 waterings before relying solely on the reservoir. This pushes moisture down to the wick zone and encourages roots to grow toward it. After that, switch to reservoir-only refills.
Pro Tip: Before the first fill, use a pointed stick or pencil to create small channels in the potting mix near the wick. This helps water reach the wick faster and activates the self-watering action sooner.
Routine maintenance calendar for healthy reservoirs
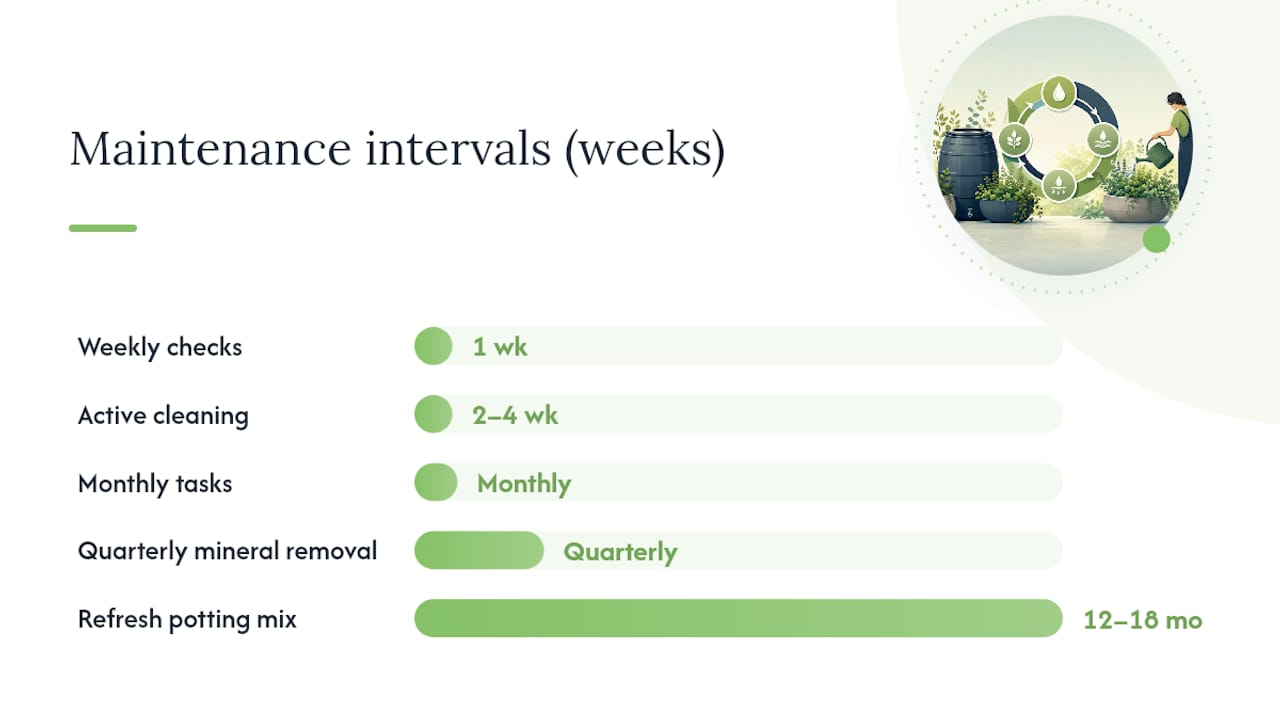
Consistent upkeep takes less than five minutes a week and prevents the most common problems: algae, mineral buildup, and clogged wicks.
Weekly checks:
- Glance at the fill indicator and top up if needed.
- Sniff the reservoir opening. A clean reservoir smells neutral; a sour or swampy odor means it’s time to flush.
- Confirm the overflow vent is clear of debris.
Monthly tasks:
- Rinse the reservoir with clean water and a soft brush. Active growing-season cleaning every 2–4 weeks keeps water quality high and prevents algae from taking hold.
- Inspect the wick for discoloration or stiffness. A healthy wick is pliable and slightly damp.
- Clear any mineral crust from the fill tube opening.
Seasonal tasks:
- Before winter, drain the reservoir completely if temperatures will drop near 35°F. Ice in a sealed reservoir can crack the container.
- Refresh potting mix every 12–18 months and perform a quarterly mineral removal using a diluted citric acid rinse to prevent clogging.
- Before replanting in spring, do a full deep clean of the reservoir, wick channel, and fill tube.
Mosquito note: Standing water in an uncovered reservoir can attract mosquitoes. Keep the fill cap in place and check that overflow holes drain freely.
Common problems and fast fixes
| Problem | Likely cause | Quick fix |
|---|---|---|
| Indicator shows full but soil is dry | Wick not contacting soil or reservoir | Re-seat wick, top-water once to re-establish contact |
| Foul smell from reservoir | Bacterial or algae growth | Flush reservoir, scrub with diluted white vinegar, refill with fresh water |
| Green algae on reservoir walls | Light reaching the reservoir | Clean immediately; cover reservoir or use an opaque container |
| Soil stays wet for more than 2 weeks | Overwatering or poor drainage | Stop refilling; let reservoir run dry before next top-up |
| Mineral crust on fill tube | Hard water buildup | Soak tube in diluted citric acid solution, then rinse |
| Roots entering reservoir | Plant maturity, roots seeking water | Trim roots at reservoir entry; consider repotting |
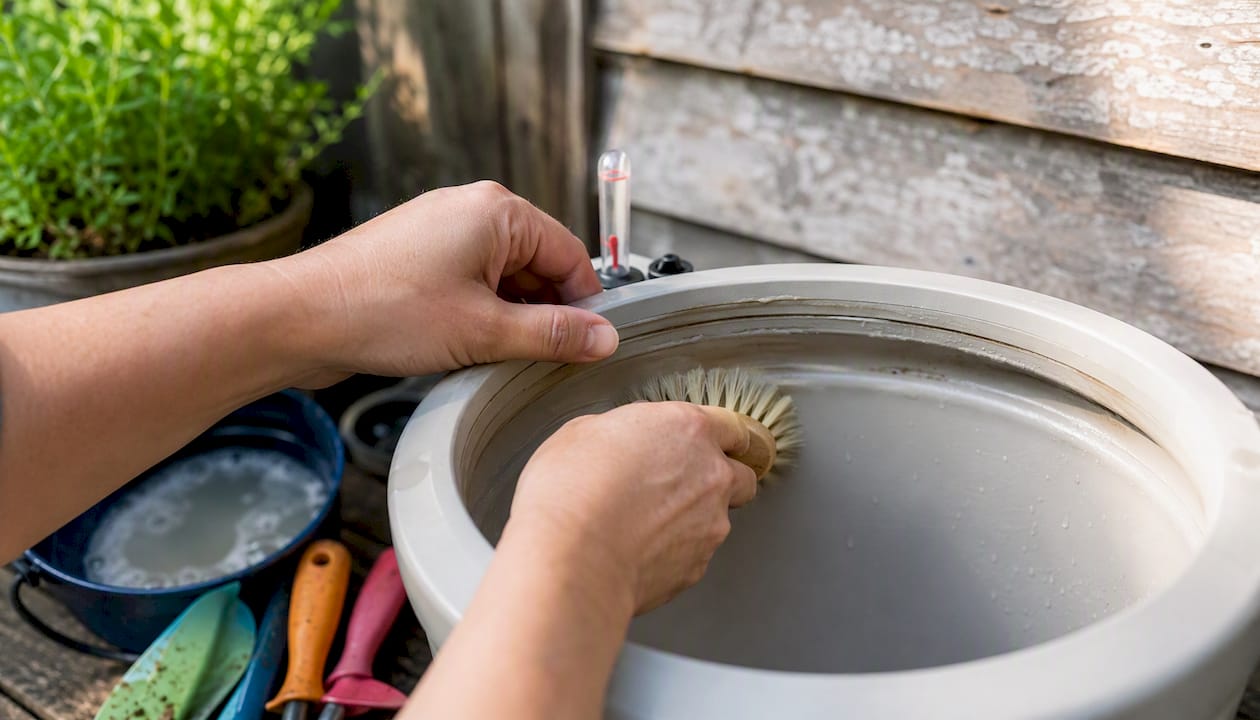
If soil stays overly wet for more than two weeks, pause refilling entirely and let the reservoir empty before starting again. Root rot develops fast in waterlogged conditions, and catching it early saves the plant. Replace a wick that stays stiff or crumbles when bent; cleaning alone won’t restore wicking action once the material breaks down.
Pro Tip: Use filtered or rainwater if your tap water is very hard. Mineral buildup is the leading cause of wick clogging, and softer water extends the time between deep cleans significantly.
Why Farmdaddy’s design changes your refill schedule
Farmdaddy’s patented self-watering planter design gives each connected container its own independent reservoir. That means a thirsty tomato doesn’t drain the water meant for your basil next door. Each plant draws exactly what it needs, which keeps refill intervals more predictable and reduces the risk of over- or underwatering across a mixed planting.
Key features that directly affect how often you refill:
- Per-container independence: Each pot manages its own moisture level, so you refill based on that plant’s actual needs, not a shared average.
- Visible fill indicator: No guessing. The indicator tells you at a glance whether a refill is due.
- Scalable reservoir options: From compact herb planters to large tomato kits, reservoir capacity is matched to plant water demand.
Farmdaddy’s self-watering vegetable garden approach is especially useful for gardeners who travel or have unpredictable schedules. A properly sized reservoir means plants stay hydrated for days without intervention. You can also explore sustainable planter materials if you want to pair your system with eco-friendly container choices.
A practical mindset that keeps reservoirs stable
The gardeners who get the most from a self-watering system are the ones who build one small habit: a consistent weekly check at the same time each week. Pick a day, glance at the indicator, and log the date. That’s it.
Three habits that make a real difference:
- Check at the same time each week. Consistency builds a mental baseline so you notice when a plant is drinking faster than usual.
- Keep a simple refill log. A sticky note on the container or a note in your phone is enough. After two weeks, you’ll know your exact cadence.
- Set a seasonal reminder. When the forecast shifts to consistent heat or cold, adjust your check frequency for one week to recalibrate.
For travelers: fill the reservoir to maximum capacity the day before you leave. A large-reservoir system like the Farmdaddy tomato kit can carry a plant through 7–10 days without attention in mild weather.
Ready to stop daily watering? Here’s where to start with Farmdaddy
The fastest way to move from daily watering to a simple weekly refill routine is to match the right Farmdaddy system to your plants.
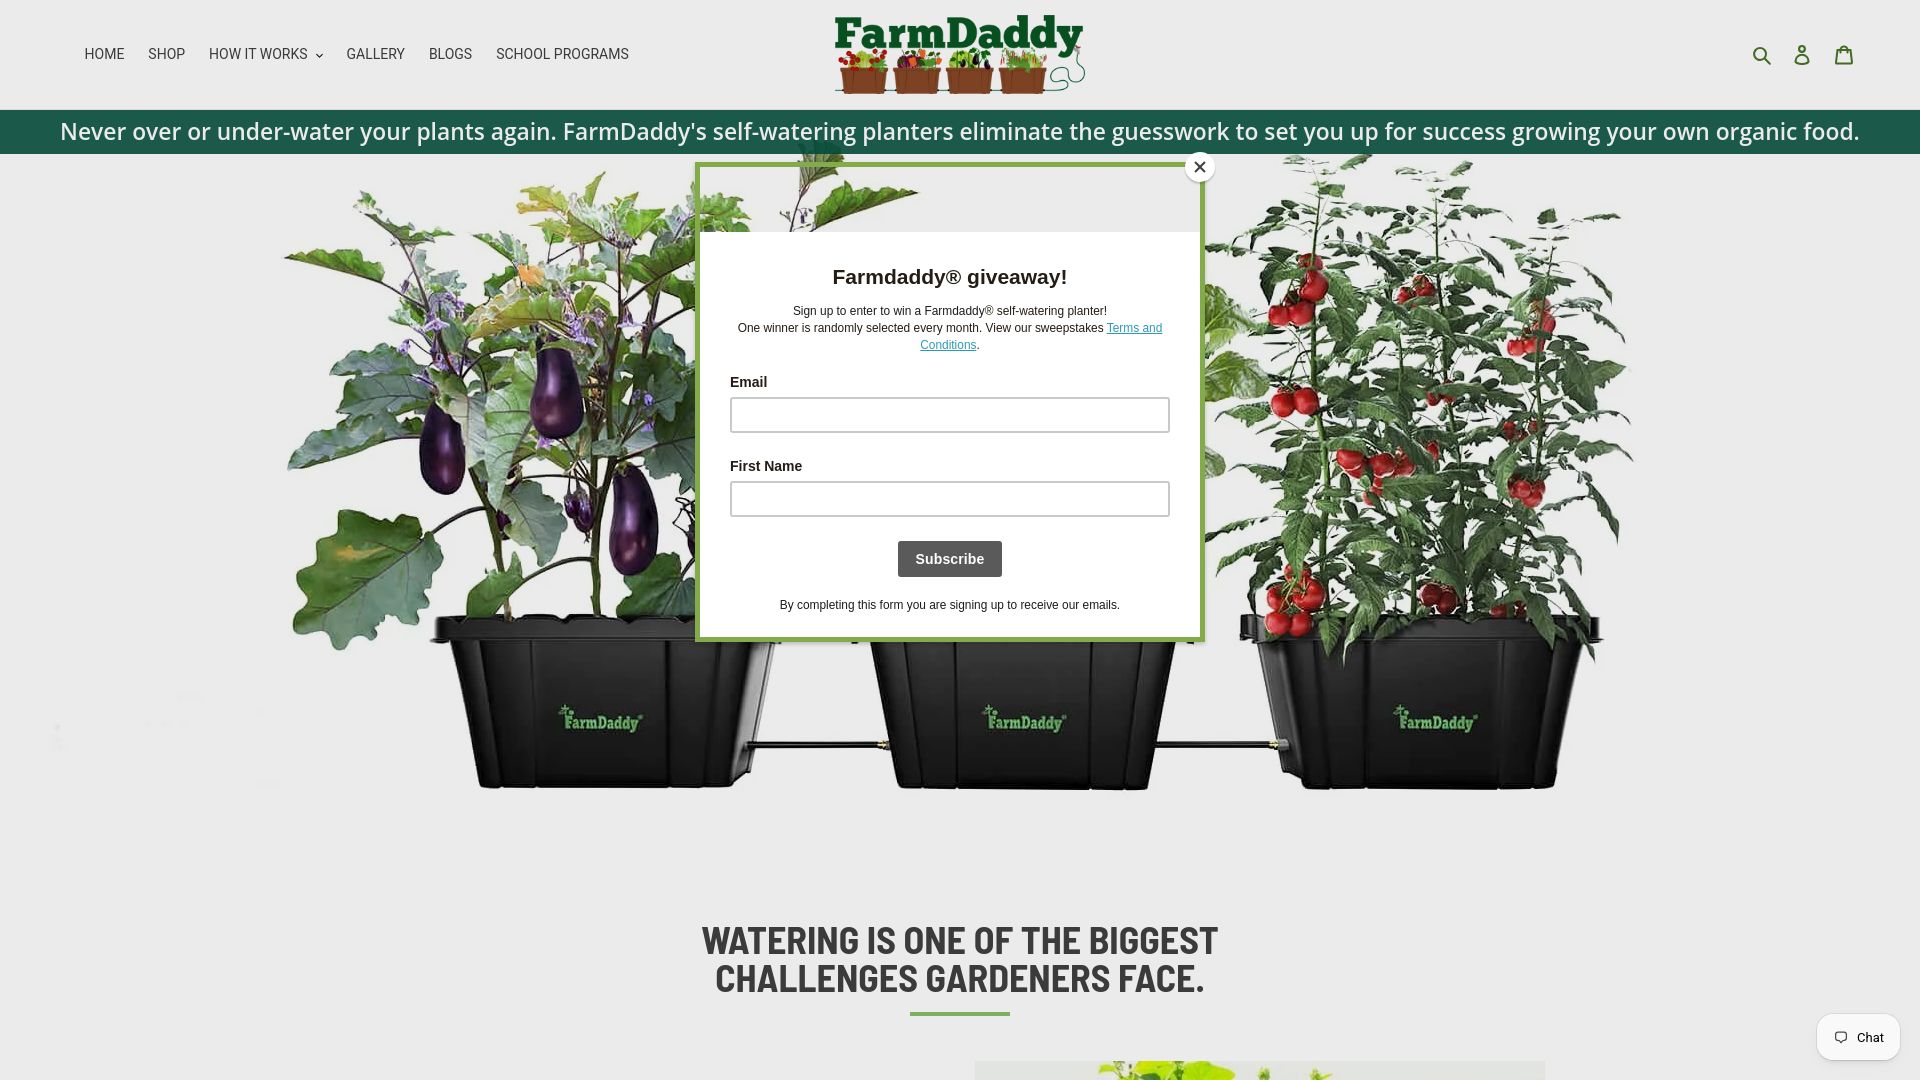
Three setups cover most home gardeners:
- Farmdaddy 2-Planter Self Watering Garden System: Ideal for balconies or small patios. Two independent containers, each with its own reservoir, so herbs and tomatoes coexist without competing for water.
- Farmdaddy Garden Box: A self-watering garden bed and herb planter in one. Great for leafy greens, herbs, and mixed plantings where you want one low-maintenance footprint.
- Farmdaddy Self Watering Tomato Planter Kit: Built for high-water-use plants. The larger reservoir handles a tomato plant’s peak summer demand without daily attention.
Your first two weeks after setup: top-water the soil once or twice, fill the reservoir, and check the indicator daily to establish your baseline cadence. By day 14, you’ll know your plant’s rhythm and can shift to weekly checks. Visit the Farmdaddy self-watering container guide to find the right system for your space and get started today.
Sources
- Self Watering Planters: The Complete Guide - Smart Garden Guru
- How Self-Watering Pots Actually Work (And When They Are Worth It) - LeafyStart
- How to Clean a Self Watering Planter Properly - Indoor Green Hub
- What maintenance do self-watering pots require? - Garden and Plants
Recommended
- Water Saving Gardening Ideas Using Self Watering Garden System & Conta – FarmDaddy®
- Best Self-Watering Planters: Top Picks for Low-Maintenance Gardeners – FarmDaddy®
- Self-Watering Planter System: Your Easy-Care Garden Guide – FarmDaddy®
- Self-Watering Vegetable Garden: Easy Growing at Home – FarmDaddy®

