
BLOG
How Self-Watering Planters Work: A Clear Guide

A self-watering planter stores water in a bottom reservoir and delivers it to plant roots on demand through capillary action, also called wicking. You never have to guess when to water. The system reads your plant’s thirst and responds automatically.
Here’s the core of how it works:
- Bottom reservoir: A sealed chamber at the base holds a supply of water, separated from the growing medium above by a perforated platform or divider.
- Wicking / capillary action: Water travels upward from the reservoir through fabric strips, a rope wick, or a soil column as the growing medium dries out, guided by the same physics that pulls water up a paper towel.
- Overflow and air gap: An overflow hole prevents the reservoir from overfilling, and a small air gap between the water surface and the growing medium keeps roots from sitting in standing water.
According to University of Maryland Extension, roots naturally grow downward toward the moisture zone, making the system self-regulating once it’s primed. Refill frequency typically ranges from 3 to 14 days depending on plant size, reservoir volume, and climate. Farmdaddy’s patented self-watering planters are built around exactly these principles, with connected containers that operate independently so each plant gets the moisture it needs.
Key Takeaways
Self-watering planters work by storing water in a bottom reservoir and delivering it to roots through capillary action, giving plants consistent moisture without daily watering.
| Point | Details |
|---|---|
| Reservoir and wicking mechanism | A bottom reservoir delivers water upward through a wick or soil column via capillary action as soil dries. |
| Refill frequency | Most planters need a refill every 3–14 days depending on plant size, reservoir volume, and climate. |
| Setup essentials | Pre-moisten your potting mix, prime the wick with two top-waterings, and never add gravel to the reservoir. |
| Best plant matches | Herbs, leafy greens, tomatoes, and tropical houseplants thrive; succulents and cacti do not. |
| Farmdaddy’s approach | Farmdaddy’s patented design lets each connected container manage water independently for precise, low-maintenance growing. |
Table of Contents
- How do self-watering planters work, exactly?
- What types of self-watering systems are there?
- Setting up and maintaining your self-watering planter
- Are self-watering planters worth it? Pros and cons
- Common myths about self-watering planters, answered
- How to troubleshoot common self-watering planter problems
- Which plants thrive in self-watering planters?
- How Farmdaddy’s patented design puts this into practice
- What to look for when buying or building a self-watering planter
- When self-watering planters are genuinely worth it
- Farmdaddy makes the reservoir system work for real gardens
- Sources
How do self-watering planters work, exactly?
The two-chamber design is the heart of every self-watering system. The growing medium sits in the upper chamber, and the water reservoir occupies the lower chamber. A perforated platform or divider separates the two, allowing moisture to travel upward while keeping roots from drowning in standing water.
Capillary action: the physics behind the wicking
Capillary action is the force that moves water upward against gravity through narrow spaces. In a self-watering planter, this happens through fabric strips, cotton rope wicks, or a column of moist potting mix that bridges the platform. As the soil in the upper chamber dries, the moisture gradient pulls more water upward from the reservoir to replace it. The plant takes only what it needs, when it needs it.
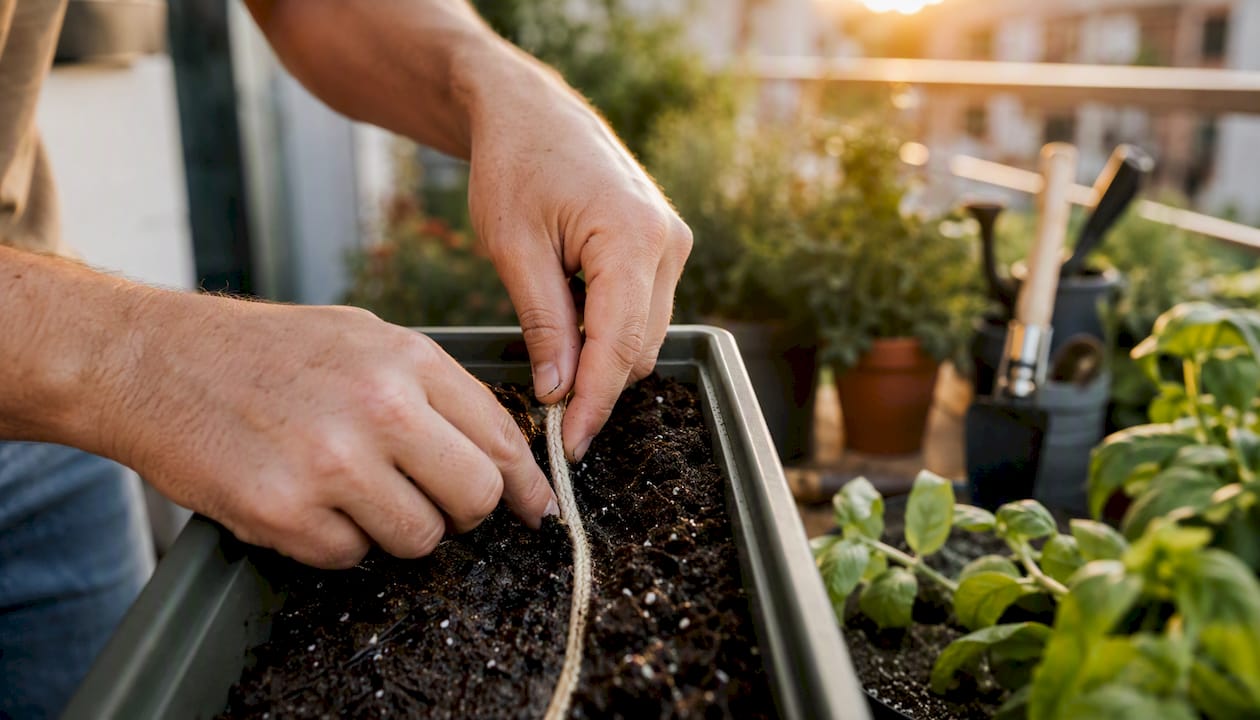
Different wick materials behave differently. Cotton rope works well in small pots and is easy to find, but it can degrade over time. Polyester felt or fabric strips last longer and resist mold. A soil column, where the potting mix itself extends through a hole in the platform directly into the reservoir, delivers the highest water volume and suits larger containers best. Smart Garden Guru’s research-backed guide recommends a reservoir depth of about 6 inches and a reservoir volume roughly 25–33% of the soil volume above it for reliable performance.
How roots interact with the system
Roots follow moisture. In a self-watering planter, they grow downward toward the wicking zone and the moist lower layer of the growing medium. The perforated platform keeps them from reaching the standing water in the reservoir itself, which protects against root rot. Over time, a dense root zone develops near the platform, right where moisture is most available.
The overflow hole and air gap
Every well-designed self-watering planter includes an overflow hole drilled at the level of the platform. When the reservoir is full, any excess water drains out rather than flooding the root zone. The air gap between the water surface and the bottom of the growing medium also matters: it allows oxygen to reach the roots, which is just as critical as water for healthy plant growth.
Parts of a self-watering planter (for a simple labeled diagram):
- Fill tube (access point to add water to the reservoir)
- Water reservoir (lower chamber)
- Perforated platform or divider
- Wick or soil column (passes through the platform)
- Growing medium (upper chamber)
- Overflow hole (at platform level)
- Air gap (between water surface and growing medium)
Pro Tip: Before planting, pre-moisten your potting mix thoroughly and thread the wick through the platform hole. Give the system its first two waterings from the top to help roots make contact with the wick. After that, switch to filling the reservoir only.
What types of self-watering systems are there?
Not all self-watering planters are built the same way. The delivery mechanism changes depending on the design, and matching the right type to your plants and space makes a real difference.
-
Wick-based systems use a fabric strip or cotton rope threaded through the platform. They work best for small pots and herbs like basil, mint, and parsley. Setup is simple, and they’re a popular choice for balcony containers. The trade-off is that cotton wicks degrade faster than synthetic options, so plan to replace them annually.
-
Soil-column / sub-irrigation designs rely on the potting mix itself to bridge the platform, with a pocket of soil extending directly into the reservoir. These suit larger planters and long-term plantings like tomatoes, peppers, and leafy greens. Because the soil column delivers more water volume than a single rope wick, they’re more reliable for thirsty crops. Polyester felt and soil columns are the most durable options for this style.
-
Tank/reservoir designs with fill tubes and float indicators are common in commercial planters. A fill tube lets you add water without disturbing the plant, and a float or water-level indicator shows you at a glance when the reservoir needs a refill. These are ideal for indoor tropicals like peace lilies and philodendrons, where consistent moisture matters and you want a clear visual cue.
-
Connected or modular systems link multiple containers through a shared water supply or connector hoses, while still allowing each container to manage its own moisture level independently. This design suits gardeners who want to grow a variety of plants side by side without one container stealing water from another. It’s especially practical for raised-bed setups on patios or in small yards.
Setting up and maintaining your self-watering planter
Getting the setup right from the start saves you a lot of troubleshooting later. Here’s how to do it well.
Step-by-step setup
- Place the perforated platform inside the container at the correct height, leaving room for the reservoir below.
- Thread your wick through the platform hole, leaving several inches hanging into the reservoir.
- Mix your potting medium with water until it’s evenly moist throughout, not soggy.
- Fill the upper chamber with the pre-moistened mix, pressing gently around the wick to ensure good contact.
- Plant at the appropriate depth for your crop.
- Top-water thoroughly for the first two waterings to help roots find the wick and establish contact with the moisture zone.
- After those initial waterings, switch to filling the reservoir via the fill tube only.
Maintenance checklist
- Check the reservoir every 3–7 days until you know your plant’s rhythm, then adjust based on season and plant size.
- Flush salts every 4–6 weeks by top-watering heavily until water runs freely from the overflow hole. This washes mineral buildup out of the soil before it concentrates enough to damage roots.
- Inspect wicks at the start of each growing season. Replace cotton wicks annually; polyester wicks may last two seasons or more.
- Clean overflow ports with a small brush or pipe cleaner to prevent blockages.
- Winter care: For outdoor planters in freezing climates, drain the reservoir completely before the first frost. Standing water in a sealed reservoir can crack plastic or ceramic containers when it freezes.
Typical refill intervals
| Planter size | Reservoir volume | Typical refill interval |
|---|---|---|
| Small (herbs, 6 in pot) | 1–2 quarts | Every 3–5 days (summer) |
| Medium (12 in pot) | 1–2 gallons | Every 3–7 days |
| Large (vegetable bed) | 3–5 gallons | Every 7–14 days |
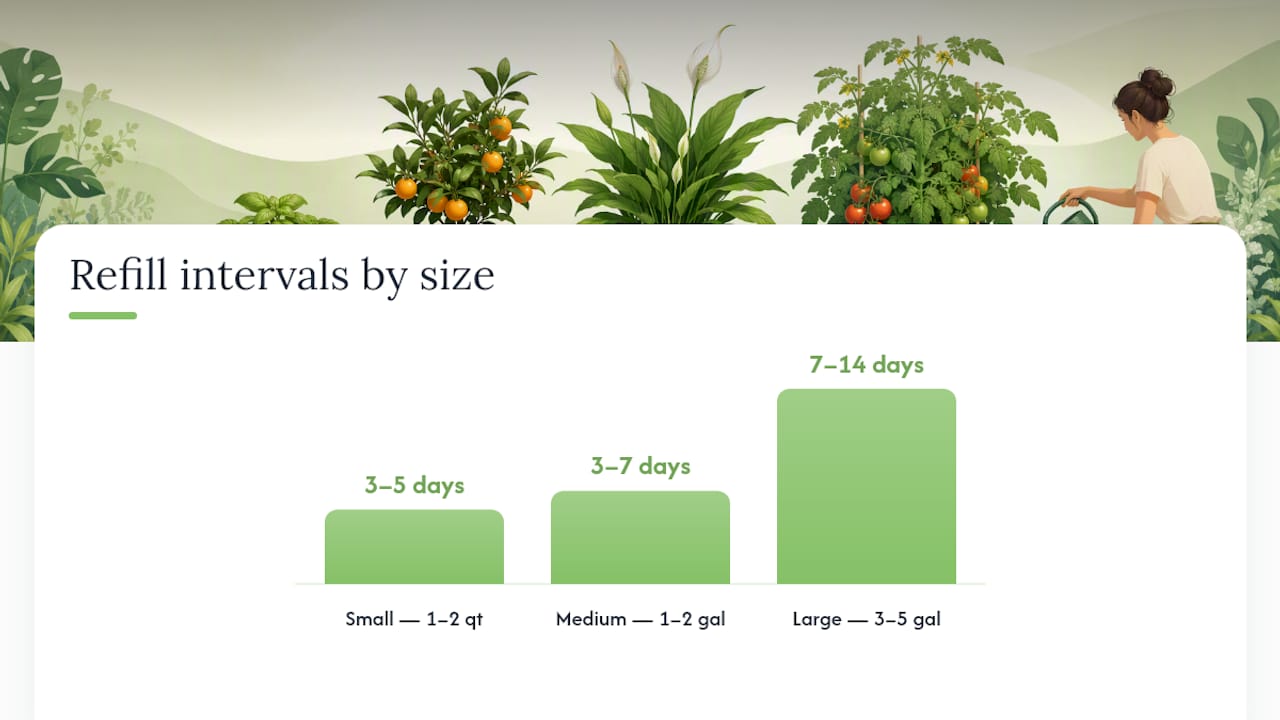
Refill frequency shifts with the seasons. Outdoor planters in full sun during summer may need a refill every 3–4 days, while the same planter indoors in winter might go two weeks between fills. The 3–14 day range is a realistic baseline, but your own observation will sharpen the schedule quickly.
Do and don’t quick list:
- Do use a lightweight, well-aerated potting mix designed for containers.
- Do top-water for the first two waterings to prime the wick.
- Do flush salts regularly, especially if you use liquid fertilizers.
- Don’t add gravel or rocks to the bottom of the container. Per University of Maryland Extension, gravel reduces effective reservoir volume and creates a perched water table that encourages root rot rather than preventing it.
- Don’t let the reservoir run completely dry for extended periods, as this can break the capillary connection.
Are self-watering planters worth it? Pros and cons
For most home gardeners, the answer is yes, with a few important exceptions.
Benefits:
- Consistent moisture. Plants receive water steadily rather than in feast-or-famine cycles. This matters most for crops like tomatoes and lettuce, which crack or bolt when moisture fluctuates.
- Less frequent watering. You fill a reservoir instead of watering daily. For travelers or busy households, this alone justifies the switch.
- Reduced surface evaporation. Because the top layer of soil stays drier, self-watering planters reduce evaporation compared to top-watered containers, which also means fewer fungus gnats and less algae growth at the soil surface.
- Water savings. Water goes directly to the root zone rather than running off the surface or evaporating before roots can use it.
Drawbacks:
- Not suited to drought-adapted plants. Succulents, cacti, lavender, and rosemary need a dry period between waterings. A constantly moist reservoir keeps the soil too wet for these species and leads to root rot.
- Salt buildup. Fertilizer salts accumulate in the soil over time because there’s no regular top-watering to flush them out. Without periodic flushing, this can stunt growth or burn roots.
- Wick degradation. Cotton wicks break down over months of use. A degraded wick stops transferring water, and the plant dries out even though the reservoir is full.
- Algae in the reservoir. Light reaching a transparent reservoir encourages algae growth. Opaque containers or covers solve this easily.
The sweet spot for self-watering planters is moisture-loving plants in containers where consistent hydration is hard to maintain manually, like a sunny balcony in July or a windowsill herb garden in a busy household.
Common myths about self-watering planters, answered
Do self-watering planters really work? Yes. The capillary action mechanism is well-established physics, and the design is backed by university extension research. Plants in self-watering containers consistently receive moisture at the root zone without the peaks and valleys of manual watering.
Should you put rocks in the bottom of a self-watering planter? No. This is one of the most persistent myths in container gardening. University of Maryland Extension is clear: adding gravel reduces the effective reservoir volume and creates a perched water table that raises the saturation zone into the root area, increasing the risk of root rot. Skip the rocks entirely.
How long do self-watering planters last? The container itself, if made from quality plastic, ceramic, or wood, can last many years with proper care. Wicks are the consumable part. Cotton wicks typically need replacing every 12 months. Polyester felt wicks can last two growing seasons or longer. Reservoirs should be cleaned and inspected each season. With basic upkeep, a well-made self-watering planter is a multi-year investment.
How to troubleshoot common self-watering planter problems
Most issues with self-watering planters come down to a few predictable causes. Here’s how to diagnose and fix them.
| Symptom | Likely cause | Fix |
|---|---|---|
| Wet topsoil, yellowing leaves | Overwatering or blocked overflow | Check overflow hole; let reservoir empty before refilling |
| Dry soil despite full reservoir | Broken capillary connection or degraded wick | Top-water to re-prime; inspect and replace wick if needed |
| Algae film on reservoir | Light exposure to water | Use an opaque container or cover the reservoir |
| White crust on soil surface | Salt/mineral buildup | Flush with heavy top-watering until water runs from overflow |
| Slow water movement | Compacted soil or poor wick contact | Loosen soil around wick; re-seat wick through platform |
Step-by-step fixes for the most common problems
-
Re-priming a broken wick. If the reservoir ran dry and the soil dried out completely, capillary action breaks and the system stops wicking. Top-water the soil thoroughly from above until it’s evenly moist. Refill the reservoir. The moisture bridge re-establishes within 24–48 hours in most cases.
-
Flushing salt buildup. Water heavily from the top, enough to saturate the soil and run freely from the overflow hole. Repeat twice in one session. Do this every 4–6 weeks if you use liquid fertilizers, or at the start of each new growing season.
-
Replacing a degraded wick. Remove the plant and growing medium carefully. Pull the old wick out through the platform hole. Cut a new length of polyester felt or cotton rope, thread it through, and leave 3–4 inches hanging into the reservoir. Re-pack the growing medium and top-water to re-prime before switching back to reservoir fills.
-
Preventing root rot. If you see yellowing leaves and the topsoil feels soggy, drain the reservoir completely and let the system dry for several days before refilling to a lower level. Check that the overflow hole is clear.
Which plants thrive in self-watering planters?
The system works best for plants that prefer consistently moist soil. It’s less suited to species that need to dry out between waterings.
Plants that do well:
- Herbs: basil, mint, parsley, chives, cilantro
- Leafy greens: lettuce, spinach, kale, Swiss chard
- Fruiting vegetables: tomatoes, peppers, cucumbers (with a large reservoir)
- Tropical houseplants: peace lily, philodendron, pothos, ferns
- Flowers: impatiens, begonias, fuchsia
Plants to avoid or use with caution:
- Succulents and cacti (need dry periods between waterings)
- Lavender and rosemary (Mediterranean plants that prefer dry soil)
- Orchids (require very specific moisture cycles)
- Bulbs that need a dormant dry period
A few plant-specific tips:
- Tomatoes benefit from a large reservoir (3 gallons or more) and a soil-column wick for high-volume delivery. Check the self-watering vegetable garden guide for crop-specific sizing advice.
- Herbs do well in small wick-based systems, but mint and basil are thirstier than rosemary or thyme. Group thirsty herbs together and drought-tolerant ones separately.
- Indoor tropicals like peace lilies are nearly ideal candidates. They prefer consistent moisture and show clear stress signals (drooping) when the reservoir runs low, making it easy to know when to refill.
How Farmdaddy’s patented design puts this into practice
Farmdaddy’s self-watering planter system applies the reservoir-and-wick principles described throughout this guide, with one key design distinction: connected containers operate independently. Each planter in a linked setup manages its own water uptake, so a thirsty tomato plant doesn’t drain moisture away from a neighboring herb container. That independence is what makes the system practical for growing a variety of plants side by side.
Practical advantages Farmdaddy gardeners report:
- Precise watering per container. Each planter draws only what its plant needs, regardless of what’s growing next door.
- Reduced maintenance for travelers. The reservoir design extends the time between refills, making it realistic to leave plants unattended for several days.
- Better results for beginners. The system removes the guesswork from watering frequency, which is the most common reason new gardeners lose plants.
- Versatility. The same system supports tomatoes, herbs, flowers, and leafy greens, with accessories like connector hoses and weed covers available to extend functionality.
Farmdaddy’s best self-watering planters guide covers which planter sizes and configurations suit different crops, which is a useful next read if you’re deciding between a compact herb box and a full vegetable bed setup.
What to look for when buying or building a self-watering planter
Whether you’re buying a kit or building your own from two stacked buckets, the same principles apply.
Buying checklist:
- Reservoir large enough for your plant type (aim for 25–33% of the soil volume above it)
- Fill tube for easy refilling without disturbing the plant
- Visible water-level indicator so you know when to refill
- Removable platform for cleaning and wick replacement
- Durable wick material (polyester felt outlasts cotton for most applications)
- Opaque reservoir walls to limit algae growth
DIY checklist:
- Two containers that nest or stack, with the inner one sitting above the outer one
- A wick of cotton rope or polyester felt, long enough to reach from the reservoir to mid-soil
- An overflow hole drilled at platform level (not at the base)
- Reservoir depth of approximately 6 inches for best water-use efficiency
- Lightweight, well-aerated potting mix (not garden soil, which compacts and blocks wicking)
Buy vs. build: A commercial kit gives you a tested design, reliable materials, and often a water indicator, which is worth the cost if you’re new to the system or growing food crops where consistency matters. DIY builds using two 5-gallon buckets mirror the same two-chamber principles and cost very little, making them a practical option for gardeners who want to experiment with larger or custom-sized containers before committing to a kit.
When self-watering planters are genuinely worth it
Self-watering planters earn their place in a garden when the plant’s water needs and the gardener’s lifestyle are both part of the equation. For moisture-loving crops like tomatoes, basil, and leafy greens, the steady supply from a reservoir produces noticeably better results than the irregular cycles most of us manage with a watering can. The difference shows up in yield, flavor, and plant health.
Where I’d push back on the hype is with drought-adapted plants. Putting a succulent or a lavender in a self-watering planter and expecting it to thrive is setting yourself up for disappointment. The system is designed to keep moisture available, and some plants genuinely need the opposite.
The other thing worth saying plainly: self-watering planters are not zero-maintenance. They reduce the frequency of watering, but they ask for different attention: checking reservoir levels, flushing salts, and replacing wicks on a schedule. Gardeners who understand that trade-off get a lot of value from the system. Those who expect to fill the reservoir once and forget about it for a month will eventually run into problems.
Start with one planter, one moisture-loving plant, and observe how the system behaves in your specific conditions before scaling up. That first season of watching the reservoir level drop, noticing how your plant responds, and adjusting your refill schedule is what turns the theory in this guide into real gardening confidence.
Farmdaddy makes the reservoir system work for real gardens
Growing food at home should feel rewarding, not stressful. Farmdaddy’s self-watering garden boxes are built for gardeners who want consistent results without daily watering routines. The patented design gives each connected container independent water control, so you can grow tomatoes next to herbs without one plant outcompeting the other for moisture.
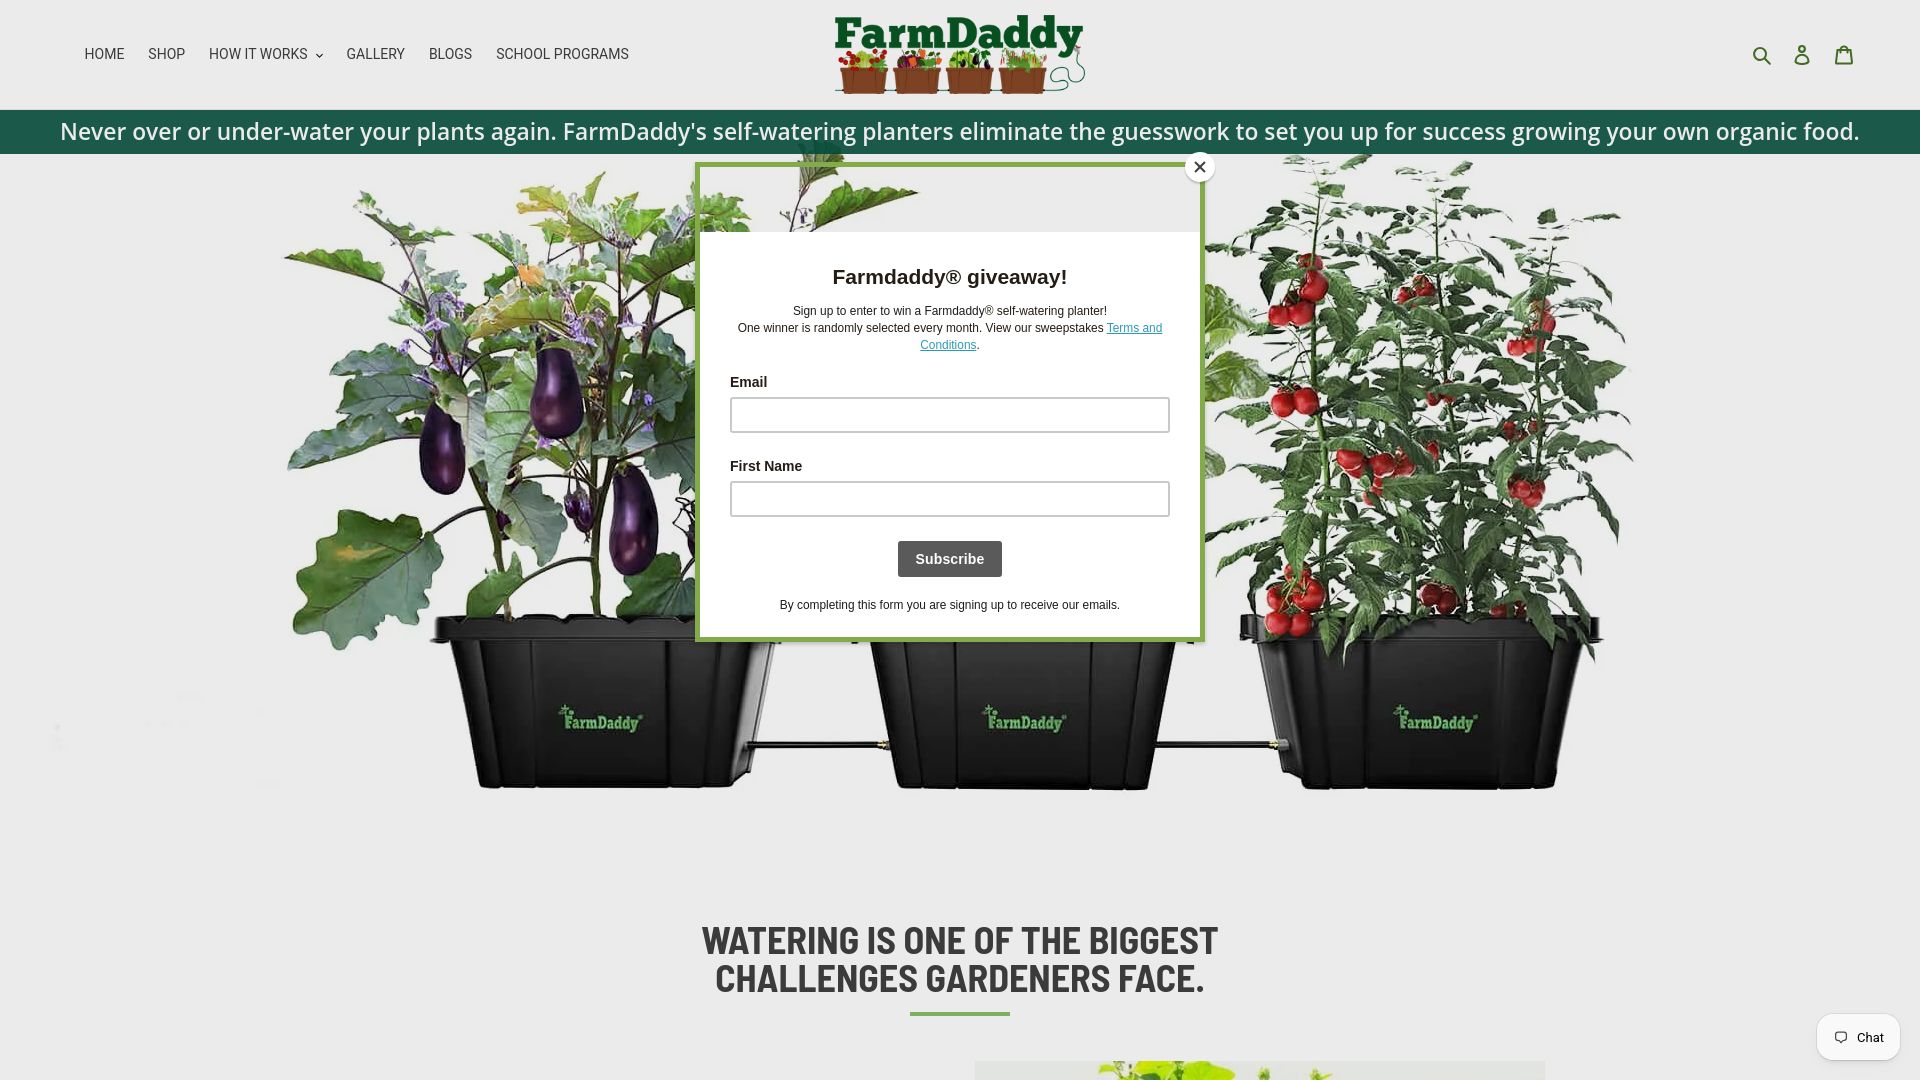
The fill system is straightforward: add water to the reservoir via the fill tube, and the planter handles the rest. Accessories like connector hoses and weed covers extend the system for larger setups, and the removable platform makes seasonal cleaning simple. Whether you’re growing a compact herb box on a balcony or a full self-watering tomato planter kit in the backyard, the system is designed to fit your space and your schedule. Browse the full range of Farmdaddy self-watering garden beds and find the setup that fits your garden.
Sources
- Self-Watering Containers | University of Maryland Extension
- Self Watering Planters: The Complete Guide - Smart Garden Guru
- Self-Watering Pots Guide for Plants | KnowYourPlant Blog
- How Self-Watering Pots Actually Work (And When They Are Worth It) - LeafyStart

