
BLOG
Grow More Food in a Small Space Vegetable Garden

Yes, you can grow a productive small space vegetable garden, even on a 4×4 balcony or a narrow patio strip. The key is choosing the right crops, containers, and a watering plan you can actually stick to. NC State Extension confirms that leafy greens thrive with just 3–4 hours of direct sun, and fruiting crops like tomatoes and peppers need 5 or more hours. That single fact shapes every decision you make about placement.
Here is your quick-start checklist before you read any further:
- Sun: Count actual hours of direct light at your spot (morning vs. afternoon matters)
- Containers: Choose pots with drainage holes and enough depth for your crops (6–12 inches minimum)
- Soil: Use a sterile commercial potting mix, not garden soil, in every container
- Drainage: Confirm every container drains freely; root rot is the fastest way to lose a crop
- Watering plan: Decide now whether you will water daily or set up a self-watering or drip system
- 6–8 week actions: Map your space, buy containers and soil in week 1; sow fast crops and set transplants in week 2–3; begin succession planting by week 4–6
“Consistent moisture management is the single biggest barrier for new urban gardeners. Self-watering systems automate water delivery and prevent the drought-to-flood cycle that kills container crops.” — Chicago Botanic Garden
Key Takeaways
A productive small space vegetable garden is achievable with the right container depth, consistent moisture, and a succession-planting schedule that keeps every square foot working all season.
| Point | Details |
|---|---|
| Sun is the first filter | Leafy greens need 3–4 hours; fruiting crops need 5 or more hours of direct sun daily. |
| Container depth drives success | Match pot depth to crop: 6 inches for greens, 12+ inches for tomatoes and cucumbers. |
| Drainage is non-negotiable | Every container must have drainage holes; root rot is the fastest way to lose a crop. |
| Succession planting multiplies yield | Replant each square immediately after harvest to get 3–4 crops per square foot per season. |
| Farmdaddy simplifies moisture | Farmdaddy’s self-watering containers maintain consistent root-zone moisture with reservoir checks every few days, not daily watering. |
Table of Contents
- What layout works best for a small space vegetable garden?
- Which vegetables give you the most from a compact garden?
- Planting and spacing quick reference for common crops
- How do you choose containers and potting mix for vegetables?
- How often should you water containers, and what systems help?
- How do you get more harvests from the same small bed?
- How to build and use trellises for vertical growing
- Feeding, pests, and harvesting in a small-space garden
- Your 6–8 week starter plan for a first small-space garden
- Why automated watering matters for container gardeners
- Storing and preserving your small-scale harvest
- Farmdaddy makes consistent moisture simple for small-space growers
- What small-space gardening has taught me
- Sources
What layout works best for a small space vegetable garden?
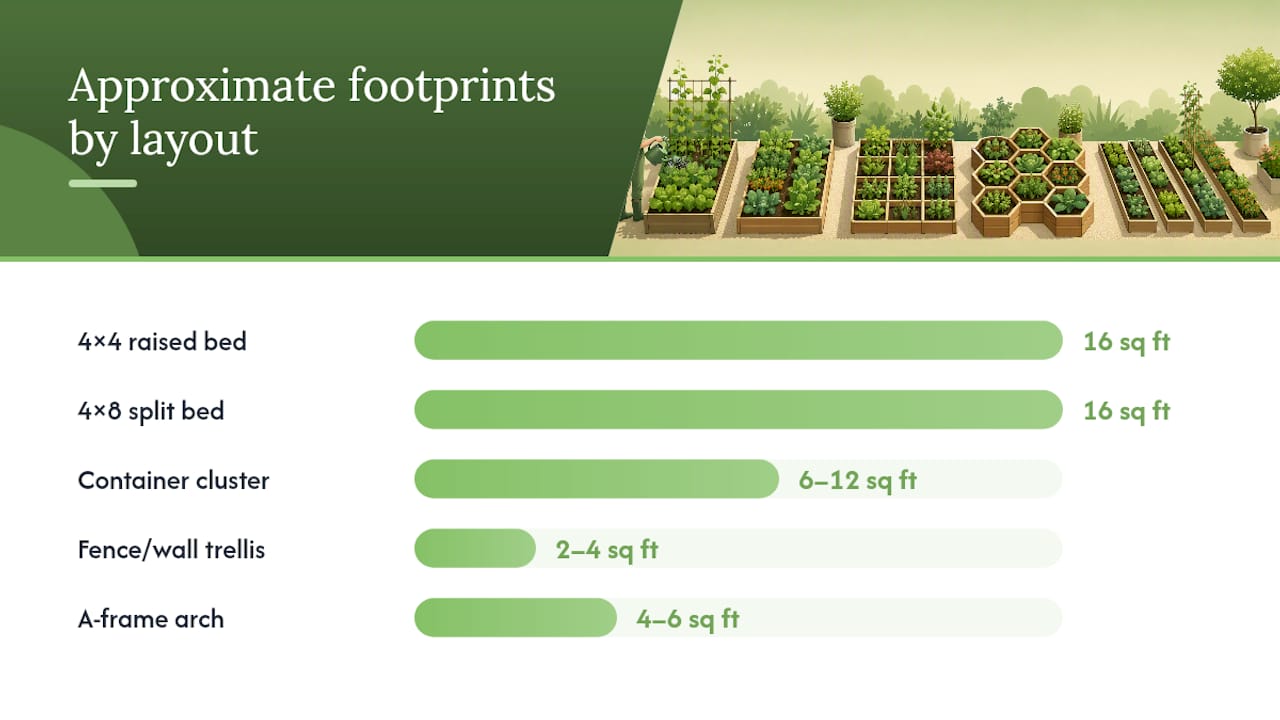
The layout you choose depends on your footprint, but a few templates work reliably across most small-space scenarios. Pick the one closest to your situation and adapt from there.
Five proven layouts:
- 4×4 raised bed with a square-foot grid: Divide the bed into 16 one-foot squares. Each square gets a different crop at the correct spacing. This is the most beginner-friendly format and the one UF/IFAS Extension recommends for intensive planting density and predictable yields.
- 4×8 split bed: One half for slow-maturing crops (tomatoes, peppers), one half for fast-turnover greens and radishes. Lets you succession-plant the fast half all season.
- Container cluster on a patio or balcony: Group 3–5 containers of varying sizes around a central trellis or stake. Tall pots anchor the back; shallow window boxes sit at the front edge.
- Vertical wall or fence trellis: Mount a cattle-panel or string trellis against a south-facing fence. Cucumbers, pole beans, and small melons climb up while low containers sit at the base.
- A-frame or arch: A freestanding arch over a path lets you grow vining crops overhead and walk underneath to harvest. Works well in a narrow side yard.
Mapping your space takes about five minutes. Stand at your spot at 9 AM, noon, and 3 PM on a clear day and note where the sun falls. Mark any shaded zones on a simple sketch. UTIA Tennessee Extension points out that sun angles shift across seasons, so a spot that is full sun in July can be partly shaded in April and October. Factor that in before you commit to a layout.
Placement rules that save you headaches:
- Put tall plants and trellises on the north side of the bed so they shade nothing
- Use “stadium seating” with containers: tallest pots at the back, shortest at the front
- Leave at least 18 inches of access path so you can reach every plant without stepping on soil
- Reflective surfaces (white walls, light-colored pavers) add usable warmth in marginal spots
Pro Tip: Vertical trellising moves a crop from 6 square feet of floor space to 1 square foot of footprint. If you only make one upgrade to your layout, add a vertical element.
| Layout | Best for | Approx. footprint | Vertical option |
|---|---|---|---|
| 4×4 raised bed | Beginners, backyards | 16 sq ft | Add trellis on north edge |
| 4×8 split bed | Mixed crops, succession | 16 sq ft | Trellis on one short end |
| Container cluster | Balconies, patios | 6–12 sq ft | Central stake or A-frame |
| Fence/wall trellis | Narrow strips | 2–4 sq ft floor | Full vertical wall |
| A-frame arch | Side yards, paths | 4–6 sq ft | Overhead growing space |
Which vegetables give you the most from a compact garden?
High-yield, space-efficient crops are the foundation of any productive container or small-bed setup. The Old Farmer’s Almanac is direct about this: some crops simply do not belong in small spaces, and choosing the wrong ones wastes your entire season.
Top picks for small spaces:
- Cherry tomatoes (varieties like ‘Tumbling Tom’, ‘Patio’, ‘Sun Gold’): highest calorie-per-square-foot return of any warm-season crop
- Bush or dwarf tomatoes: stay under 3 feet, no staking required, ideal for 5-gallon containers
- Pole beans: climb a trellis and produce for weeks; far more efficient than bush beans per square foot
- Trellised cucumbers (‘Bush Pickle’, ‘Spacemaster’): train vertically and they take almost no floor space
- Cut-and-come-again salad greens (loose-leaf lettuce, arugula, spinach): harvest outer leaves and the plant keeps producing for 6–8 weeks
- Radishes: ready in 25–30 days; use them to fill gaps between slower crops
- Bush beans: compact, no support needed, heavy producer in a 12-inch-deep container
- Peppers (‘Lunchbox’, ‘Shishito’): thrive in 3-gallon pots and produce all summer
- Herbs (basil, parsley, chives, cilantro): extremely high value per square inch; grow in window boxes
Crops to skip or limit:
Sweet corn needs at least a 10×10 block for pollination. Large pumpkins and winter squash sprawl 6–10 feet in every direction. Asparagus takes 2–3 years to produce and occupies a bed permanently. Watermelon needs 6 feet of spread per plant. None of these make sense unless you have extra room to spare.
Look for the words “bush,” “patio,” “dwarf,” or “compact” on seed packets and plant tags. Those labels signal a variety bred for smaller spaces and containers.
Pro Tip: Interplant fast crops with slow ones. Tuck radishes or lettuce between tomato transplants. By the time the tomatoes need the space, the quick crops are already harvested. For more container combination ideas, pairing compatible plants boosts your total yield without adding a single extra pot.
Planting and spacing quick reference for common crops
Use this table while planning your layout or shopping for containers. Light requirements follow NC State Extension and University of Maryland Extension guidance.
| Crop | Season | Light (hrs/day) | Container depth | Spacing (inches) | Best placement |
|---|---|---|---|---|---|
| Lettuce | Cool | 3–4 | 6 in | 6–8 | Container, window box |
| Kale | Cool | 4–6 | 8 in | 12 | Raised bed, large pot |
| Radish | Cool | 3–4 | 6 in | 2–3 | Container, raised bed |
| Carrot | Cool | 4–6 | 12 in | 3–4 | Deep container, raised bed |
| Beets | Cool | 4–6 | 8 in | 4–6 | Raised bed, deep container |
| Bush beans | Warm | 6+ | 8 in | 6 | Container, raised bed |
| Pole beans | Warm | 6+ | 12 in | 6 | Trellis, fence |
| Cucumber | Warm | 6+ | 12 in | 12 | Trellis, raised bed |
| Cherry tomato | Warm | 6–8 | 12–18 in | 18 | Large container, raised bed |
| Pepper | Warm | 6–8 | 10–12 in | 12–18 | Container, raised bed |
| Eggplant | Warm | 6–8 | 12 in | 18 | Large container, raised bed |
| Herbs (basil, parsley) | Warm/cool | 4–6 | 6 in | 6–8 | Window box, small pot |
A few notes on reading this table:
- “Container depth” refers to the minimum interior depth of the pot, not the overall pot height
- Spacing figures are center-to-center distances between plants
- Cool-season crops can be started 4–6 weeks before your last frost date; warm-season crops go in after frost risk passes
- Check your local county extension office for zone-specific planting dates, since these vary significantly across the US
How do you choose containers and potting mix for vegetables?
Container choice is where many small-space gardens succeed or fail before a single seed goes in the ground.
Size by crop type:
- Small herbs and lettuce: 1–2 gallon pots, 6-inch depth minimum
- Peppers, bush beans, beets: 3–5 gallon pots, 8–10-inch depth
- Tomatoes, cucumbers, eggplant: 5–10 gallon pots, 12-inch depth minimum
- Pole beans and vining crops: 10–15 gallon containers or raised beds with trellis support
Form factors worth knowing:
Grow bags (fabric pots) air-prune roots and prevent circling, which improves root health. Window boxes work well for herbs and lettuce but are too shallow for most fruiting crops. Hanging baskets suit trailing cherry tomatoes and strawberries. Self-watering containers with built-in reservoirs are the most efficient option for busy gardeners.
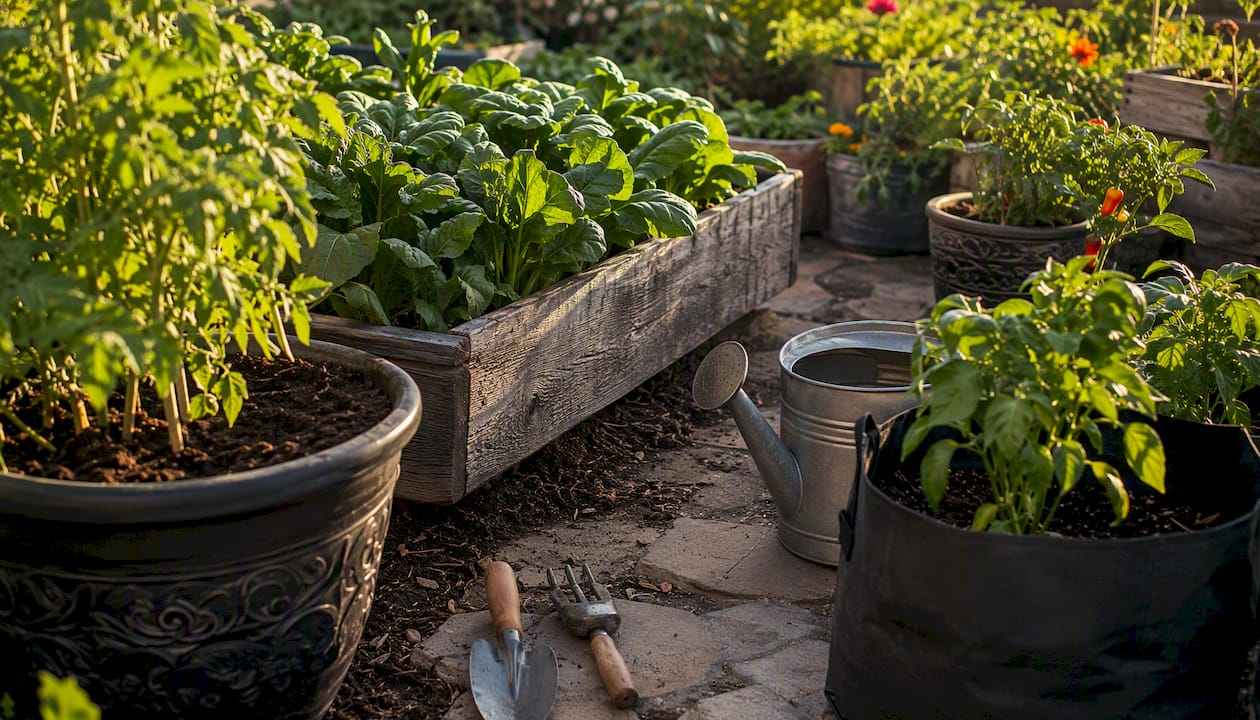
Drainage holes are non-negotiable. The Old Farmer’s Almanac is clear: containers without drainage cause root rot, and no amount of good soil or careful watering fixes that. If you love a decorative pot that lacks holes, drill at least three half-inch holes in the base before planting.
Potting mix matters more than most beginners expect. NC State Extension recommends commercially prepared potting mixes that are free of pests and disease. Never use straight garden soil in a container; it compacts, drains poorly, and often carries pathogens. A good commercial mix targets a pH of 6.0–6.5, which suits most vegetables. You can check pH with an inexpensive kit available through most county extension offices. For more guidance on choosing the right potting soil, the mix you start with sets the ceiling for everything that follows.
Pro Tip: Dark plastic pots absorb heat and can raise root-zone temperatures above 90°F on a sunny patio, which stresses roots and dries soil fast. Light-colored or porous pots help keep roots cooler and reduce watering needs in warm weather.
How often should you water containers, and what systems help?
Container soil dries out far faster than in-ground beds, and the smaller the pot, the faster it happens. A 1-gallon pot in full summer sun may need water twice a day. A 5-gallon pot in partial shade typically needs water every 1–2 days. The rule of thumb: push your finger 1 inch into the soil; if it feels dry, water thoroughly until it drains from the bottom.
Manual watering best practices:
- Water in the morning so foliage dries before evening, reducing fungal risk
- Soak until water runs freely from drainage holes, then stop; shallow watering encourages shallow roots
- Lift the pot after watering to feel its weight; a light pot means it is drying out faster than expected
- Group containers together to create a microclimate that slows evaporation
Automated options:
Drip irrigation systems are affordable and can efficiently water multiple containers. Wicking systems use a reservoir and a fabric wick to draw water up into the root zone passively; they work well for herbs and greens but may not keep up with thirsty tomatoes in peak summer. Self-watering containers help maintain consistent moisture with less frequent watering.
The Chicago Botanic Garden emphasizes that automating water delivery is the most effective way to close the behavioral gap for busy urban gardeners, preventing the drought-to-flood cycle that causes stress-induced wilting and crop loss. For a deeper look at water-saving strategies with self-watering systems, the difference in plant health is visible within a week.
Pro Tip: Check your self-watering reservoir every 3–4 days in summer heat. A full reservoir in a 5-gallon self-watering container typically lasts 5–7 days for most vegetables. Pair it with a high-quality potting mix that retains moisture without waterlogging, and you cut active watering time to a few minutes a week.
How do you get more harvests from the same small bed?
Spacing, timing, and plant combinations are the three levers that multiply output from a fixed footprint.
Square-foot and intensive spacing principles:
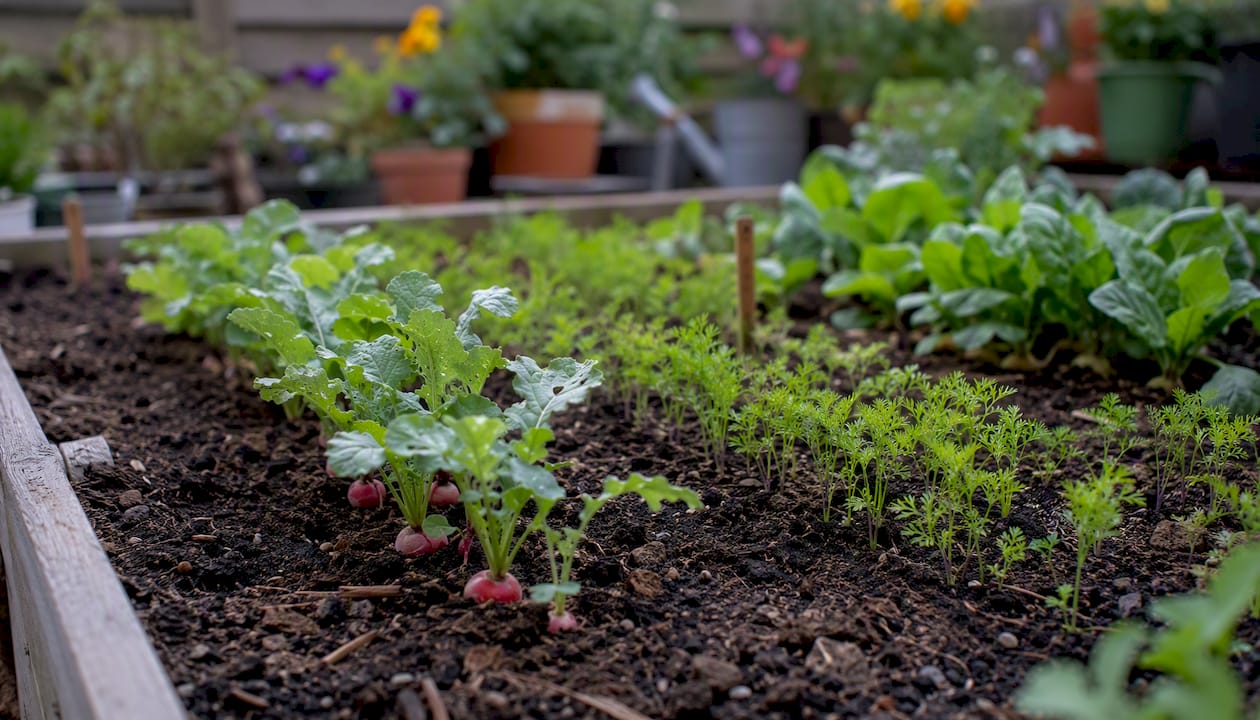
UF/IFAS Extension’s square-foot gardening guidance divides a 4×4 bed into 16 one-foot squares and assigns each square a crop at its recommended density: 1 tomato, 4 lettuces, 9 spinach plants, or 16 radishes per square foot. This approach eliminates wasted space between rows and makes succession planting easy to track.
Succession planting in practice:
LSU AgCenter identifies succession planting as the key to matching yields from larger plots in a limited footprint. The idea is simple: the moment you harvest a crop, replant that square immediately.
Here is a sample timeline for one 1-square-foot patch through a warm season:
- Early spring: Sow radishes (ready in 25 days)
- After radish harvest: Plant lettuce transplants (harvest in 30–40 days)
- After lettuce bolts: Sow a second round of radishes or arugula
- Late summer: Plant a fast spinach or kale for fall harvest
That single square foot produces 3–4 distinct crops in one season.
Intercropping pairs that work:
- Lettuce beneath tomatoes: tomatoes provide afternoon shade that keeps lettuce from bolting in summer
- Radishes with carrots: radishes germinate fast and mark the row; harvest them before carrots need the space
- Basil alongside peppers: basil deters aphids and thrips and uses the same warm, sunny conditions
- Pole beans on a trellis with low herbs at the base: the beans fix nitrogen; the herbs use the shaded ground
Month-by-month action timeline (warm-season cycle, USDA Zone 6–8):
| Month | Action |
|---|---|
| March | Map sun, buy containers and soil, start tomato/pepper seeds indoors |
| April | Sow cool-season crops (lettuce, radish, kale) directly; install trellis |
| May | Transplant tomatoes and peppers after last frost; begin watering routine |
| June | Succession-plant second round of greens; start feeding schedule |
| July | Monitor water daily; harvest frequently to encourage production |
| August | Sow fall crops (kale, spinach, beets) in vacated squares |
| September | Harvest warm-season crops before first frost; plant garlic for spring |
How to build and use trellises for vertical growing
Vertical growing is the highest-leverage upgrade you can make to a small-space setup. The Planter App’s layout guide notes that trellising moves a crop from 6 square feet of floor space to 1 square foot of footprint. That math changes everything about what you can grow.
Simple builds and materials:
- String trellis: Drive two stakes into the soil or container and run horizontal twine every 6 inches up to 6 feet. Costs under $10 and works for beans, peas, and cucumbers.
- Cattle-panel arch: Bend a 16-foot cattle panel into an arch over a raised bed. Cucumbers, melons, and squash climb over it; you harvest from underneath.
- A-frame: Two wooden panels hinged at the top, spread at the base. Freestanding, portable, and easy to store in winter.
- Wall-mounted lattice: Attach a wood or metal lattice to a fence or exterior wall. Landlord-friendly if you use removable hooks rather than screws.
- Melon and squash slings: Cut strips of old pantyhose or mesh fabric and tie them to the trellis to cradle heavy fruit. Without support, the weight of a cantaloupe will snap the vine.
Mounting safely on balconies:
Use over-the-railing hooks rated for at least 50 lbs. Avoid drilling into concrete or masonry without landlord permission. Freestanding A-frames and weighted container trellises work well where permanent fixtures are not allowed.
Training vining crops:
- Tie the main stem loosely to the trellis every 8–10 inches as it grows; use soft plant ties or strips of fabric, never wire
- Pinch off side shoots below the first flower cluster on indeterminate tomatoes to keep energy focused upward
- For cucumbers, remove any fruit that forms in the bottom 12 inches of the plant to encourage upward growth
- Check ties weekly; stems thicken fast and a tight tie can girdle the plant within two weeks
Pro Tip: Always place your trellis on the north side of the bed or container cluster. A trellis on the south side casts shade over everything behind it. On the north side, the vertical plants catch full sun and the low crops in front stay bright all day.
Feeding, pests, and harvesting in a small-space garden
Container vegetables are heavy feeders because frequent watering flushes nutrients from the potting mix faster than in-ground beds lose them.
Fertilizing schedule:
- Start with a slow-release granular fertilizer mixed into the potting soil at planting (follow label rates)
- Begin liquid feeding 3–4 weeks after transplanting, once roots are established
- Use a balanced liquid fertilizer (such as a 5-5-5 or 10-10-10 formulation) every 7–14 days through the growing season
- Switch to a lower-nitrogen, higher-phosphorus formula once fruiting crops begin to flower; too much nitrogen at that stage pushes leafy growth at the expense of fruit
Common pests and quick organic controls:
- Aphids: Blast off with a strong stream of water; follow up with insecticidal soap spray
- Whiteflies: Yellow sticky traps catch adults; neem oil spray disrupts the life cycle
- Caterpillars and hornworms: Hand-pick in the morning; row covers prevent egg-laying on young plants
- Spider mites: Increase humidity around plants; insecticidal soap works well on heavy infestations
Disease prevention basics:
Good air circulation is your first line of defense. Space plants at their recommended distances and avoid overhead watering in the evening. University of Maryland Extension notes that containers need easy access to water and consistent care; the same attention that keeps moisture steady also keeps you watching for early disease signs. Remove any yellowed or spotted leaves promptly, and never compost diseased plant material.
Pro Tip: Harvest frequently and harvest early. Picking cherry tomatoes, beans, and cucumbers at peak ripeness signals the plant to produce more. A plant left with overripe fruit on the vine slows production. Check every 2–3 days during peak season.
Your 6–8 week starter plan for a first small-space garden
This plan gets you from zero to a producing garden in about six weeks. Follow it in order and adjust timing to your last frost date.
- Week 0–1: Measure your space and count sun hours at three times of day. Sketch a simple layout. Buy containers with drainage holes, a quality potting mix, and any trellis materials you need. Set up your watering system (drip timer or self-watering containers) before you plant anything.
- Week 2–3: Sow fast crops directly: radishes, lettuce, and arugula go straight into containers or the raised bed. Transplant tomatoes and peppers into appropriately sized containers at the right time. Install your trellis and tie the first stems loosely.
- Week 4–6: Sow your first succession crop in any square that has already been harvested. Begin your liquid feeding schedule. Check for pests weekly and address them early. Monitor your water reservoir or drip system and adjust frequency as temperatures rise.
First-month troubleshooting checklist:
- Yellowing lower leaves: likely nitrogen deficiency; begin liquid feeding
- Wilting despite wet soil: check drainage; root rot may have started
- Leggy, pale seedlings: insufficient light; move containers to a sunnier spot or add a grow light
- Blossom drop on tomatoes/peppers: temperature stress or inconsistent watering; stabilize moisture and check nighttime temps
- Slow germination: soil too cold; wait until soil temperature reaches at least 60°F for warm-season crops
| Milestone | Target week |
|---|---|
| Space mapped, containers purchased | Week 1 |
| Fast crops sown, transplants set | Week 2–3 |
| First succession sowing | Week 4–5 |
| First harvest (radishes, lettuce) | Week 4–6 |
| Full feeding schedule running | Week 4 onward |
Why automated watering matters for container gardeners
Inconsistent moisture is the leading cause of failure for new small-space and container gardeners. The pattern is predictable: a few days of overwatering followed by a few days of neglect creates a drought-flood cycle that stresses roots, causes blossom-end rot in tomatoes and peppers, and triggers premature bolting in greens.
“Self-watering systems provide the ‘tending bridge’ for busy professionals — automating water delivery and preventing the stress-induced wilting that ends most beginner container gardens before the first harvest.” — Chicago Botanic Garden
Self-watering containers with sub-irrigation reservoirs address this directly. The plant draws water upward through the root zone as needed, maintaining consistent moisture without daily attention. For a self-watering vegetable garden setup, the practical result is that you check the reservoir every few days rather than watering every day.
Practical metrics to watch:
- Reservoir fill interval: in peak summer, a 5-gallon self-watering container typically needs refilling every 5–7 days
- Soil moisture: the top inch of soil should feel slightly dry before the reservoir needs refilling; if the top inch stays wet, reduce reservoir fill level
- Plant response: consistent leaf color and upright posture are the best indicators that moisture is dialed in
Pro Tip: Pair a self-watering container with a high-quality, well-draining potting mix. A dense or poorly draining mix defeats the sub-irrigation system by preventing the upward wicking action. Look for mixes that list perlite or vermiculite as ingredients.
Storing and preserving your small-scale harvest
A small garden produces in waves, and knowing how to handle a sudden flush of tomatoes or beans keeps nothing from going to waste.
Short-term storage by crop:
- Tomatoes: Store at room temperature, stem side down, away from direct sun. Refrigeration kills flavor and texture. Use within 5–7 days of peak ripeness.
- Leafy greens: Wrap loosely in a damp paper towel, place in a zip-lock bag, and refrigerate. Most greens stay crisp for 5–7 days this way.
- Herbs: Stand fresh-cut herbs in a glass of water on the counter (like flowers) for up to a week, or wrap in a damp paper towel and refrigerate.
- Peppers and cucumbers: Refrigerate unwashed in the crisper drawer. Peppers last 1–2 weeks; cucumbers are best within 5 days.
- Beans: Refrigerate unwashed in a bag; use within 4–5 days for best texture.
Preservation for bigger flushes:
When your cherry tomatoes ripen faster than you can eat them, roast them with olive oil and freeze in portions. Blanch and freeze beans in 2-minute batches; they hold quality for up to 8 months in a freezer bag. Herbs like basil freeze well when blended with olive oil and poured into ice cube trays. Kale and spinach can be blanched and frozen for use in soups and smoothies all winter.
Fermentation is worth learning for small-scale gardeners. A simple brine ferment turns surplus cucumbers into pickles in 3–5 days with no canning equipment. Radishes, beets, and green beans all ferment well and keep for months in the refrigerator.
One practical rule: harvest in the morning when sugar content is highest, and process or refrigerate within a few hours. Heat degrades both flavor and nutrition faster than most gardeners expect.
Farmdaddy makes consistent moisture simple for small-space growers
Growing vegetables in containers is genuinely rewarding, and the single thing that separates a thriving container garden from a frustrating one is consistent moisture. Farmdaddy’s self-watering garden containers solve that problem with a patented sub-irrigation design: each container draws water from its own reservoir independently, so a thirsty tomato never steals moisture from the pepper next to it.
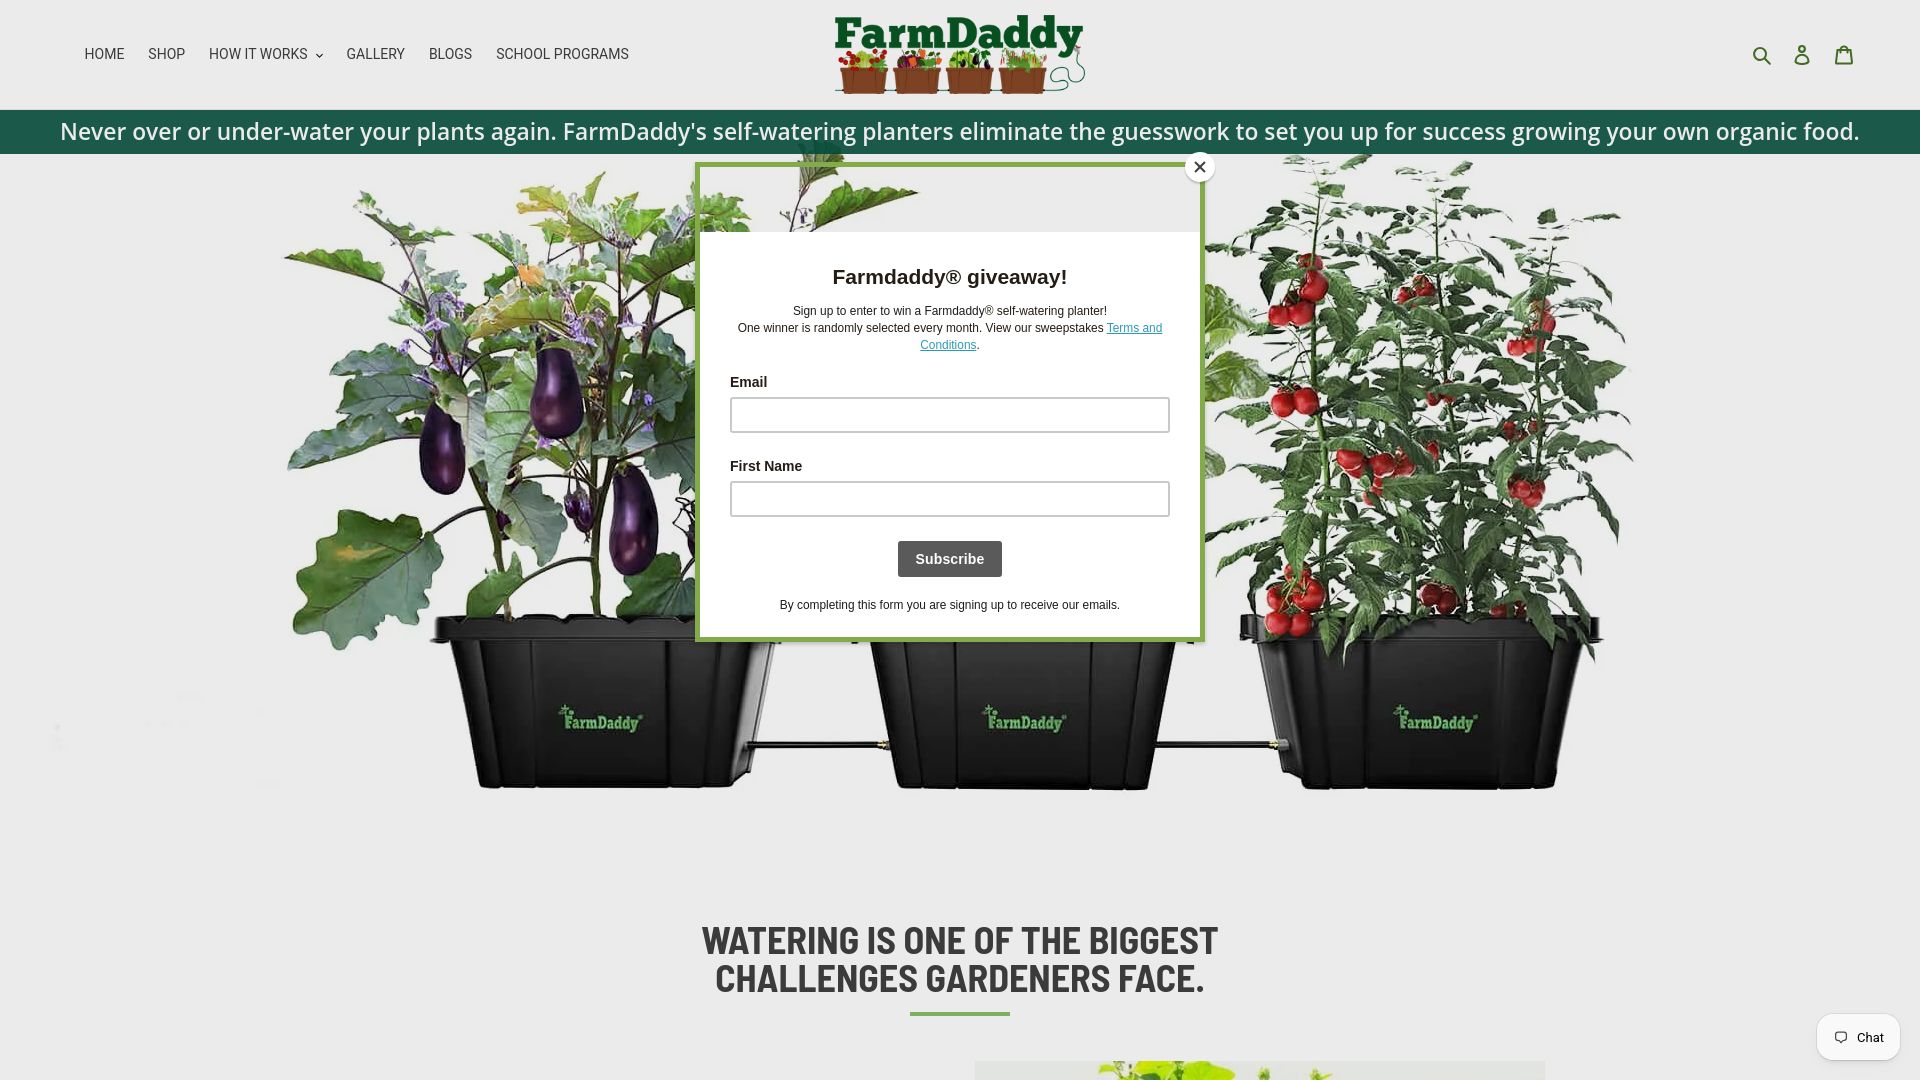
The system fits naturally into the layouts this guide recommends: container clusters on a balcony, 4×4 raised-bed setups, and patio arrangements all work with Farmdaddy’s modular connector hoses. Accessories like weed covers reduce maintenance further, and compatible organic fertilizers mean you can set up a complete, low-effort growing system in one order. Whether you are starting with a single self-watering garden box or a full two-planter kit, the setup takes less than an hour and the reservoir typically needs refilling just once or twice a week. Browse the full range at Farmdaddy to find the right size for your space.
What small-space gardening has taught me
The most common mistake beginners make is trying to grow too many different things at once. A 4×4 bed with six crop types, each at a different growth stage, is genuinely harder to manage than the same bed planted with three crops you actually eat. Start with two or three crops you love, get those right, and add variety in your second season.
The second lesson: watering is the variable that matters most. You can recover from a pest problem or a nutrient deficiency, but a week of drought stress during flowering sets a tomato back by three weeks. Farmdaddy’s self-watering system removes that risk entirely. The reservoir acts as a buffer between your schedule and your plants’ needs, which is exactly what a beginner needs while building the habit of regular garden checks.
Start with one 4×4 bed or a cluster of three containers. Get comfortable with the rhythm of checking moisture, feeding every two weeks, and harvesting frequently. Once that feels easy, add a vertical element and a succession-planting schedule. Small wins compound fast in a small garden.
Sources
These are the primary sources used throughout this guide. Each one is free and goes deeper on specific topics.
- Vegetable Gardening in Small Spaces | NC State Extension Publications
- Growing Vegetables in Containers | University of Maryland Extension
- Starting a small space vegetable garden | Chicago Botanic Garden
- LSU AgCenter — Succession planting guidance
- Square-foot garden basics | UF/IFAS Extension
- Small Vegetable Garden Plans and Layouts | The Old Farmer’s Almanac
- UTIA Tennessee Extension W1288A — Small-space garden planning
Check your local county extension office for zone-specific planting dates. The national guides above give general timing, but your county extension will have the exact last-frost and first-frost dates for your zip code, which makes a real difference in when you start seeds and when you plant out.

