
BLOG
Container Gardening for Beginners: Easy Start Guide

You can start a productive container garden today. All you need is one container with drainage holes, a bag of quality potting mix, a beginner-friendly plant, and a simple watering plan. That’s it. According to the University of Illinois Extension, a single suitably sized container with one hardy plant is a completely valid starter kit, and setup takes about 10 minutes per pot.
Here’s your quick-start checklist:
- Container with drainage holes (at least 12 inches wide for most vegetables)
- Quality potting mix (not garden soil from your yard)
- One beginner-friendly plant or seed (lettuce, herbs, or cherry tomatoes are great first picks)
- Basic tools (a hand trowel and a watering can or hose)
- A simple watering plan (check soil moisture daily; water deeply when the top inch feels dry)
Guidance from Purdue University Extension, the Old Farmer’s Almanac, and the University of Maryland Extension all agree on the same core rules: drainage, the right mix, and consistent watering are what separate thriving containers from struggling ones.
Pro Tip: Don’t overthink your first container. Pick one plant you actually want to eat, buy the right-sized pot, and focus on keeping the soil consistently moist. You’ll learn more from one real plant than from weeks of research.
Table of Contents
- What do you need before you start planting?
- What pot size does each vegetable actually need?
- Why should you use potting mix instead of garden soil?
- Which plants are easiest to grow in containers?
- How do you find the right spot for your containers?
- How do you water container plants without overwatering or underwatering?
- Do your container plants need stakes or supports?
- When should you repot, and how do you care for containers through the seasons?
- What does the research say about beginner container gardening success?
- Key Takeaways
- The best advice for new gardeners is to start smaller than you think
- Farmdaddy makes consistent watering the easy part
- Useful sources for further reading
What do you need before you start planting?
Gathering the right supplies before you plant saves you from mid-session trips to the store and helps you avoid the most common early mistakes. The good news: the core list is short.
The essentials:
- A container with working drainage holes (or the ability to drill them)
- A bag of high-quality potting mix sized for your container
- A hand trowel for filling and planting
- A water source close enough to reach your containers easily
- Your plant, transplant, or seed packet
Helpful additions that make life easier:
- A saucer or drip tray to protect surfaces and catch overflow
- Plant labels or popsicle sticks and a marker (you will forget what you planted)
- A slow-release granular fertilizer to mix in at planting time
- Stakes, a small tomato cage, or a trellis if you’re growing anything that vines or gets tall
Optional time-savers worth considering:
- A self-watering planter with a built-in reservoir (more on this below)
- A simple drip irrigation timer if you travel or have a busy schedule
Pro Tip: Start with one 12–14 inch container and one plant. Master that cycle before you add more pots. You’ll build confidence fast, and you won’t feel stretched thin managing a dozen containers at once.
What pot size does each vegetable actually need?
Undersized pots are one of the most common reasons’ beginner container gardens fail. Roots run out of space, the soil dries out in hours, and plants stall. Purdue University Extension recommends matching container volume to the plant’s mature root depth, not the seedling you’re starting with.
A simple rule: when in doubt, go one size up. Larger containers buffer water and nutrients better, dry out more slowly, and give roots room to develop properly.
Minimum depth and volume by crop:
| Crop | Minimum Soil Depth | Minimum Container Volume |
|---|---|---|
| Lettuce, spinach, radish | 6–9 inches | 1–2 gallons |
| Herbs (basil, parsley, chives) | 6–8 inches | 1–2 gallons |
| Bush beans, peas | 8–12 inches | 3–5 gallons |
| Peppers, eggplant | 12–14 inches | 5 gallons |
| Cherry tomatoes | 12–14 inches | 5 gallons |
| Full-size tomatoes | 18 inches | 10 gallons |
| Zucchini, cucumbers | 18 inches | 10 gallons |
| Potatoes | 18 inches | 10 gallons |
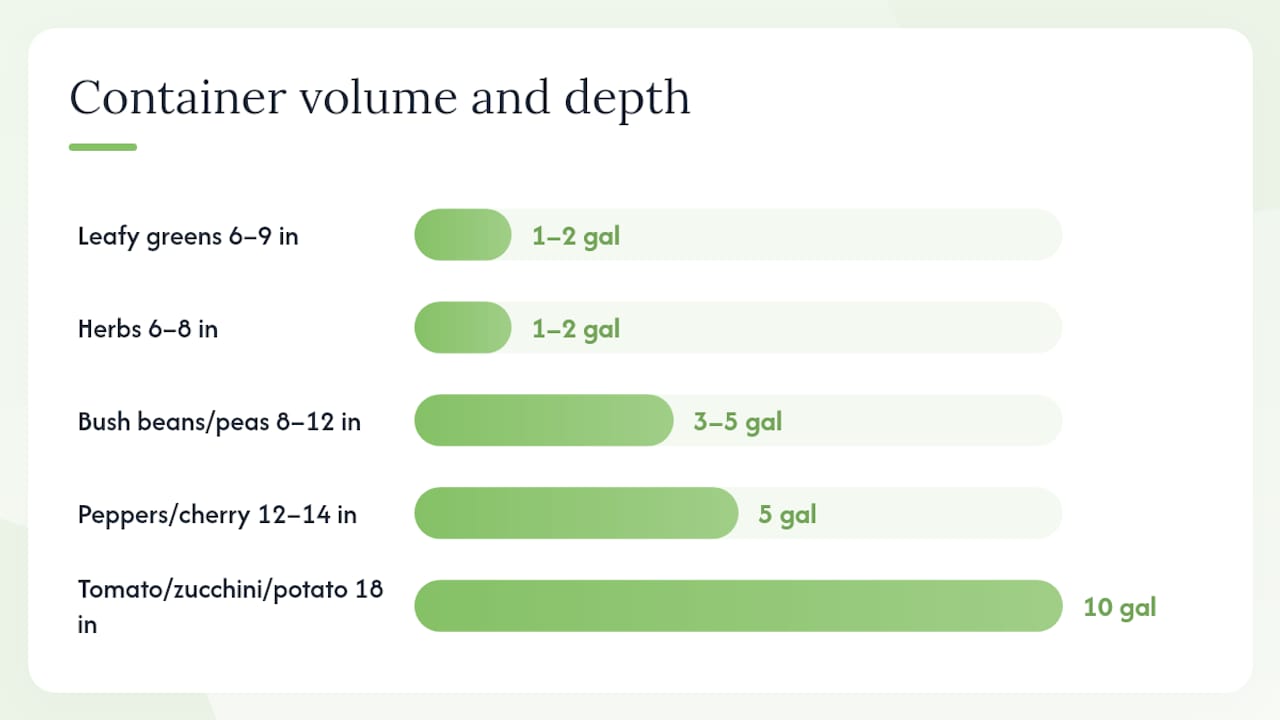
Depth ranges above are drawn from UC Master Gardeners of Santa Clara County, which provides one of the clearest plant-by-depth references available for home gardeners.
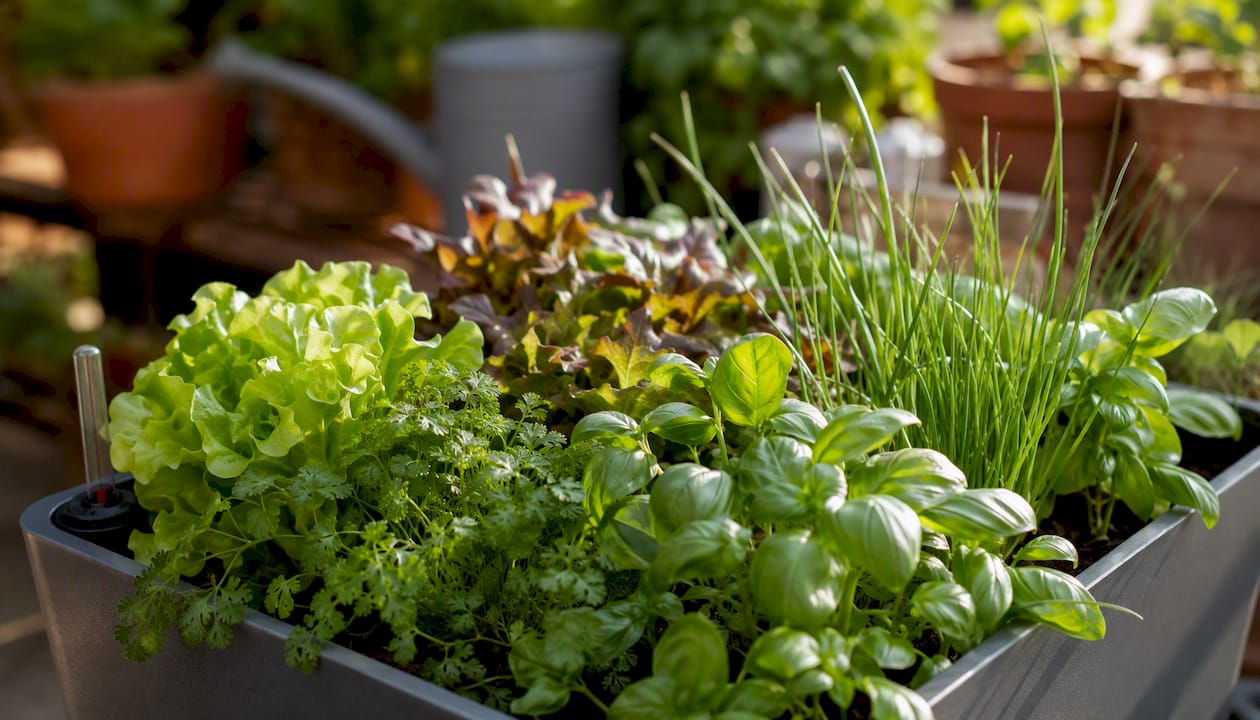
Spacing multiple plants in one container. You can grow several plants together if root systems are compatible and the container is large enough. A 12-inch pot can hold four to six lettuce plants comfortably. A 14-inch pot works for two to three herb varieties. Avoid mixing plants with very different water needs in the same container — a moisture-loving basil and a drought-tolerant rosemary will not thrive together.
Pro Tip: Never buy the smallest pot that technically fits a plant. A tomato “can” survive in a 5-gallon bucket, but it will produce far more fruit in a 10-gallon container with room to grow. The extra soil volume is free insurance against heat stress and drought.
Why should you use potting mix instead of garden soil?
Garden soil compacts in containers. When you pack it into a pot, it squeezes out air pockets, restricts root growth, and holds too much moisture around the roots. Penn State Extension is clear on this: use a high-quality, soilless potting mix for containers, not soil from your yard or garden beds.
Quality potting mixes are formulated to stay loose and well-aerated even after repeated watering. Most contain perlite or vermiculite (the white or silver flecks you see in the bag) to improve drainage and aeration. Many also include compost for nutrients and moisture-retaining components like coconut coir or peat moss.
What to look for on the bag:
- Lightweight and loose texture (not dense or clay-like)
- Contains perlite or vermiculite for aeration
- Includes or accepts slow-release fertilizer
- Peat-free options are available if sustainability matters to you (look for coir-based mixes)
- Moisture-retention additives (helpful in hot, dry climates)
For more guidance on choosing the right mix for your containers, Farmdaddy’s potting soil selection guide walks through the key differences between mix types and what each crop prefers.
When to refresh your potting mix. Potting mix degrades over time. After one full growing season, the structure breaks down, nutrients are depleted, and the mix may become hydrophobic (water beads off instead of soaking in). Signs the mix has degraded include soil that pulls away from the pot edges, water running straight through without absorbing, and stunted growth despite regular feeding.
At the start of each new season, remove the old mix, rinse the container, and refill with fresh potting mix. You can compost the old mix or use it to amend an in-ground bed. Never reuse mix from a container where plants showed signs of disease.
Which plants are easiest to grow in containers?
The best beginner container plants are forgiving, productive, and sized to fit a modest pot. University of Maryland Extension recommends starting with dwarf or bush varieties specifically bred for compact growth, which reduces the learning curve significantly in year one.
Flowers and companion planting
Mixed ornamental containers follow the “thriller, filler, spiller” formula: one tall focal plant (thriller), mounding plants to fill the middle (filler), and trailing plants that cascade over the edge (spiller). For edible containers, try planting marigolds alongside tomatoes or peppers — they deter aphids and add color. Nasturtiums are edible, easy to grow, and attract beneficial insects.
For creative plant combination ideas that work well in containers, Farmdaddy’s plant combination guide offers practical pairings for both ornamental and edible pots.
| Plant Type | Beginner Pick | Container Size | Annual or Perennial |
|---|---|---|---|
| Salad greens | Lettuce mix | 6–9 in / 1–2 gal | Annual |
| Root vegetable | Radish | 6–9 in / 1–2 gal | Annual |
| Legume | Bush beans | 10–12 in / 3–5 gal | Annual |
| Fruiting vegetable | Cherry tomato | 12–14 in / 5 gallons | Annual |
| Herb | Basil | 6–8 in / 1–2 gal | Annual |
| Herb | Chives | 6–8 in / 1–2 gal | Perennial |
| Flower | Marigold | 6–8 in / 1 gal | Annual |
How do you find the right spot for your containers?
Placement is one of the decisions beginners underestimate most. The right spot can mean the difference between a plant that thrives and one that barely survives.
Sun-hour rules to follow:
- Warm-season crops (tomatoes, peppers, cucumbers, beans) need 6–8 hours of direct sun daily.
- Cool-season crops (lettuce, spinach, kale, parsley) do well with 3–5 hours and actually prefer some afternoon shade in summer.
- Most herbs fall in between: 4–6 hours suits basil, chives, and parsley, while rosemary and thyme want as much sun as possible.
Penn State Extension notes that southern and western exposures generally deliver the most sun hours. If you’re unsure about your space, spend one day tracking where direct sunlight falls at 9 AM, noon, and 3 PM. That three-point check gives you a reliable picture of your microclimate.
Watch for heat sinks. Brick walls, concrete patios, and dark-colored surfaces absorb heat and radiate it back at night, which can stress roots and accelerate soil drying. If your containers sit directly on a hot concrete surface, elevate them on pot feet or a wooden pallet to reduce heat transfer.
Practical placement tips:
- Use wheeled plant caddies so you can reposition pots as seasons change without heavy lifting.
- Move cool-season crops to a shadier spot in summer to extend their harvest window.
- Cluster pots together to create a slightly more humid microclimate, which slows moisture loss.
- Keep containers close to your water source. If watering is inconvenient, it will become inconsistent.
If you want to map your outdoor space before committing to a layout, Backyard Buddy’s outdoor planning guide is a useful resource for visualizing container placement in small patios and balconies.
Pro Tip: Before you buy plants, spend a weekend observing your space. Note where the sun hits and for how long. That 20-minute observation saves you from planting sun-loving tomatoes in a spot that only gets three hours of light.
How do you water container plants without overwatering or underwatering?
Watering is where most beginners go wrong, and it’s the single biggest reason container plants fail. Colorado State University Extension identifies inconsistent watering as the top beginner mistake, and notes that containers in hot summer conditions may need water once or even twice daily.
Containers dry out faster than in-ground beds because they have limited soil volume and are exposed to air on all sides. Shallow, frequent sprinkles wet only the top inch and leave roots dry. Deep, thorough watering is what plants actually need.
How to water deeply (step by step):
- Water slowly at the base of the plant, not over the leaves.
- Continue until water runs freely from the drainage holes.
- Wait 30 minutes, then water again if the soil absorbed the first round quickly.
- Empty saucers after 30 minutes so roots don’t sit in standing water.
How to check soil moisture:
- Finger test: Push your finger one inch into the soil. If it feels dry at that depth, water now. If it still feels moist, check again in a few hours.
- Weight test: Lift the pot. A dry container feels noticeably lighter than a freshly watered one. With practice, you’ll know by feel.
Watering frequency examples:
- Cool-season crops in spring or fall: every 2–3 days in moderate temperatures.
- Warm-season crops in summer heat: daily or every other day, depending on pot size and material.
- Terracotta pots in full sun: possibly daily even in mild weather.
- Large plastic containers in partial shade: every 3–4 days.
Low-effort watering options:
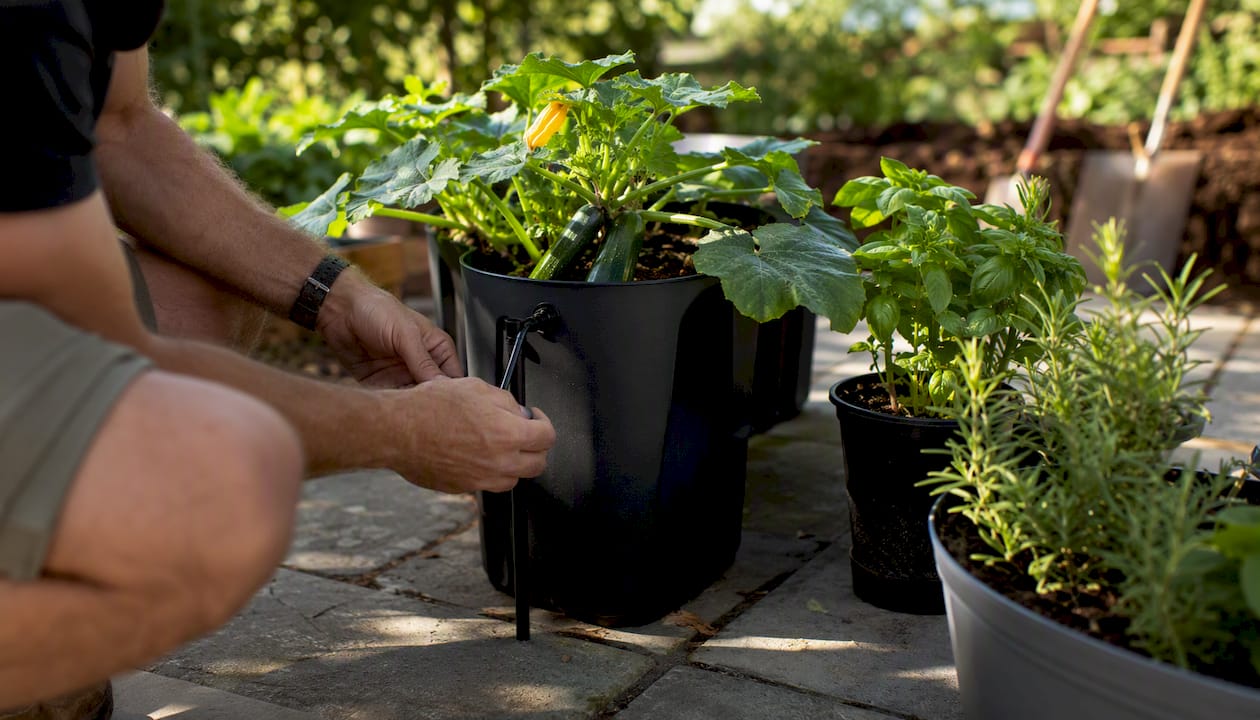
- Self-watering planters: The plant draws water from a reservoir as needed. Farmdaddy’s self-watering container system is designed specifically for this, with each container operating independently so every plant gets the moisture it needs.
- Drip irrigation on a timer: A simple drip irrigation setup with a battery-powered timer can automate watering entirely for a few hundred dollars or less.
- Reservoir inserts: Inexpensive plastic reservoirs that sit inside standard pots and release water slowly.
Pro Tip: Water in the morning when possible. Morning watering gives leaves time to dry before evening, which reduces fungal disease risk. Evening watering leaves foliage wet overnight, creating conditions that mold and mildew love.
Do your container plants need stakes or supports?
Some plants need support from early on. Waiting until a tomato plant is flopping over to add a cage is too late — you risk breaking stems and damaging roots when you push supports into crowded soil.
When to use each type of support:
- Stakes: Best for single-stem plants like peppers or young tomatoes. Push a bamboo stake into the soil at planting time and tie the main stem loosely with soft garden twine as it grows.
- Cages: Ideal for bushy tomatoes and peppers. Place the cage over the plant when it’s still small, before it fills out.
- Trellises: Great for cucumbers, pole beans, and peas in large containers. A simple trellis leaned against a wall or fence works well.
DIY support options for containers: A few bamboo stakes tied together at the top form a simple teepee trellis. A wire tomato cage from any hardware store fits most 5-gallon containers. For small pots, a single chopstick or pencil stake works for herbs that get leggy.
Spacing in multi-plant containers:
- One cherry tomato plant + two basil plants in a 10-gallon container works well.
- Four to six lettuce plants in a 12-inch pot is comfortable.
- One pepper plant per 5-gallon container is the right call — peppers don’t like root competition.
When root systems compete too aggressively, both plants suffer. For high-value crops like tomatoes and peppers, single-crop containers almost always outperform mixed plantings.
Pro Tip: Add your support structure at planting time, not after the plant has grown. Pushing a stake into a mature root system damages roots and stresses the plant. A cage placed early causes zero disruption.
When should you repot, and how do you care for containers through the seasons?
Containers need seasonal attention to stay productive year after year. Knowing when to repot and how to prepare for winter keeps your investment in pots and plants working for you.
Signs you need to repot:
- Roots are growing out of the drainage holes
- The plant dries out within hours of watering, even in cool weather
- Growth has stalled despite regular feeding and watering
- The potting mix has shrunk significantly away from the pot edges
Step-by-step repotting:
- Water the plant thoroughly the day before to reduce transplant stress.
- Tip the container on its side and gently ease the root ball out.
- Loosen circling or girdling roots with your fingers before placing in the new pot.
- Fill the new container with fresh potting mix, position the plant at the correct depth, and fill in around the roots.
- Water in well and place in a shaded spot for 2–3 days to let the plant recover.
- Return to its normal sun position and resume your regular care routine.
Timing: Repot annuals at the start of each new season. Repot perennials when you see the root signs above, typically every 1–2 years.
End-of-season and overwintering care:
- Annual vegetables: Pull spent plants, discard the old mix, clean the container, and store it for winter.
- Perennial herbs (rosemary, chives, thyme): In USDA zones 7 and above, many survive outdoors in containers with minimal protection. In colder zones, move them to an unheated garage or shed where temperatures stay above freezing.
- Tender perennials (citrus, tropical herbs): Bring indoors before the first frost. Place near a south-facing window or under a grow light.
- Soil refresh: Before spring planting, top-dress containers with 1–2 inches of fresh potting mix and a dose of slow-release fertilizer to replenish what the previous season depleted.
What does the research say about beginner container gardening success?
The practical rules in this guide aren’t guesswork. They come from university extension programs that have studied container gardening for decades, and the evidence consistently points to the same failure points and fixes.
Purdue University Extension outlines the core rules clearly: functional drainage holes, high-quality potting mix (not garden soil), container volume matched to the plant’s mature root depth, and sun-hour requirements met before you plant. These aren’t suggestions. They’re the structural requirements for a container to function as a growing system.
“Inconsistent watering is the most common beginner mistake in container gardening. Containers dry out faster than in-ground beds and may need watering once or even twice daily during hot summer months. Self-watering systems and automated irrigation timers significantly reduce this risk for busy or new gardeners.” — Colorado State University Extension
The Royal Horticultural Society frames container constraints as a teaching advantage: the small scale helps beginners read plant signals and practice management without the complexity of a full garden. A single pot is a low-stakes learning environment where mistakes are cheap and lessons are fast.
The evidence case for self-watering systems is straightforward. Because inconsistent watering is the primary failure mode, any system that stabilizes moisture delivery directly addresses the root cause. Self-watering planters with reservoirs create a buffer that protects plants during heat waves and short travel absences, according to the Old Farmer’s Almanac. For beginners who can’t yet read soil moisture reliably, that buffer is meaningful protection.
Extension sources worth bookmarking for local guidance:
- Purdue University Extension for drainage, sizing, and soil rules
Key Takeaways
Container gardening for beginners succeeds when you pair the right-sized container and quality potting mix with consistent watering and regular feeding.
| Point | Details |
|---|---|
| Drainage is non-negotiable | Every container needs working drainage holes; no rocks at the bottom, no exceptions. |
| Size up your containers | Most vegetables need at least a deep container suitable for root growth; full-size tomatoes require large volume containers. |
| Use potting mix, not garden soil | Commercial potting mix stays loose and aerated; garden soil compacts and holds too much moisture in pots. |
| Watering consistency is the top success factor | Containers dry faster than in-ground beds; check moisture daily and water deeply when the top inch is dry. |
| Farmdaddy self-watering planters | Farmdaddy’s reservoir-based planters stabilize moisture automatically, reducing the daily watering burden for beginners. |
The best advice for new gardeners is to start smaller than you think
Most new gardeners overplan and underdo. They research for weeks, buy six containers, and then feel overwhelmed by the upkeep. The research from University of Maryland Extension points to something more useful: start with a few compact varieties, learn plant signals, and build from there.
What the conventional wisdom gets wrong is the idea that more plants equals more success. A single well-tended cherry tomato plant in the right pot will outperform six neglected plants in undersized containers every time. The learning happens in the details: noticing when leaves droop slightly before the soil even looks dry, recognizing the difference between a pest-damaged leaf and a sunburned one, understanding how your specific balcony or patio behaves in July versus September.
The constraints of container gardening are actually useful. You’re managing a small, defined system. Mistakes are visible quickly, and fixes are straightforward. That’s a much better learning environment than a sprawling in-ground garden where problems can hide for weeks.
Start with one container. Pick a plant you want to eat. Follow the watering and feeding basics. You will make mistakes, and those mistakes will teach you more than any guide can. The goal in year one isn’t perfection. It’s building the habit and the confidence to add one more pot next season.
Farmdaddy makes consistent watering the easy part
The hardest part of container gardening for beginners isn’t choosing plants or finding the right soil. It’s keeping up with watering, especially in summer when containers can dry out in a single hot afternoon.
Farmdaddy’s self-watering garden planters solve that problem directly. Each planter uses a built-in reservoir that delivers water to plant roots as needed, so you’re not guessing whether the soil is dry or scrambling to water on a hot Tuesday when you’re already busy. The patented design lets each connected container operate independently, meaning a thirsty tomato won’t pull water away from a more drought-tolerant herb next to it.
For beginners, the practical benefit is real: fill the reservoir every few days instead of checking soil moisture twice daily. The Farmdaddy 2-planter system is a strong starting point if you want to grow two different crops side by side without the complexity of managing separate watering schedules. Pair any Farmdaddy planter with a quality potting mix and one of the beginner-friendly plant picks from this guide, and you’ve removed the biggest variable that causes new gardeners to give up.
Visit farmdaddy.com to see the full planter lineup and find the right size for your space.
Useful sources for further reading
These resources back the guidance in this article and give you local, research-based answers when you need more detail.
- Purdue University Extension
- Colorado State University Extension - Container gardens
- University of Illinois Extension - Container gardens
- UC Master Gardeners of Santa Clara County - Container Gardening Basics
- Penn State Extension - Growing vegetables and flowers in containers
- Old Farmer’s Almanac - Vegetable container gardening
- Mother Earth News - Container gardening
- University of Maryland Extension - Growing vegetables in containers
- Royal Horticultural Society - Growing plants in containers

