
BLOG
Urban Container Gardening: Easy Plans for Small Spaces

The fastest path to a productive urban garden is a small, prioritized plan: one large fruiting container, a cluster of herbs, and a salad window box, all growing in quality potting mix sized to match each plant’s roots. That combination outproduces a scattered collection of mismatched pots, and it takes less than an hour to set up.
Start here, today:
- Map your sun. Watch your balcony, patio, or windowsill for one full day and count the direct light hours.
- Choose one container and one fast crop. A 15 to 20 gallon pot with a dwarf tomato or a window box with lettuce gets you a harvest in weeks, not months.
- Buy or mix quality potting soil. Skip garden soil entirely; it compacts in containers and drains poorly.
Two techniques make the rest of this easier: self-watering containers, which cut down on daily watering stress, and vertical pairing, which stacks a climbing crop over a low one to double your output per square foot. Farmdaddy’s self-watering systems handle the first piece well, especially if you travel or simply forget to check soil moisture every day.
Key Takeaways
Urban container gardening succeeds when container size matches crop root needs, potting mix replaces garden soil entirely, and watering stays consistent through self-watering systems or a disciplined finger-test routine.
| Point | Details |
|---|---|
| Size containers to crops | Match depth and volume to root needs: 6 to 10 inches for herbs, 15 to 20 gallons for tomatoes. |
| Use container-specific potting mix | Skip garden soil; it compacts and drains poorly, choking roots in a confined space. |
| Water based on conditions, not habit | Check with a finger test and adjust for pot size, material, sun, and wind exposure. |
| Prioritize high-yield crops | Focus on dwarf tomatoes, herbs, and salad greens for the best harvest per square foot. |
| Reduce watering stress with self-watering systems | Farmdaddy’s independent-reservoir containers cut watering frequency and protect fruiting crops during travel or busy weeks. |
Table of Contents
- Choosing Containers: Materials, Sizes, and Drainage Rules
- What Potting Mix Works Best for Container Vegetables?
- How Often Should You Water Container Plants?
- Which Vegetables Give You the Most Food per Container?
- How Do You Map Sunlight for a Small Space?
- Vertical Growing Systems That Work on Balconies
- Managing Pests and Disease in Containers
- Building a Starter Garden on a Tight Budget
- Three Starter Layouts You Can Copy Today
- Why Self-Watering Containers Solve the Biggest Container Problem
- Planning Your Container Garden Around the Seasons
- How Urban Microclimates Change What You Can Grow
- Common Urban Container Gardening Problems and How to Fix Them
- A Realistic Look at What to Expect in Year One
- Getting Started with Farmdaddy’s Self-Watering System
- Sources
Choosing Containers: Materials, Sizes, and Drainage Rules
The container you pick determines almost everything that happens next, from how often you water to how much food you actually get. Plastic and resin pots are light, cheap, and retain moisture longer, making them a strong pick for balconies and rooftops where weight matters. Terracotta looks great but dries out fast and gets heavy when wet. Fabric grow bags breathe well and prevent root circling, though they dry out even faster than terracotta. Glazed ceramic holds moisture nicely but is expensive and fragile in tight urban spaces.
Depth needs to match the crop, not just personal preference. Container gardening works best when you match container depth to what the plant’s roots actually need, rather than using garden soil in whatever pot looks nice. A quick reference:
- Herbs and lettuce: 6 to 10 inches deep
- Leafy greens and radishes: 8 to 10 inches deep
- Strawberries: 10 to 12 inches deep
- Peppers: 10 to 15 gallons
- Cherry tomatoes and other fruiting vegetables: 15 to 20 gallons
Every container needs real drainage holes, not decorative slits. Standing water rots roots faster than almost any pest or disease you’ll encounter. On balconies, weight adds up quickly once soil is wet, so keep large pots near load-bearing walls or the balcony’s edge rather than the center, and resist the urge to line up five big containers in a row.
Pro Tip: A single well-tended 15 to 20 gallon container with one dwarf tomato usually produces more usable food than four small pots crammed with the same plant. Fewer, healthier plants beat crowding every time.
What Potting Mix Works Best for Container Vegetables?
Garden soil compacts inside a container, chokes root oxygen, and often carries pests indoors. Container gardening calls for a mix built specifically for pots: lighter, better draining, and formulated to hold moisture without suffocating roots, as outlined in DUG’s guide to container gardening. If you want to build your own instead of buying a bag, this ratio works for most vegetables and herbs:
- Two parts high-quality compost
- One part coconut coir or peat
- One part perlite or vermiculite for drainage
Add a scoop of worm castings for a slow nutrient boost, especially in fruiting crops. Farmdaddy’s guide on choosing the best potting soil for containers breaks down amendment options if you want more detail before you buy.
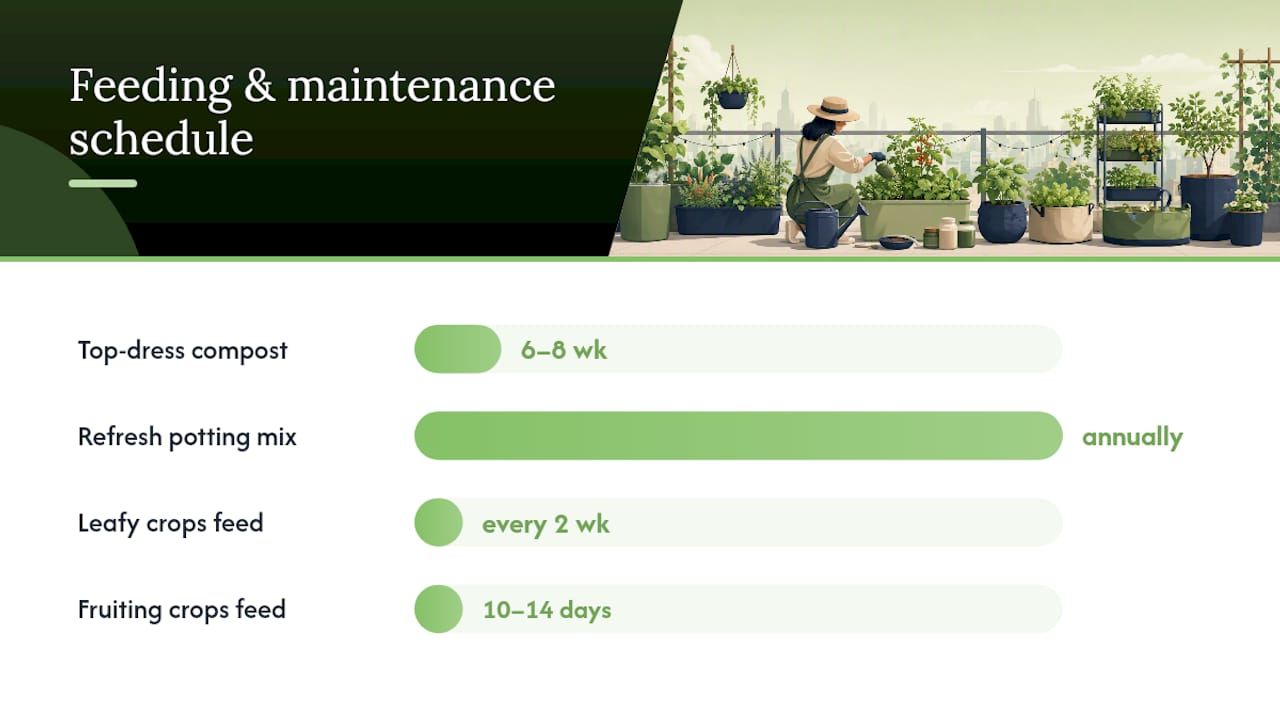
Containers deplete nutrients faster than garden beds because there’s simply less soil volume holding reserves. Top-dress with an inch of fresh compost every six to eight weeks during the growing season, and fully refresh the mix once a year for perennial herbs. Leafy crops like lettuce and basil do well with a balanced liquid feed every two weeks. Fruiting crops like tomatoes and peppers need a phosphorus-heavy feed once flowers appear, then again every ten to fourteen days through harvest.
Pro Tip: If leaves yellow between the veins but stay green along them, that’s usually a magnesium deficiency, not a watering problem. A diluted Epsom salt drench once a month solves it.
How Often Should You Water Container Plants?
Containers dry out faster than garden beds, full stop. Less soil volume means less buffer, and on a sunny balcony that difference is dramatic. The Survipedia container gardening guide notes this is one of the biggest adjustments new container gardeners face.
The finger test still beats most gadgets: push a finger two inches into the soil, and if it comes out dry, water. Moisture meters work too, and they’re handy for larger pots where reaching two inches down isn’t practical. As a rough frequency guide:
- Small pots (under 2 gallons) in full sun: daily, sometimes twice on hot days
- Medium containers (5 to 10 gallons): every one to two days
- Large containers (15+ gallons): every two to three days, longer if mulched
Wind pulls moisture out of soil almost as fast as direct sun, which matters on higher floors where breeze is constant. Terracotta and fabric pots need more frequent watering than plastic or glazed ceramic because the material itself wicks moisture away.
For hand-watering, water slowly until it runs from the drainage holes, confirming the whole root zone got soaked rather than just the surface. Drip systems on a timer work well for larger setups but need occasional adjustment as plants grow. Self-watering containers solve the daily-check problem entirely by holding a water reservoir that plants draw from as needed, cutting down on both watering frequency and the guesswork of when to water.
If you’re renting or you travel often, group pots together to raise humidity around them, add saucers to catch runoff, and mulch the soil surface with straw or wood chips to slow evaporation.
Which Vegetables Give You the Most Food per Container?
Not every vegetable is worth the container space. Some crops give you pounds of food from one pot; others give you a garnish. Prioritize these for a small urban setup:
- Lettuce and salad greens — fast turnover, harvest in 30 to 45 days, ideal for a window box
- Herbs (basil, chives, thyme, oregano) — continuous harvest for months from one 8 to 10 inch pot
- Dwarf or determinate tomatoes — the highest yield-per-square-foot crop for a 15 to 20 gallon container
- Bush beans — compact, no staking needed, steady harvest over several weeks
- Compact peppers — reliable in a 10 to 15 gallon pot, tolerate some neglect
- Strawberries — great for hanging or rail planters, ongoing harvest through the season
- Radishes — ready in three to four weeks, perfect for filling gaps between slower crops
A single well-managed 15 to 20 gallon tomato container can outproduce three or four crowded small pots holding the same plant, because each root system gets enough room to actually support fruit.
Stack your plantings for continuous harvests: sow radishes around the base of a slower-growing pepper plant, and pull them before the pepper needs the space, using small backyard patio ideas that maximize every inch to efficiently arrange your container garden. Pair a trellised cucumber with lettuce growing in its shade below. For speed, start lettuce, radishes, and beans from seed directly in the container. Buy transplants for tomatoes and peppers since they take too long to reach fruiting size from seed in a short urban growing window.
How Do You Map Sunlight for a Small Space?
Guessing at your sun exposure is the single most common mistake in urban container gardening. Nearby buildings, awnings, and even a neighbor’s tree can cut your actual light hours in half compared to what you’d assume from a compass direction alone.
- Pick a clear day and check your space every hour from sunrise to sunset, noting when the spot is in direct sun versus shade.
- Total the direct sun hours. Six or more means you can grow fruiting crops like tomatoes and peppers. Four to six supports leafy greens and herbs well. Under four limits you to shade-tolerant greens like lettuce and spinach.
- Note wind patterns, especially on higher floors, and plan to anchor taller containers or trellises against a wall or railing.
- Check your building’s rules on balcony weight and attachments before installing anything permanent. Most guides recommend calculating total wet soil weight before grouping several large containers together, since filled pots get heavy fast.
Pro Tip: Recheck your sun map in spring and fall. The sun angle shifts enough between seasons that a spot getting six hours in July might get three in October.
Vertical Growing Systems That Work on Balconies
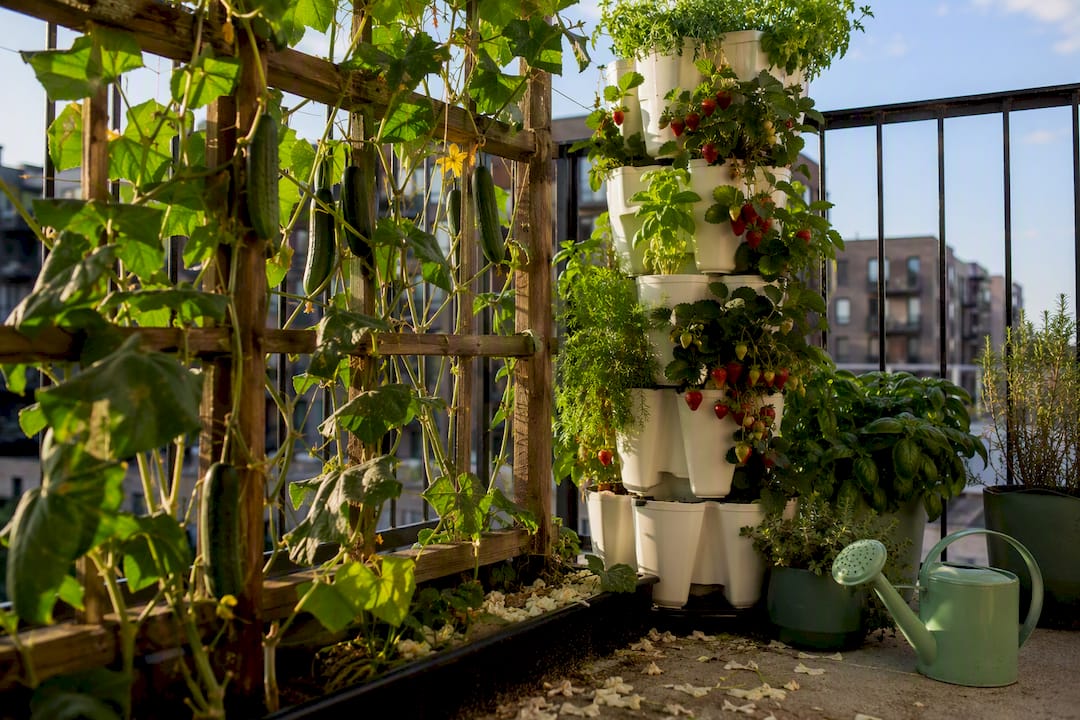
Vertical growing multiplies your usable space without adding floor footprint, which matters enormously when your entire garden fits on a balcony. A trellis works well for vining crops like cucumbers and pole beans that need support but not a fully enclosed structure. A tower system, stacking several planting pockets vertically, suits strawberries and herbs where you want dense planting in a small footprint. Railing planters clip directly onto a balcony rail, adding growing space that costs you nothing in floor area.
Anchoring matters more than most beginners expect. Wind on an upper floor can tip an unsecured trellis or knock a tall planter over, so secure vertical structures to a wall stud or railing rather than relying on the container’s base weight alone.
Pair vertical crops with low-growing plants underneath to capture two harvests from one footprint. Beans climbing a trellis with lettuce growing in the shade below is a classic combination that works because the lettuce actually benefits from the afternoon shade.
- Freestanding trellises: cheapest, no drilling required, ideal for renters
- Railing planters: no floor space used, but check weight limits first
- Tiered towers: highest yield-per-square-foot, moderate upfront cost
Managing Pests and Disease in Containers
Container plants get sick or attacked less often than in-ground gardens, but when problems hit, they hit fast because there’s less soil to buffer stress. Watch for sticky residue or curling leaves, both early signs of aphids. Fine webbing under leaves usually means spider mites. White powdery patches on leaves signal powdery mildew, common in crowded, poorly ventilated setups.
- Space containers so air moves freely between plants; crowding is the number one cause of fungal problems.
- Remove badly infested leaves immediately rather than treating the whole plant.
- Use insecticidal soap or a diluted neem oil spray for soft-bodied pests like aphids.
- Wipe down containers with a diluted vinegar solution between plantings to reduce disease carryover.
- Check soil moisture weekly and prune dead or yellowing growth as you go.
Rotate what you grow in a container season to season where possible, since reusing the same soil for the same crop repeatedly builds up pest and disease pressure over time.
Building a Starter Garden on a Tight Budget
You don’t need a big budget to start growing real food in containers. Reused containers work fine as long as you clean them thoroughly and drill drainage holes if they don’t already have them. Buckets, storage totes, and even large yogurt tubs all become viable planters with a few holes drilled in the bottom.
- Buy one large container (15 to 20 gallons) for a tomato or pepper. This single purchase gives you the highest food return of anything on this list.
- Invest in quality potting mix rather than cheap topsoil. It’s the one place where spending a little more pays off in plant health.
- Add a window box for salad greens, which costs little and produces continuously for weeks.
- Source seeds through community swaps or seed libraries before buying packets retail.
A basic starter setup runs somewhere between $40 and $300 depending on how much you reuse versus buy new, according to guidance from RenterFriendly’s container gardening guide. Splurge on the potting mix and one good-sized container first. Delay vertical systems and decorative planters until your first crop proves the space works.
Three Starter Layouts You Can Copy Today
Pick the layout that matches your actual space, not the one you wish you had.
Layout 1: Windowsill or herb rack. Three to five pots, 6 to 8 inches deep, holding basil, chives, thyme, and parsley. Water every two to three days, checking with a finger test since indoor light and airflow vary.
Layout 2: Very small balcony. One 15 to 20 gallon container for a dwarf tomato, one 8 to 10 inch herb pot, and one window box for lettuce or salad mix. Water the tomato every one to two days in summer, herbs every two to three days, and the salad box every other day.
Layout 3: Medium balcony. Two large fruiting containers (tomato and pepper), a trellis with pole beans, and a salad window box underneath the trellis for shade-grown greens. This layout benefits most from a self-watering system since you’re managing multiple containers with different needs at once.
Weekly checklist for any layout:
- Finger-test soil moisture in each container
- Pinch off yellowing or dead leaves
- Check for pest activity on leaf undersides
- Harvest anything ready, even a little, to keep plants producing
- Top off mulch if it’s thinning
Why Self-Watering Containers Solve the Biggest Container Problem
Self-watering containers work through sub-irrigation: a reservoir sits below the soil, and plants draw up moisture through a wicking layer as they need it, rather than depending on you to catch the exact right watering moment. This design directly answers the most common cause of container plant failure, which is inconsistent watering from people who mean well but forget, travel, or misjudge how fast a small pot dries out.
Self-watering systems can reduce watering frequency by roughly 50 to 70 percent, according to Survipedia’s container gardening research, and they’re especially useful for tomatoes, peppers, and greens grown by people who can’t check soil daily.
Farmdaddy’s self-watering containers use a patented design where each connected container operates independently, so one thirsty tomato doesn’t steal water meant for a neighboring pepper. Customers consistently point to that independence as the reason the system works for mixed plantings rather than a single crop.
Self-watering setups fit best where the stakes of missed watering are highest:
- Fruiting crops like tomatoes and peppers, which suffer visibly from inconsistent moisture (blossom end rot, cracked fruit)
- Travelers and busy professionals who can’t guarantee daily check-ins
- Any layout with more than two or three containers, where manual watering becomes a real time cost
To add one to a starter layout, swap your large fruiting container for a Farmdaddy unit first, since that’s the pot most vulnerable to drought stress. Keep in mind a reservoir still needs occasional top-watering to flush built-up salts and a nutrient check every few weeks, since self-watering makes the schedule forgiving, not automatic.
Planning Your Container Garden Around the Seasons
Container gardens follow the same seasonal rhythm as in-ground beds, just compressed into a smaller footprint. Cool-season crops like lettuce, spinach, and radishes thrive in spring and again in fall when temperatures sit between 60 and 75 degrees Fahrenheit. Warm-season crops like tomatoes, peppers, and beans need consistent warmth and should go in after your last frost date.
A simple rotation for a single large container: lettuce or radishes in early spring, swapped for a tomato or pepper transplant once nights warm up, then back to fast-growing greens or garlic in fall once summer crops finish. This keeps that expensive potting mix working year round instead of sitting empty for months.
Rotating crop families within the same container matters even in small spaces. Growing tomatoes in the same soil season after season builds up soil-borne disease pressure, since containers hold less volume to dilute the buildup than garden beds do. Swap a fruiting crop for a leafy green or legume every other season if you’re reusing the same pot and mix.
Herbs are the exception. Perennial herbs like thyme, oregano, and chives can stay in the same container for years with an annual top-dress and occasional root pruning, so there’s no need to rotate those on the same schedule as annual vegetables.
How Urban Microclimates Change What You Can Grow
A rooftop in full sun behaves nothing like a ground-floor patio shaded by the building next door, even a few blocks apart in the same city. Concrete and brick absorb heat all day and release it slowly overnight, which means urban containers often run several degrees warmer than a suburban garden bed at the same latitude. That extended warmth can push your tomato harvest earlier, but it also stresses cool-season crops like lettuce, which bolt and turn bitter faster in prolonged heat.
Wind funneling between buildings dries out containers faster than open exposure would, particularly on higher floors where breeze is near-constant. Reflected heat off glass or light-colored walls can scorch leaves pressed too close to a surface, even when the plant technically sits in partial shade.
Watch your specific spot rather than trusting general climate assumptions for your city or region. A balcony facing a brick wall might run five to ten degrees warmer than one facing an open courtyard, and that difference changes both your watering frequency and which crops actually thrive. Move pots seasonally if you can. Pulling containers a few feet from a heat-radiating wall in midsummer, or closer to it in early spring, takes advantage of the microclimate instead of fighting it.
Common Urban Container Gardening Problems and How to Fix Them
Space constraints create predictable headaches. Here’s what tends to go wrong and the fastest fix for each.
Containers drying out too fast in wind or heat. Group pots together, add mulch, or switch vulnerable crops to a self-watering system rather than fighting the schedule manually.
Weight limits on balconies. Choose plastic or fabric containers over ceramic or terracotta, and spread large pots across the floor rather than clustering them in one spot.
Not enough sun for fruiting crops. If your space gets under six hours of direct light, shift toward herbs, lettuce, and other shade-tolerant crops instead of forcing a tomato that will underperform.
Pest pressure from neighboring gardens or planters. Inspect new plants before bringing them onto your balcony, and keep a few inches of space between containers for airflow.
Landlord or HOA restrictions on attachments. Stick to freestanding containers, railing clips that don’t require drilling, and mats or saucers to protect flooring, keeping your setup fully removable.
Running out of space mid-season. This is usually a sign you planted too densely upfront. Thin aggressively and remember that one healthy plant beats three struggling ones in the same footprint.
A Realistic Look at What to Expect in Year One
Your first container garden won’t look like the photos. Expect a few plants to underperform, expect at least one pest surprise, and expect your watering rhythm to take a few weeks to feel natural. That’s normal, not a sign you’re doing it wrong.
Start with one container you can realistically manage, get a real harvest from it, and let that small win teach you what your specific space actually needs before you scale up. Urban container gardening rewards patience and observation more than any particular gadget or gardening technique, and the gardeners who stick with it are the ones who started small and adjusted instead of trying to fill every inch in the first month.
— Steven
Getting Started with Farmdaddy’s Self-Watering System
If watering is the part of gardening that trips you up, that’s exactly the problem Farmdaddy’s containers were built to solve. Each connected planter operates independently, so your tomato gets exactly the water it needs without stealing from the herbs next to it, and you stop losing plants to a missed watering day while you’re at work or on vacation.
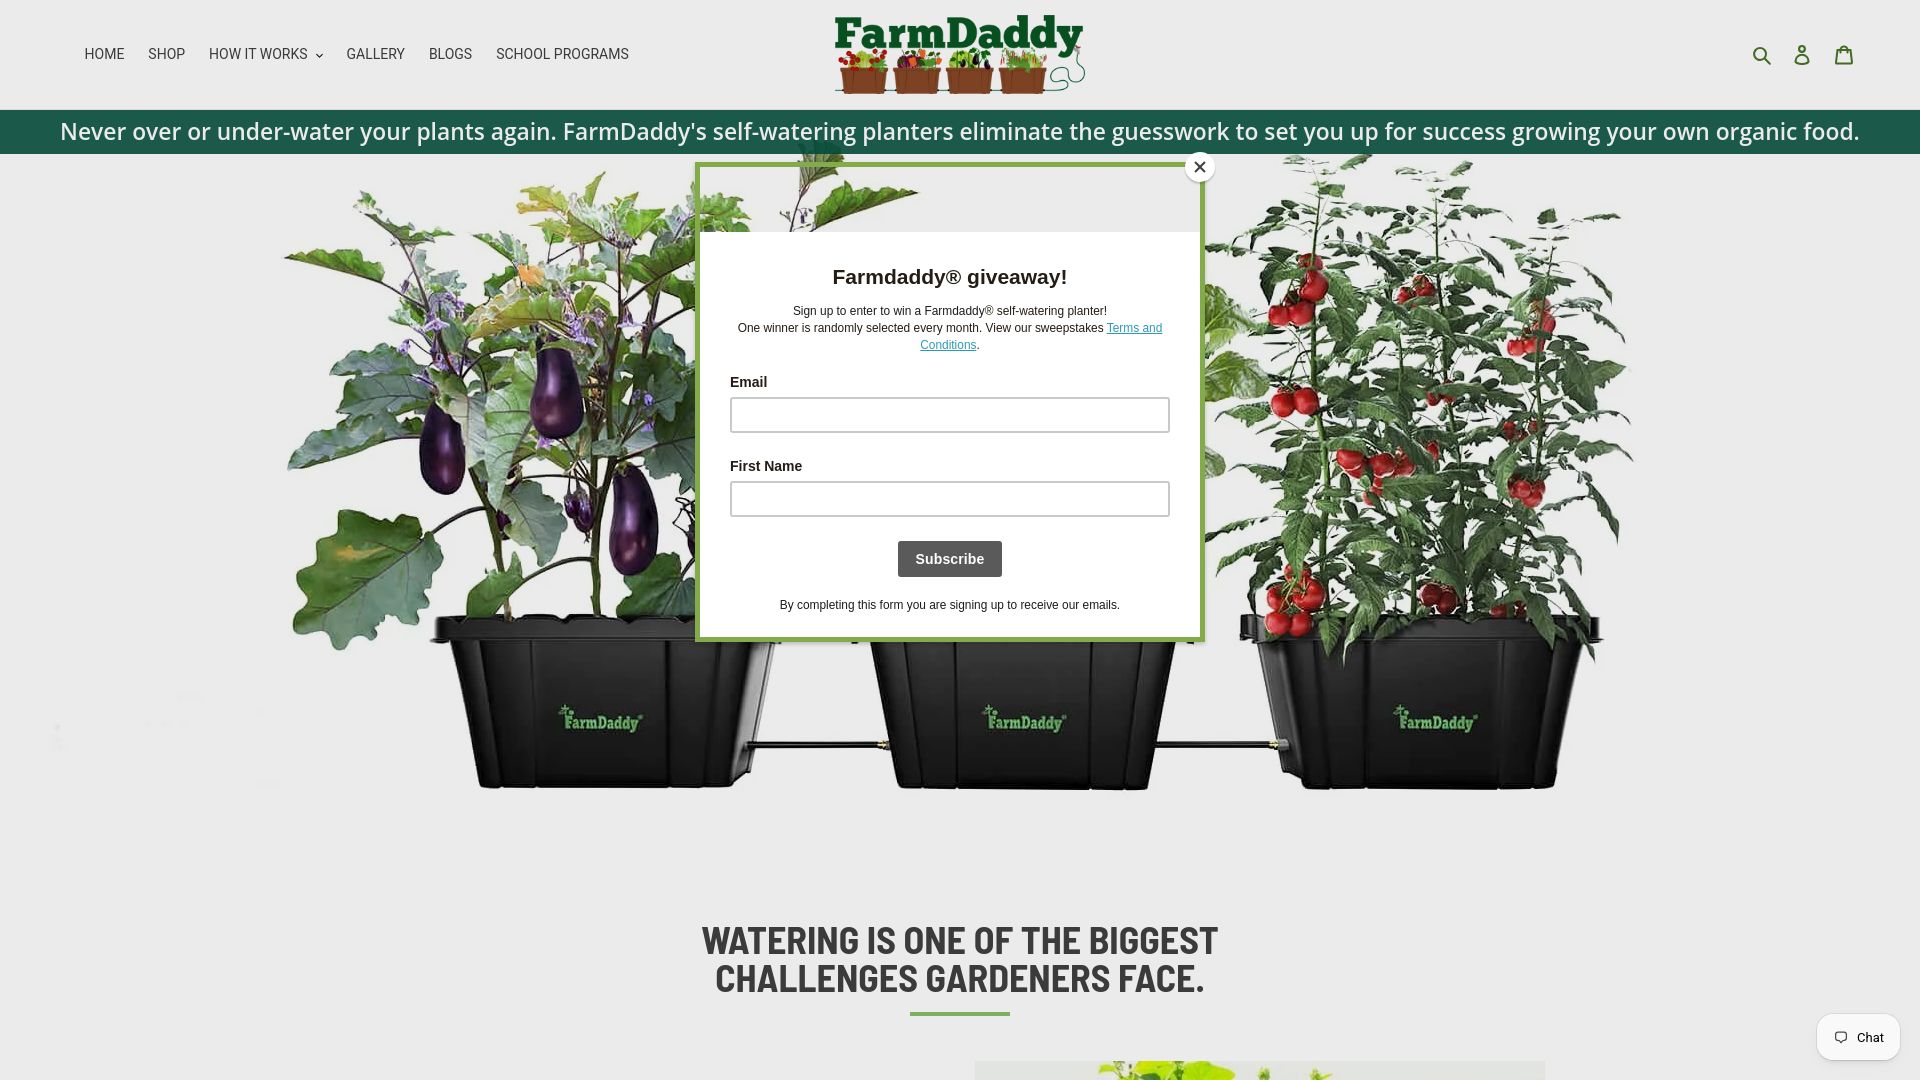
For the medium balcony layout described above, the smartest first purchase is a fruiting container since that’s where inconsistent watering does the most damage, whether that’s blossom end rot on a tomato or a stressed pepper plant that drops its flowers. The 2-Planter Self Watering Garden System covers two crops at once, which suits a starter setup with a tomato and a pepper side by side. If you’re focused on a single high-yield plant first, the Self Watering Tomato Planter Kit gets you growing without the guesswork of building a reservoir system yourself.
Browse the full self-watering container lineup and pick the setup that matches the layout you’re building this season.
Sources
- Balcony food garden design for apartments — Cultivate
- Guide to container gardening — DUG (Dig Up Grow)
- Container gardening — Survipedia
- Container gardening for renters — RenterFriendly

