
BLOG
Container Garden Layout: Templates, Tips, and Plant Recipes

A 3-pot cluster is the single most effective starting point for any container garden layout: one large anchor pot (12–18 inches diameter), one medium filler pot (8–12 inches), and one small spiller pot (6–8 inches). Place them in a triangle, staggered by height, with the anchor at the back or center. That one arrangement works on a patio corner, a balcony entry, or a front stoop, and you can scale it up by repeating the cluster.
Three quick actions to get started today:
- Measure your light. Stand in your space at midday and count hours of direct sun. Six or more hours is full sun; three to five is part shade; fewer than three is shade. Every plant choice flows from this number.
- Pick your pot sizes. Match the anchor to your largest plant’s root depth (most vegetables need at least 12 inches deep), the filler to a mid-size bushy plant, and the spiller to a trailing variety that can hang over the rim.
- Choose one plant per role. One thriller (tall, bold), one filler (mounding, medium), one spiller (trailing). You can always add more pots later.
Two things to check before you buy anything:
- Every pot needs at least one drainage hole. No exceptions.
- Sun requirements on the plant tag must match your measured light hours. Mismatching sun is the single most common reason containers fail.
Pro Tip: Sketch your space on paper first, even a rough rectangle with compass directions. Knowing where north is takes five minutes and saves you from planting sun-lovers in a shaded corner.
Key Takeaways
A great container garden layout starts with matching pot size and sun exposure to your plants, then building outward with a clear structure of anchor, filler, and spiller roles.
| Point | Details |
|---|---|
| Start with a 3-pot cluster | Use one large anchor (12–18" diameter), one medium filler, one small spiller in a triangle for any space. |
| Match pot size to plant needs | Most fruiting vegetables need at least 5 gallons and 12 inches of depth; herbs thrive in 1-gallon pots. |
| Use thriller-filler-spiller | Assign one tall thriller, one mounding filler, and one trailing spiller per pot for visual balance. |
| Water by pot size and heat | Small pots (under 3 gallons) may need daily watering in summer heat; large pots (15+ gallons) can go 2–3 days. |
| Farmdaddy for low-maintenance setups | Farmdaddy self-watering planters deliver consistent root-zone moisture and reduce daily watering, especially for fruiting vegetables. |
Table of Contents
- What container garden layout works for your specific space?
- How do you choose the right pot size, shape, and material?
- Which plant combinations actually work in containers?
- What potting mix and fertilizer do containers need?
- How often should you water container plants?
- How self-watering planters change your layout and maintenance
- How should you place and group containers for the best visual effect?
- What are the most common container garden mistakes and how do you fix them?
- How do you rotate plants through seasons and reuse containers?
- Your step-by-step checklist for planning and planting a container garden
- What I’ve learned from years of container garden planning
- Farmdaddy self-watering planters take the guesswork out of container gardening
- Sources
What container garden layout works for your specific space?
Most gardeners don’t need a custom design. They need a tested template they can copy. Here are five layouts that cover the most common situations, each with pot sizes, plant roles, and a short note on why it works.
Patio corner cluster (3–5 pots)
Setup: One 15–20 gallon anchor pot (18" diameter, 18" deep) at the back, two 5-gallon fillers (12" diameter) flanking it, and one or two 1–2 gallon spillers (6–8" diameter) at the front edge.
Plant roles: Anchor: ornamental grass, dwarf conifer, or a large tomato. Fillers: petunias, basil, or compact peppers. Spillers: sweet potato vine, trailing nasturtium, or creeping thyme.
Sun: Full sun (6+ hours). Why it works: Height variation creates depth, and the triangle shape draws the eye naturally. Cultivating Flora recommends sketching this kind of layout before buying pots to avoid overcrowding and uneven watering.
5-pot balcony layout
Setup: One large pot (15 gallons, 16–18" diameter) centered or at one end, two medium pots (5 gallons, 12") on either side, two small pots (1–2 gallons, 6–8") at the rail or front.
Plant roles: Large: columnar herb like rosemary or a dwarf citrus. Mediums: cherry tomatoes or compact zinnias. Smalls: trailing herbs like thyme or lobelia.
Sun: Part sun to full sun. Why it works: A 5-pot layout is a practical sweet spot for small balconies, giving visual variety with manageable upkeep. Keep the two largest pots against the wall or a sturdy rail bracket; reserve the small pots for mobile repositioning.
Accessibility note: Place pots you’ll water daily within arm’s reach. Leave at least 18 inches between pots for airflow and so you can reach the back of each container without straining.
8-pot small-yard vegetable plan
Setup: Four 5-gallon pots (12" diameter, 12" deep) for tomatoes or peppers; two 10-gallon pots (14–16" diameter) for squash or cucumbers; two 1-gallon pots for herbs.
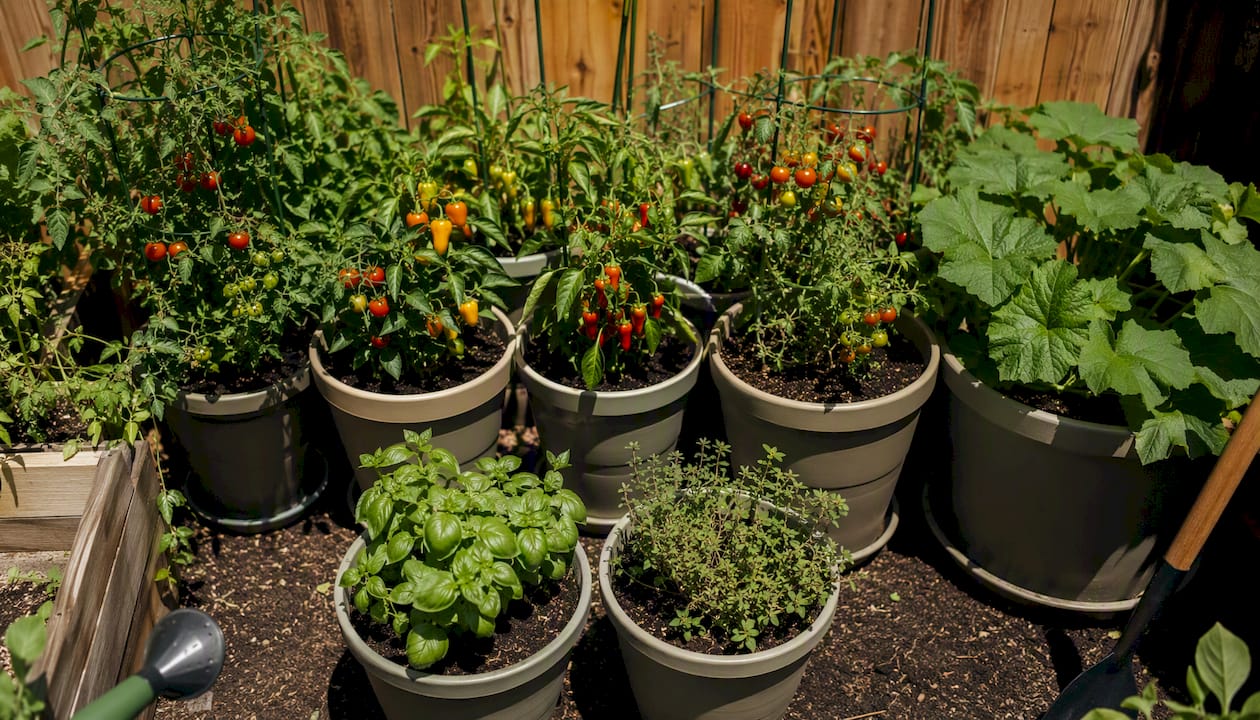
Arrangement: Two rows of four, with the larger pots at the back (north side if possible) so they don’t shade smaller plants. Herbs at the front for easy snipping.
Sun: Full sun required. Why it works: University of Illinois Extension provides a container-size table showing that most fruiting vegetables need at least 5 gallons, while herbs thrive in 1-gallon pots. This layout respects those minimums without wasting space.
Entryway flanking pair
Setup: Two matching pots (10–15 gallons, 14–16" diameter) placed symmetrically on either side of a door or gate.
Plant roles: Both pots use the same anchor plant (boxwood, dwarf holly, or a clipped standard) for formal symmetry, with seasonal color tucked around the base.
Sun: Adaptable to the entry’s actual light. Why it works: Symmetry reads as intentional and welcoming. Swap the seasonal color (pansies in spring, impatiens in summer, ornamental kale in fall) without touching the anchor.
Vertical or railing layout
Setup: Rail planters (6–8" wide, 24–36" long) mounted on a balcony rail, plus one floor pot (10 gallons) at each end as anchors.
Plant roles: Rail planters: trailing herbs, lettuce, or strawberries. Floor anchors: upright rosemary or a small ornamental grass.
Sun: Assess rail exposure carefully; south-facing rails get intense afternoon heat. Why it works: Vertical space is often the only space on a small balcony. Rail planters keep floor space open while adding greenery at eye level. For urban spaces with limited floor area, small-space gardening principles suggest prioritizing vertical elements to maximize growing area without cluttering walkways.
Pro Tip: For any layout with pots over 20 gallons, place them on rolling platforms before filling with soil. Moving a filled 20-gallon pot is nearly impossible without one.
| Template | Pot sizes (gallons) | Sun | Best for |
|---|---|---|---|
| Patio corner cluster | 15–20 gal anchor, 5 gal fillers, 1–2 gal spillers | Full sun | Ornamentals, mixed edibles |
| 5-pot balcony | 15 gal, 5 gal x2, 1–2 gal x2 | Part to full sun | Herbs, cherry tomatoes, flowers |
| 8-pot veggie plan | 5 gal x4, 10 gal x2, 1 gal x2 | Full sun | Vegetables and herbs |
| Entryway flanking pair | 10–15 gal x2 | Matches entry light | Formal structure, seasonal color |
| Vertical/railing | Rail planters + 10 gal anchors | Assess rail exposure | Small balconies, herbs, lettuce |
How do you choose the right pot size, shape, and material?
Container choice affects how often you water, how heavy your setup gets, and whether your plants thrive or struggle. Getting this right before you buy saves a lot of repotting later.
Volume, diameter, and depth: what actually matters
Volume determines how much root space and soil moisture a plant has. Diameter determines how many plants fit side by side. Depth determines whether deep-rooted plants like tomatoes and carrots can develop properly.
The Old Farmer’s Almanac vegetable container size chart maps common vegetables to recommended gallon size, diameter, and depth. Cucumbers, for example, need at least 5 gallons and 12 inches of depth. Lettuce can manage in a 6-inch-deep window box. Use the chart below as a quick reference:
| Plant | Min. pot size | Min. diameter | Min. depth | Plants per pot |
|---|---|---|---|---|
| Lettuce | 1 gal | 6" | 6" | 2–4 |
| Herbs (basil, parsley) | 1 gal | 6–8" | 6–8" | 1–2 |
| Peppers | 3–5 gal | 10–12" | 10–12" | 1 |
| Tomatoes (determinate) | 5 gal | 12" | 12" | 1 |
| Cucumbers | 5 gal | 12" | 12" | 1 |
| Squash/zucchini | 10 gal | 14–16" | 12–14" | 1 |
| Dwarf citrus | 15 gal | 16–18" | 16–18" | 1 |
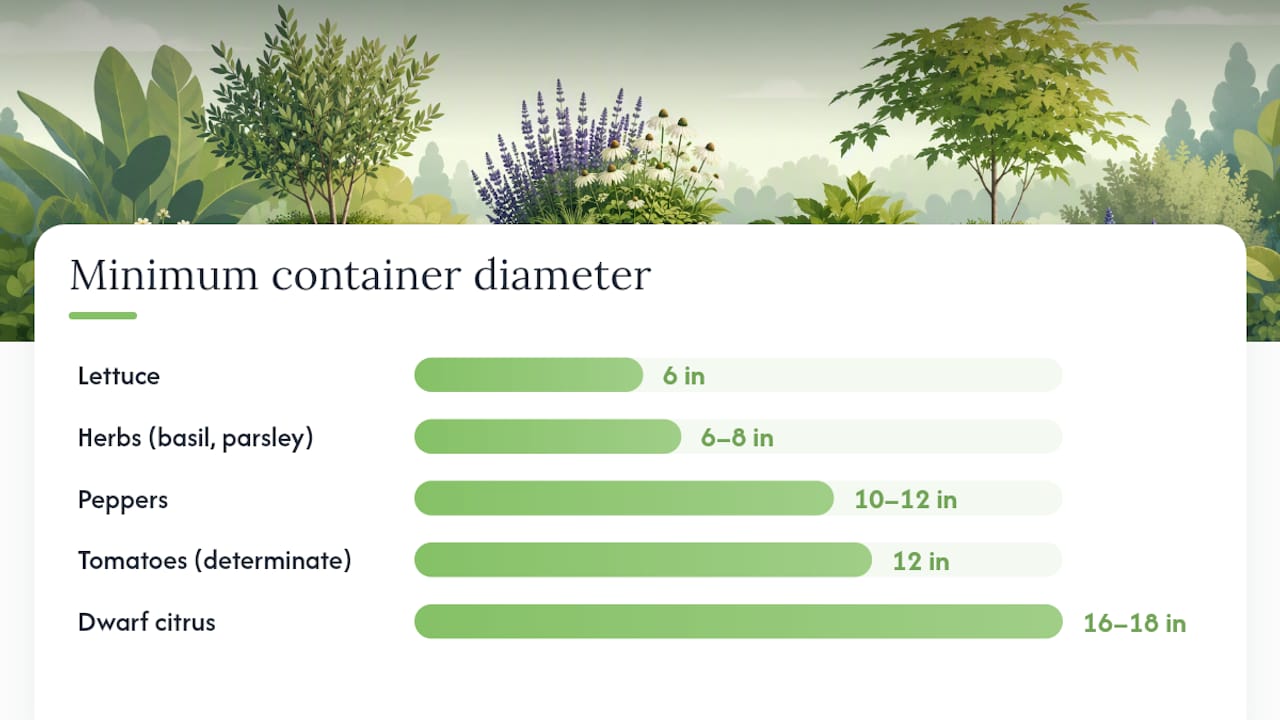
Michigan State University Extension gives a clear rule for plant spacing: roughly one plant per 8–12 inches of container diameter. Exceeding that causes faster nutrient depletion and more frequent watering needs.
Material tradeoffs
Plastic and resin are lightweight, affordable, and retain moisture well. They’re the practical choice for large pots you’ll move or for vegetables that need consistent moisture. Downside: they can look cheap and degrade in UV over several years.
Glazed ceramic holds moisture nearly as well as plastic, looks polished, and comes in a wide range of sizes. Heavy when filled, so plan placement before filling.
Unglazed terra-cotta is porous, which means moisture evaporates through the walls as well as the surface. Plants in terra-cotta dry out faster, especially in heat and wind. MSU Extension notes that porous pots raise watering frequency and are less ideal for moisture-sensitive vegetables prone to blossom end rot.
Fabric grow bags are breathable, promote air pruning of roots, and are surprisingly effective for tomatoes and potatoes. They dry out quickly in hot weather and need more frequent watering.
Concrete and hypertufa are heavy, durable, and excellent for permanent anchor pots. Not practical for anything you need to move.
Drainage and what goes in the bottom
Every pot needs at least one drainage hole. Roots sitting in waterlogged soil develop rot within days. The old advice to put gravel or pot shards in the bottom actually raises the water table inside the pot, making drainage worse, not better. Leave the bottom empty or use a thin layer of coarse perlite if you want to slow soil loss through the hole.
For windy sites or railing setups, choose wider-based pots and avoid tall, narrow shapes that tip easily. Saucers are useful for protecting surfaces but empty them after rain or heavy watering so roots don’t sit in standing water.
Pro Tip: When switching to self-watering planters or adding rolling platforms, choose pots with flat, stable bases. Rounded or tapered bottoms don’t sit securely on platforms and can tip when the reservoir is full.
Which plant combinations actually work in containers?
Great container plant arrangements come down to three roles: thriller, filler, and spiller. The thriller is your tallest, boldest plant, the visual anchor. The filler is a mounding mid-height plant that fills the gaps. The spiller trails over the rim and softens the pot’s edge.
When to break the formula
The thriller-filler-spiller rule works beautifully for pots viewed from one side, like a patio wall or a front step. For pots in the center of a space, viewed from all angles, landscape designer Christina Salwitz notes that off-center plantings and rule-bending create dynamic displays that read as professional from every direction. Try planting the thriller slightly off-center and using two or three different spillers around the rim for a 360° effect.
Plant recipes by exposure
Full sun ornamental (6+ hours direct sun)
- Thriller: Canna lily or ornamental grass (Pennisetum)
- Filler: Lantana or calibrachoa
- Spiller: Sweet potato vine (Ipomoea) or trailing verbena
Part-sun mixed edibles and flowers (3–5 hours)
- Thriller: Dwarf basil or compact pepper
- Filler: Nasturtium or compact marigold
- Spiller: Trailing thyme or lobularia
Shade patio (fewer than 3 hours direct sun)
- Thriller: Caladium or upright fern
- Filler: Impatiens or coleus
- Spiller: Creeping Jenny (Lysimachia) or ivy
Herb kitchen pot (part to full sun)
- Thriller: Upright rosemary
- Filler: Basil or flat-leaf parsley
- Spiller: Trailing thyme or oregano
Small-space vegetable mix (full sun)
- Anchor: One determinate tomato (e.g., Patio or Bush Early Girl)
- Companion: Basil (deters aphids, improves tomato flavor)
- Edge: Marigolds (deter nematodes and whiteflies)
For more ready-to-use pairings, Farmdaddy’s plant combination ideas for container gardens covers additional recipes organized by purpose and season.
Texture and color rules
Better Homes & Gardens advises that texture beats color for sustaining visual interest. Mix leaf forms: strappy (ornamental grass), broad (hosta or caladium), and fine or feathery (asparagus fern or dill). A pot with three different leaf shapes holds visual interest even when nothing is blooming.
Color works best in threes: one dominant, one secondary, one accent. Avoid mixing too many colors in one pot; it reads as busy rather than lively.
Pairing caution: Never mix succulents with moisture-loving herbs like basil or mint. Their water needs are incompatible, and one group will always suffer. Group plants by water requirements, not just by visual appeal.
Pro Tip: For portfolio-style photos of your containers, shoot at a 45-degree angle from slightly above, with the focal plant (thriller) in the center-left of the frame. Morning light gives the most flattering color rendering.
What potting mix and fertilizer do containers need?
Containers need a different growing medium than garden beds. Garden soil compacts in pots, blocks drainage, and can introduce pests and disease. Always use a dedicated container potting mix.
Choosing the right potting mix
A good container mix is soilless: typically a blend of peat moss or coconut coir, perlite or vermiculite, and composted bark. The perlite keeps the mix from compacting and maintains air pockets around roots. Coir-based mixes hold moisture slightly better than peat-based ones and are a more sustainable choice.
For Farmdaddy’s guidance on selecting the right media for your specific containers, their potting soil guide covers mix characteristics matched to container type.
Planting order and root care
- Add a layer of potting mix to the bottom of the pot, deep enough so the transplant’s root ball sits with the crown about 1–2 inches below the rim. That rim gap is your watering space; without it, water runs off the surface before soaking in.
- Remove the transplant from its nursery container and gently loosen any circling roots. A root-bound plant left uncorrected will continue circling and restrict its own growth.
- Set the transplant in the center (or off-center for 360° pots), fill in around the root ball, and firm the mix gently. Don’t pack it hard.
- Water thoroughly until water runs from the drainage hole.
Fertilizer basics
Containers need more frequent feeding than garden beds because nutrients leach out with every watering. Two approaches work well:
- Slow-release granules (e.g., Osmocote): Mix into the potting medium at planting time. They feed for 3–6 months depending on the formula. Good for ornamentals and low-maintenance setups.
- Soluble liquid fertilizer (e.g., fish emulsion, balanced 10-10-10): Apply every 2–3 weeks during the growing season. Better for heavy feeders like tomatoes and peppers, which need consistent nutrition through fruiting.
For vegetables, start with a balanced fertilizer at planting, then switch to a lower-nitrogen, higher-phosphorus formula once flowering begins to support fruit set rather than leaf growth.
| Problem | Likely cause | Quick fix |
|---|---|---|
| Compacted, hard mix | Overwatering or old media | Loosen top inch; refresh top 2–3" of mix |
| White crust on soil surface | Salt buildup from fertilizer | Leach pot thoroughly with plain water |
| Yellowing lower leaves | Nitrogen deficiency or overwatering | Feed with balanced soluble fertilizer; check drainage |
| Soggy, foul-smelling mix | Root rot from poor drainage | Repot into fresh mix; improve drainage |
Pro Tip: For container-grown edibles, add a starter fertilizer (high phosphorus) at transplanting to support root establishment. Wait two weeks before switching to a balanced feed so you don’t burn young roots.
How often should you water container plants?
Containers dry out faster than garden beds because they have limited soil volume, and roots can’t reach deeper moisture. Watering frequency depends on pot size, material, plant type, and temperature.
General rules of thumb:
- Small pots (under 3 gallons) in summer heat may need watering once or even twice daily, as Oklahoma State University Extension notes that small containers can dry out multiple times per day in hot, sunny, or windy conditions.
- Medium pots (5–10 gallons) typically need water every 1–2 days in summer.
- Large pots (15+ gallons) can often go 2–3 days between waterings in moderate temperatures.
The most reliable check: push your finger 1–2 inches into the soil. If it feels dry at that depth, water thoroughly until it drains from the bottom.
Signs of under- and over-watering
Under-watering: Wilting (especially in the afternoon), dry and pulling-away-from-pot-sides soil, crispy leaf edges, and lightweight pot when lifted.
Over-watering: Yellowing lower leaves, soggy soil that doesn’t dry between waterings, musty smell, and algae or moss on the soil surface.
Quick troubleshooting checklist:
- Wilting despite moist soil? Check for root rot; repot if roots are brown and mushy.
- Uneven wetting (dry in center, wet at edges)? The mix may be hydrophobic; water slowly or soak the pot in a tub.
- Algae in saucers? Empty saucers after each watering and move the pot to better airflow.
- Salt crust on soil? Leach with plain water and reduce fertilizer frequency.
Irrigation options
Hand-watering with a watering can or hose wand gives you the most control and a daily check on plant health. It’s time-consuming for large setups.
Drip irrigation with a timer is reliable for larger patios. It requires setup time but removes daily watering from your routine. For urban setups, urban gardening tips suggest combining drip lines with moisture-retentive potting mixes to reduce irrigation frequency on balconies.
Self-watering reservoir planters are the most consistent option for containers. The plant draws water from a bottom reservoir as needed, which prevents both over- and under-watering and is particularly valuable during hot spells or when you travel.
A note on watering consistency: Inconsistent watering is the leading cause of blossom end rot in tomatoes and peppers. A self-watering reservoir removes that variable entirely, delivering steady moisture to the root zone without daily monitoring.
Pro Tip: Water in the morning when possible. Evening watering leaves foliage wet overnight, which encourages fungal diseases like powdery mildew and botrytis.
How self-watering planters change your layout and maintenance
Switching to self-watering containers doesn’t just reduce your watering workload. It changes how you think about container garden spacing, plant selection, and layout planning.
A reservoir-based system delivers water from below, keeping the root zone consistently moist without saturating the surface. This steadier moisture supply means plants experience less stress between waterings, which matters most for fruiting vegetables like tomatoes, peppers, and cucumbers where inconsistent moisture causes fruit problems.
Layout changes when using self-watering planters:
- Reservoir depth adds to the overall pot height, so account for that when planning vertical arrangements or shelf setups.
- Because watering is less frequent, you can position planters slightly farther from a water source without inconvenience.
- Farmdaddy’s patented connector system allows multiple containers to share a water source while each operates independently, so each plant gets the moisture it needs regardless of its neighbors. This makes it practical to run a row of connected planters along a fence or wall without running a separate hose to each one.
- Fabric or porous terra-cotta pots lose moisture through their walls and don’t pair well with reservoir systems; solid-wall plastic, resin, or glazed ceramic containers work best.
For travelers and busy gardeners: A patio cluster using Farmdaddy self-watering planters can go several days between reservoir refills depending on plant size and temperature, making it realistic to leave a container garden unattended over a long weekend without coming home to wilted plants.
Pro Tip: Even with a reservoir system, check the water level before any trip longer than three days. Top up the reservoir and move pots out of intense afternoon sun if possible to reduce evaporation while you’re away.
BobVila’s container garden guidance reinforces that mapping sunlight and repeating plant varieties creates cohesive, low-maintenance displays, and a self-watering system amplifies that low-maintenance quality by removing the daily watering variable.
How should you place and group containers for the best visual effect?
A well-placed container garden looks intentional. A randomly scattered one looks like an afterthought, even with beautiful plants. A few composition rules make the difference.
Core placement principles:
- Anchor with structure. Place your largest, most permanent pot first. Everything else arranges around it. Better Homes & Gardens recommends using evergreen anchor plants for year-round structure, then layering seasonal textures and colors around them.
- Repeat elements for cohesion. Using the same pot style or the same plant variety in two or three locations ties the space together. BobVila’s container garden coverage notes that repeating plant varieties creates visual cohesion across a patio or balcony.
- Vary height deliberately. Group pots in odd numbers (3 or 5) and vary their heights by at least 6 inches between levels. Use pot risers, overturned pots, or plant stands to create tiers.
- Group by purpose. Keep edible containers together and ornamental containers together. Mixed groupings look fine, but separating them makes harvesting and maintenance easier.
Using containers as screens, focal points, and traffic guides
A row of tall containers (ornamental grasses or columnar evergreens in 15-gallon pots) creates a privacy screen without a fence permit. Two matching pots flanking a gate or path entrance create a formal focal point. A single large, striking pot at the end of a path draws the eye and guides movement naturally.
For seasonal interest, layer your containers: one evergreen anchor that holds structure year-round, one plant that peaks in spring or early summer, and one that peaks in late summer or fall. Rotating just the seasonal layer keeps the display fresh without rebuilding the whole arrangement.
Spacing for airflow and access: Leave at least 12 inches between pots for air circulation, which reduces fungal disease. For pots you harvest from regularly, 18 inches of clear access on at least one side is practical.
Pro Tip: Treat your patio or balcony like an outdoor room. Place the largest pot where you’d put a piece of furniture, and build the arrangement outward from there. The space will feel designed, not just planted.
What are the most common container garden mistakes and how do you fix them?
Most container garden failures come down to a short list of repeatable mistakes. Knowing what to look for makes troubleshooting fast.
Top mistakes and their fixes:
- Wrong pot size. Too small a pot restricts roots, dries out fast, and stunts growth. Fix: repot into the correct size (see the chart in the container selection section).
- Mismatched water needs. Succulents next to basil, or drought-tolerant lavender next to moisture-loving ferns. Fix: group plants by water requirements, not just by appearance.
- Poor drainage. No drainage hole, or a saucer left full of water. Fix: drill a hole if needed; empty saucers within an hour of watering.
- Overcrowding. More plants than the pot diameter supports. MSU Extension’s rule of one plant per 8–12 inches of diameter is a reliable ceiling. Fix: thin or transplant excess plants.
- Wrong potting mix. Garden soil in containers compacts and blocks drainage. Fix: replace with a soilless container mix.
- Irregular feeding. Containers need feeding every 2–3 weeks for heavy feeders. Fix: set a calendar reminder or switch to slow-release granules.
Troubleshooting table
| Symptom | Likely cause | First-step fix |
|---|---|---|
| Yellowing leaves (lower) | Nitrogen deficiency or overwatering | Check drainage; apply balanced liquid fertilizer |
| Wilting despite moist soil | Root rot | Unpot, trim brown roots, repot in fresh mix |
| Stunted growth | Pot too small or compacted mix | Repot into larger container with fresh potting mix |
| Fungal spots on leaves | Poor airflow or evening watering | Increase pot spacing; water in the morning |
| Leggy, stretched growth | Insufficient light | Move to a sunnier location |
| Blossom drop (tomatoes, peppers) | Inconsistent watering or extreme heat | Stabilize moisture; shade afternoon sun in extreme heat |
When to start over
Repot when roots are circling the bottom of the pot or emerging from drainage holes. Replace the potting mix entirely if it has been in use for more than two growing seasons, smells sour, or has a heavy salt crust that doesn’t clear with leaching. A fresh start with clean containers and new mix is faster than trying to rehabilitate severely depleted soil.
Pro Tip: Before repotting, water the plant thoroughly. A hydrated root ball holds together and suffers less transplant shock than a dry one.
How do you rotate plants through seasons and reuse containers?
A container garden doesn’t have to go dormant in fall. With a simple seasonal rotation, you can keep pots productive or attractive through most of the year.
Seasonal timeline
- Spring (March–May): Plant cool-season crops (lettuce, spinach, pansies, snapdragons) as soon as nighttime temperatures stay above 40°F. Refresh potting mix in pots that overwintered; add a slow-release fertilizer at planting.
- Early summer (May–June): Transition to warm-season plants (tomatoes, peppers, basil, zinnias) after the last frost date for your USDA hardiness zone. Pull cool-season crops before they bolt.
- Late summer (August–September): Deadhead and prune to extend flowering. Feed heavy feeders with a liquid fertilizer every two weeks.
- Fall (September–October): Replace spent summer annuals with cool-season ornamentals (ornamental kale, mums, asters) and edibles (kale, Swiss chard, arugula). This is also the time to plant spring bulbs in the top layer of large pots.
- Winter: Protect containers from freeze-thaw cycles that crack ceramic and terra-cotta. Move pots to a sheltered spot, wrap with burlap or bubble wrap, or bring indoors. Lift heavy pots before the ground freezes.
Overwintering options
- Bring indoors: Best for tropical plants (citrus, bougainvillea) and glazed ceramic pots that crack in freezing temperatures.
- Insulate in place: Wrap pots with burlap or horticultural fleece; mulch the soil surface with 2–3 inches of straw or wood chips.
- Cluster pots together: Grouped pots lose heat more slowly than isolated ones.
Reusing containers
Clean pots between seasons to prevent disease carryover. Replace at least the top 3 inches of potting mix each season, or replace entirely every two years. Garden container weed covers help reduce weed pressure and slow moisture loss between plantings, making seasonal transitions cleaner.
Pro Tip: Label your pots with the plant variety and planting date using a waterproof marker on a stake. When you pull a plant in fall, you’ll know exactly what worked and what to repeat next year.
Your step-by-step checklist for planning and planting a container garden
This checklist works whether you’re starting from scratch or reorganizing an existing setup. Work through it in order and you’ll avoid the most common beginner mistakes.
- Measure your light (10 minutes): Stand in your space at midday and count hours of direct sun. Note which areas get morning sun vs. afternoon sun. Afternoon sun is hotter and more intense.
- Map your space (15 minutes): Sketch the area on paper. Mark doors, walls, railings, and any fixed structures. Note where you want focal points and where you need clear pathways (minimum 24 inches wide for comfortable movement).
- Choose a layout template (10 minutes): Pick the template from Section 2 that matches your space. Adjust pot counts to fit.
- Select containers and check drainage (30 minutes at the store): Match pot size to plant requirements using the size chart. Confirm every pot has a drainage hole. Choose materials that match your maintenance goals and weight limits.
- Pick your plant recipes (20 minutes): Choose one thriller, one filler, one spiller per pot, matched to your measured light. Group plants with similar water needs.
- Buy potting mix and fertilizer (at the store): Get a soilless container mix, a slow-release granular fertilizer, and a liquid fertilizer for mid-season feeding.
- Plant in the correct order (30–60 minutes): Add mix to the bottom, set transplants at the right depth with a 1–2 inch rim gap, fill in, firm gently, and water thoroughly.
- Set up irrigation (15–30 minutes): Decide on hand-watering, drip, or self-watering planters. Position pots near a water source or set up your drip system.
- Label pots (5 minutes): Mark variety and planting date on each pot.
- Schedule maintenance (5 minutes): Set calendar reminders for fertilizing (every 2–3 weeks for heavy feeders), deadheading (weekly during peak bloom), and seasonal transitions.
Minimum tools needed: Watering can or hose with wand, trowel, gloves, waterproof plant labels, and a measuring tape.
Accessibility shortcuts: Use rolling platforms for any pot over 10 gallons. Raise pots to counter height on sturdy stands if bending is difficult. Self-watering planters reduce the frequency of the most repetitive task (daily watering) significantly.
What I’ve learned from years of container garden planning
The thriller-filler-spiller formula is genuinely useful, but it’s a starting point, not a rule. The most striking container displays I’ve seen break it deliberately: an off-center thriller, two spillers instead of one, or a pot planted entirely with one bold variety that doesn’t need supporting cast. The formula teaches you to think in layers; once you understand that, you can bend it.
The other thing most guides understate is how much pot choice matters relative to plant choice. You can put the right plants in the wrong pot and watch them struggle all season. A tomato in a 3-gallon pot will survive but never thrive. A moisture-loving herb in an unglazed terra-cotta pot in full afternoon sun will need water twice a day. Matching the container to the plant’s actual needs, not just its aesthetic appeal, is where most of the real success comes from.
At Farmdaddy, we’ve seen this play out consistently: gardeners who switch to self-watering planters don’t just save time. They get better results because the plants receive consistent moisture without the peaks and valleys of hand-watering. That consistency is especially valuable for fruiting vegetables, where irregular watering is the direct cause of some of the most frustrating problems, like blossom end rot and fruit cracking. The goal is to make container gardening accessible and genuinely low-maintenance, not just theoretically possible for people with a lot of free time.
Farmdaddy self-watering planters take the guesswork out of container gardening
The biggest pain point in any container garden layout isn’t the design. It’s keeping up with watering, especially in summer heat when small pots dry out fast and a missed day can set plants back by a week.
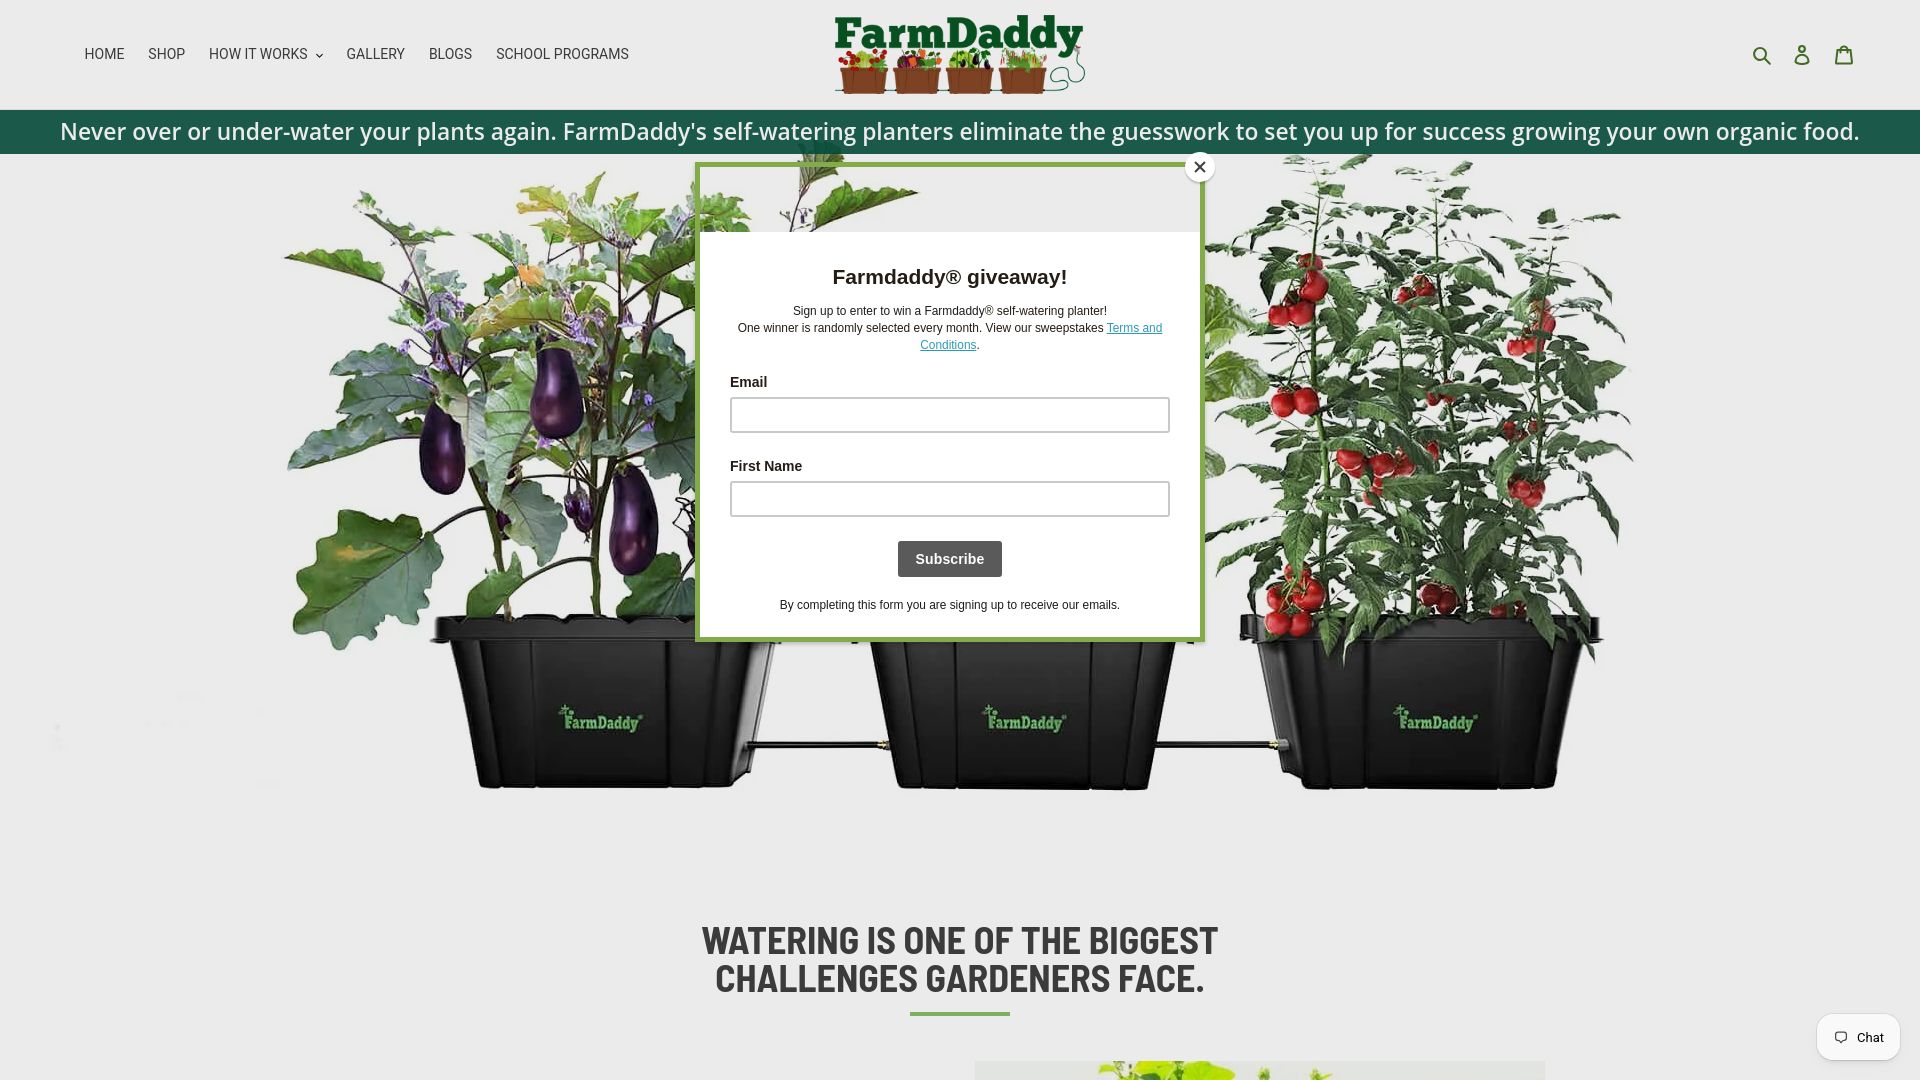
Farmdaddy’s self-watering garden planters solve that directly. Each planter draws water from a bottom reservoir as the plant needs it, delivering consistent moisture to the root zone without daily monitoring. The patented connector system lets multiple containers share a water source while each operates independently, so a row of tomato planters along a fence gets exactly the right hydration for each plant, not a one-size average.
The 2-planter self-watering garden system is a natural fit for the 8-pot vegetable layout in this guide: start with two connected planters for tomatoes or peppers, add the self-watering tomato planter kit for a dedicated fruiting setup, and pair with weed covers and a connector hose to keep maintenance minimal between seasonal rotations. Visit Farmdaddy to see the full system and find the right setup for your space.
Sources
These sources were used throughout this guide and are worth bookmarking for deeper reference:
- Growing vegetables in containers — University of Illinois Extension
- Container gardening with vegetables and herbs — Michigan State University
- Container gardening — Oklahoma State University Extension

